background image

LT-F160

OWNER’S MANUAL

ENGLISH

ENGLISH

This manual should be considered a permanent part of the vehi-
cle and should remain with the vehicle when resold or otherwise
transferred to a new owner or operator. The manual contains
important safety information and instructions which should be
read carefully before operating the vehicle.

Summary of Contents for LT-F160 2006

Page 1: ...PROPRIETAIRE MANUAL DEL PROPIETARIO This owner s manual contains important safety information Please read it carefully Never allow anyone under 16 years old to ride this ATV Ce Manuel du propri taire...

Page 2: ...idered a permanent part of the vehi cle and should remain with the vehicle when resold or otherwise transferred to a new owner or operator The manual contains important safety information and instruct...

Page 3: ...ll fee When a non business purchaser or age appropriate family mem ber completes training the pur chaser will receive a 100 check if it is their first ATV or a 50 check if they have owned an ATV befor...

Page 4: ...HAZARDOUS TO OPERATE An ATV handles differently from other vehicles including motorcycles and cars A collision or rollover can occur quickly even during routine maneu vers such as turning and driving...

Page 5: ...ng as described in this manual Practice turning at low speeds before attempting to turn at faster speeds Do not turn at excessive speed Never operate the ATV on hills too steep for the ATV or for your...

Page 6: ...dding or sliding out of control Never operate an ATV in fast flow ing water or in water deeper than that specified in this manual Remember that wet brakes may have reduced stopping ability Test your b...

Page 7: ......

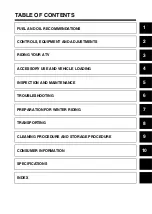
Page 8: ...ATIONS CONTROLS EQUIPMENT AND ADJUSTMENTS RIDING YOUR ATV ACCESSORY USE AND VEHICLE LOADING INSPECTION AND MAINTENANCE TROUBLESHOOTING PREPARATION FOR WINTER RIDING TRANSPORTING CLEANING PROCEDURE AND...

Page 9: ......

Page 10: ...1 1 1 FUEL AND OIL RECOMMENDATIONS FUEL 1 2 ENGINE OIL 1 3...

Page 11: ...alcohol also known as GASOHOL may be used in your motorcycle if the ethanol content is not greater than 10 Gasoline Methanol Blends Fuels containing 5 or less methanol wood alcohol may be suitable fo...

Page 12: ...gines Motor cycle and ATV engines lubricate clutch and transmission gears with engine oil JASO T903 specifies per formance requirements for motorcy cle and ATV clutches and transmissions There are two...

Page 13: ......

Page 14: ...REVERSE LEVER 2 6 GEARSHIFT LEVER 2 7 LEFT HANDLEBAR 2 7 CHOKE LEVER 2 8 RIGHT HANDLEBAR 2 9 THROTTLE LIMITER 2 9 CHOKE LIMITER KNOB 2 10 REAR BRAKE PEDAL 2 10 PARKING BRAKE LOCK LEVER 2 10 FUEL VALV...

Page 15: ...2 CONTROLS EQUIPMENT AND ADJUSTMENTS LOCATION OF PARTS 1 Left handlebar switches 2 Choke lever 3 Indicator lights 4 Ignition switch 5 Throttle lever 6 Front brake lever 7 Reverse lever 8 Fuel tank ca...

Page 16: ...2 3 9 Battery 0 Fuse A Fuel valve B Throttle stop screw C Cam chain tensioner D Tools E Seat lock F Gearshift lever G Footrests...

Page 17: ...2 4 H Air cleaner I Engine oil filler cap J Choke limiter knob K Spark plug L Parking brake lever M Engine oil inspection window N Rear brake pedal O Engine oil drain plug P Engine oil filter...

Page 18: ...ed ON position The ignition circuit is on and the engine can be started The key can not be removed in this position LIGHTS position The ignition circuit is on and the head light and taillight turn on...

Page 19: ...as a reverse gear To shift into reverse gear completely stop the vehicle and shift the trans mission into neutral Pull the reverse lever upward When the ATV is in reverse gear the gearshift lever will...

Page 20: ...itch to select the high or low headlight beam when the ignition switch is in the LIGHTS position When you move the dimmer switch to the HI position the high beam will light When you move the dimmer sw...

Page 21: ...n When the engine is warm you do not need to use the choke system for starting NOTE Refer to the RIDING YOUR ATV section of the manual for the engine starting procedure CAUTION Engaging the starter mo...

Page 22: ...increase engine speed Release it to decrease engine speed THROTTLE LIMITER Use the throttle limiter to restrict max imum engine power by limiting throttle lever travel Adjust this limiter accord ing t...

Page 23: ...full choke condition NOTE Refer to the RIDING YOUR ATV section of this manual for the engine starting procedure REAR BRAKE PEDAL Depressing the rear brake pedal will apply the rear brake PARKING BRAK...

Page 24: ...uel valve to the RES position to use the reserve fuel supply Reserve fuel supply 1 1 L 0 3 0 2 US Imp gal OFF position Turn the fuel valve to the OFF posi tion whenever the engine is not run ning In t...

Page 25: ...overflow when it expands Fuel expands due to engine heat or heating by the sun Fuel that overflows can catch fire Stop adding fuel when the fuel level reaches the bottom of the filler neck WARNING Im...

Page 26: ...move the com partment box cover unhook the com partment box cover by pulling it rearward and move it forward To install the compartment box cover insert the rear hooks into the retainers and then inse...

Page 27: ...g the spring pre load adjuster provided in your tool kit adjust the spring pre load Adjust it by turning the spring tension ring to the desired position Position 1 provides the softest spring tension...

Page 28: ...RE RIDING 3 3 WHAT TO WEAR 3 5 BREAK IN 3 6 STARTING THE ENGINE 3 7 STARTING OFF AND SHIFTING 3 8 BRAKING 3 13 TURNING 3 13 SKIDDING OR SLIDING 3 14 OPERATION ON HILLS 3 15 RIDING OVER OBSTACLES 3 18...

Page 29: ...arned in the course and the operating tech niques described in this owner s manual For more information about the training course contact your authorized Suzuki ATV dealer or call 1 800 887 2887 WARNI...

Page 30: ...to find these controls without looking for them You will not have time to look for them when you are riding INSPECTION BEFORE RIDING WARNING Failure to inspect the ATV before operating it can be hazar...

Page 31: ...nt Never modify this ATV through improper installation or use of accessories Refer to the ACCES SORY USE AND LOADING section in this manual WARNING Overloading this ATV or carrying or towing cargo imp...

Page 32: ...ion Gearshift No damage lever Smooth operation Drive chain Proper tension Adequate lubrication No excessive wear or damage General condition Bolts and nuts are tight No rattle from any parts of the ma...

Page 33: ...lines explain proper break in procedures Maximum Throttle Opening Recommendation During the first 10 hours of operation you should always use less than 1 2 throttle Vary the Engine Speed Vary the engi...

Page 34: ...neutral 3 Turn the key to the ON position 4 Set the engine stop switch to the RUN position 5 Set the fuel valve to the ON posi tion When the Engine is Cold If the temperature is below 40 F 5 C 1 Pull...

Page 35: ...ystem WARNING Running your ATV indoors where there is little or no ventilation can be hazardous When breathed in exhaust gases from the ATV can cause death or severe injury Always run your ATV outdoor...

Page 36: ...t of control Avoid operating the ATV on paved surfaces whenever possible If you must ride on a paved surface go slowly and do not make sud den turns or stops WARNING Operating this ATV on public stree...

Page 37: ...ent including an over turn Never attempt stunts such as wheelies or jumps Don t try to show off WARNING Removing your hands from the handlebars or feet from the foot rests during operation can be haz...

Page 38: ...arned and practiced the skills necessary to control the ATV on such terrain Always be especially cautious on these kinds of terrain WARNING Failure to use extra care when operating this ATV on unfamil...

Page 39: ...To shift down release the throt tle and push down on the gearshift lever to engage a lower gear WARNING The ATV can start moving as soon as you release the parking brake Unexpected movement can cause...

Page 40: ...orter distance than the outside wheel This happens even though both wheels are still turn ing at the same speed WARNING Braking while turning the ATV can be hazardous Use of the brake when turning cou...

Page 41: ...hrottle and making the turn wider if possible SKIDDING OR SLIDING You may experience skidding or slid ing when you are not braking You may be able to overcome it by using the techniques listed below I...

Page 42: ...n be hazardous Climbing hills improperly can cause loss of control or cause the ATV to overturn Always follow the proper proce dures for climbing hills as described in this section Always check the te...

Page 43: ...unable to make it to the top If this happens use the correct procedure described below to turn around to get back down the hill If you still have forward movement and enough space to turn around safe...

Page 44: ...bars to the left Stay on the uphill side Release the parking brake with your foot and pump the hand brake to let the ATV slowly roll until it points downhill Reset the parking brake 6 Remount the vehi...

Page 45: ...verturn Never attempt to turn the ATV around on any hill until you have mastered the turning technique as described in the CLIMBING A HILL section Practice this technique on level ground Be very caref...

Page 46: ...gh shallow water Make sure it is not more than 30 cm 12 in deep and is not moving fast Choose a good place to cross before you ride through any water Look for a spot where the banks are gently sloped...

Page 47: ...d that you change the oil to 5W 30 CAUTION Operating the ATV in water sand or mud causes rapid brake wear Excessive brake wear can cause the brakes to be less effective After repeated operation of the...

Page 48: ...a temperature of 10 F 12 C the wind chill created by going just 10 mph 16 km h makes you as cold as if you were standing still at a temperature of 9 F 23 C At this temperature exposed flesh will free...

Page 49: ...en riding your ATV can be hazardous Loose clothing such as a long scarf or shawl can get caught in an ATV s moving parts Never wear loose clothing when riding your ATV WARNING Riding on snow covered t...

Page 50: ...s and move the reverse lever back ward A red light will come on when the transmission is in reverse 3 Look to make sure there is noth ing in your way behind you 4 Slowly release the brakes and apply t...

Page 51: ...king abrupt turns in reverse gear can be hazardous Throttle surges or abrupt turns could cause you to lose control of the ATV When you ride in reverse go slowly and turn carefully WARNING Indicates a...

Page 52: ...4 1 4 ACCESSORY USE AND VEHICLE LOADING ACCESSORY USE AND VEHICLE LOADING 4 2...

Page 53: ...choose accessories and install them correctly The guidelines below should help you decide how to equip your ATV and how to use it cor rectly when you use accessories or carry cargo WARNING Operating...

Page 54: ...trols or other equipment 5 Do not carry heavy or bulky cargo Cargo racks are designed to carry light items 6 Distribute cargo weight evenly between the front and rear of the vehicle as well as both si...

Page 55: ......

Page 56: ...10 ENGINE OIL 5 11 ENGINE OIL AND FILTER CHANGE 5 11 AIR CLEANER 5 14 AIR CLEANER DRAIN TUBES 5 16 DRIVE CHAIN 5 17 DRIVE CHAIN CLEANING AND OILING 5 18 DRIVE CHAIN ADJUSTMENT 5 19 TIRES 5 20 BRAKES...

Page 57: ...200 km or 1 month Every 600 miles 1000 km or 3 months Every 1200 miles 2000 km or 6 months Battery I I I Engine nuts and bolts T T T Valve clearance I I I Camshaft drive chain tensioner I I I Spark pl...

Page 58: ...ience If you are not sure how to do any of the jobs ask your Suzuki dealer or a qualified mechanic to do the maintenance CAUTION If you use your ATV under severe conditions it will need mainte nance m...

Page 59: ...The battery is located under the cover 1 Loosen two screws 2 and remove the cover 1 The level of the battery acid must be kept between the UPPER and LOWER level lines at all times If the level drops b...

Page 60: ...our battery WARNING Hydrogen gas produced by batter ies can be hazardous Batteries produce flammable hydrogen gas which can explode if exposed to flames or sparks Keep flames and sparks away from the...

Page 61: ...3 Tighten the set screw 2 firmly to lock the tensioner push rod in position Tighten the lock nut 1 to secure the set screw NOTE If the cam chain is noisy after adjustment the tensioner push rod is pr...

Page 62: ...or a qualified mechanic To install a spark plug turn it in as far as possible with your fingers tighten it with a wrench CAUTION Failure to use the proper spark plug can damage your ATV An improper s...

Page 63: ...ottle stop screw 1 in or out so that the engine idles at 1400 1600 r min CAUTION Dirt can damage your ATV if it enters an open spark plug hole Dirt can damage engine parts that move Cover the spark pl...

Page 64: ...ck the throttle lever play Readjust it if it is not within the specified limits 3 0 5 0 mm 3 0 5 0 mm WARNING Operating the vehicle with an inadequate throttle cable play can be hazardous Inadequate t...

Page 65: ...2 in or out so that the choke lever end has proper play of 1 0 5 0 mm 0 04 0 20 in 3 Tighten the lock nut 1 4 Recheck the choke lever play Readjust it if it is not within the correct limits FUEL HOSE...

Page 66: ...rain easily The procedure is as follows 1 Park the vehicle on level ground 2 Remove the oil filler cap 1 3 Remove the drain plug 2 from the bottom of the engine and drain the oil into a drain pan CAUT...

Page 67: ...sed oil Repeated prolonged contact with used engine oil may cause skin cancer Brief contact with used oil may irritate skin Keep new and used oil and used oil filters away from children and pets To mi...

Page 68: ...hree minutes Recheck the oil level on the engine oil inspection window The oil level should be at the F full mark If it is lower than the F mark add oil until it reaches the F mark Inspect the area ar...

Page 69: ...ck from the carburetor to the air intake box without the air cleaner element to stop it Severe engine damage can also occur if dirt enters the engine due to running the engine without the air cleaner...

Page 70: ...element by pressing it between the palms of both hands to remove excess solvent Do not twist or wring the element or it will develop cracks 3 Dry the element 4 Put the element in a plastic bag Pour i...

Page 71: ...sure to keep oil and solvent away from children and pets Dis pose of used oil and solvent prop erly CAUTION Failure to position the air cleaner element properly can damage your ATV Air can bypass the...

Page 72: ...or rusted links Kinked or binding links Excessive wear Improper chain adjustment If you find anything wrong with the drive chain condition or adjustment correct the problem if you know how If necessar...

Page 73: ...from kerosene Keep children and pets away from kero sene Dispose of used kerosene properly CAUTION Cleaning the chain with gasoline or other commercial cleaning sol vents can damage your ATV These flu...

Page 74: ...sen the lock nuts 2 Turn the left side adjusting bolt 3 until the chain has 20 30 mm 0 8 1 2 in of play at the middle between front and rear sprockets 4 Tighten the lock nut 2 securely 5 Tighten the f...

Page 75: ...n be hazardous If you use improper tires or improper or uneven tire pressure you may lose control of the ATV Always use the size and type tires specified Always maintain proper tire pressure as descri...

Page 76: ...ant to use the proper tools when repairing or replacing tires to prevent damage to the tire bead or wheel rims Have this work done by your Suzuki dealer or a qualified tire repair station When breakin...

Page 77: ...re to properly inspect and maintain your ATV s brake sys tems can be hazardous Improper maintenance of the brakes increases your chances of having an accident Be sure to inspect the brakes before each...

Page 78: ...least 5 mm 0 2 in of the adjuster threads are inserted in the lever holder as shown in the photograph 3 Turn the upper or lower cable adjuster so that when the brake lever is squeezed the cable holde...

Page 79: ...e travel WARNING Failure to adjust the front brake lever and rear brake pedal clear ances properly can lead to an accident or damage your ATV If there is too much clearance the brakes may not stop the...

Page 80: ...of the index mark is within the range 3 If the extension line is outside this range have the brake replaced by your Suzuki dealer or a qualified mechanic WARNING Failure to check brake lining wear and...

Page 81: ...torque chart to determine the tightness of the wheel nuts Tighten the nuts in a cross wise pattern Tightening Torque Front 26 N m 2 6 kgf m 19 lb ft Rear 55 N m 5 5 kgf m 40 lb ft WARNING Failure to...

Page 82: ...on as you start the engine Unexpected movement can cause you to lose control of the ATV Be sure to shift into neutral and set the parking brake before you start the engine WARNING Running your ATV ind...

Page 83: ...procedure 1 Remove the two screws shown by the arrows 2 Pull out the headlight reflector assembly 3 Turn the socket to the left and pull it off Headlight 12V 45 45W Brake light Taillight 12V 21 5W CAU...

Page 84: ...t using the procedure below HEADLIGHT BEAM ADJUSTMENT The headlight beam can be adjusted vertically if the beam is too high or too low To make this adjustment loosen the bolts shown by the arrows Move...

Page 85: ...em failure first check the fuse In case the fuse blows there is one spare fuse 15A CAUTION Overtightening the screws may damage the lens If the screws are too tight the lens may crack Tighten the lens...

Page 86: ...ualified mechanic should do general lubrication as shown in the MAINTENANCE CHART Grease Oil 1 Throttle cable and holder 2 Throttle lever 3 Choke cable 4 Steering shaft holder 5 Front wheel bearing 6...

Page 87: ...re Gross Trailer Weight by put ting each wheel of the fully loaded trailer on a bathroom scale Add the weights shown on the scales Tongue Weight is the downward force exerted on the hitch by the trail...

Page 88: ...o weight shifting while mov ing can affect your ability to han dle the ATV safely Make sure that the load in your trailer is properly secured and will not shift while moving WARNING Riding your ATV wi...

Page 89: ......

Page 90: ...6 1 6 TROUBLESHOOTING FUEL SYSTEM CHECK 6 2 IGNITION SYSTEM CHECK 6 3...

Page 91: ...el valve lever to the OFF positions b Loosen the drain screw which is located under the carburetor Drain the fuel from the carbure tor into a container CAUTION Failure to troubleshoot a problem correc...

Page 92: ...plug gap If there is no spark take your machine to your Suzuki dealer or a qualified mechanic COMPLAINT Engine stalls 1 Make sure there is enough fuel in the fuel tank 2 Check to see that the spark pl...

Page 93: ......

Page 94: ...7 1 7 PREPARATION FOR WINTER RIDING ENGINE OIL CHANGE 7 2 CHECKING CHOKE LIMITER POSITION 7 2...

Page 95: ...IL CHANGE Dirt and dust in the oil will affect engine performance especially when the weather is cold Change the engine oil before using your ATV in cold weather below freezing even if the oil that is...

Page 96: ...8 1 8 TRANSPORTING STARTING THE LT F160 AFTER TRANSPORT 8 3...

Page 97: ...s drained retighten the drain screw WARNING Spilled battery acid can be hazard ous Battery acid is corrosive and could cause severe burns if you get it on your skin It can also damage ATV parts Remove...

Page 98: ...e to properly secure the ATV when transporting it can be haz ardous Failure to properly secure the vehicle may result in an accident or damage to the vehicle When transporting the LT F160 lock the par...

Page 99: ......

Page 100: ...ANING PROCEDURE AND STORAGE PROCEDURE PREPARATION FOR CLEANING 9 2 WASHING YOUR ATV 9 3 INSPECTION AFTER CLEANING 9 3 STORAGE PROCEDURE 9 4 MAINTENANCE DURING STORAGE 9 4 PROCEDURE FOR RETURNING TO SE...

Page 101: ...aust system can reduce engine cooling conceal damage or increase wear of certain parts It is important to remove all debris during cleaning PREPARATION FOR CLEANING Wash the ATV before any mud dries o...

Page 102: ...mitts or cleaning brushes can be used Be careful with brushes as they may scratch plastic or painted surfaces Rinse the ATV thoroughly with clean water Dry all areas using a chamois or soft absorbent...

Page 103: ...the engine a few times to spread the oil in the cylinder BATTERY 1 Remove the battery from the vehi cle 2 Clean the outside of the battery with mild soap and remove any corrosion from the terminals an...

Page 104: ...fresh oil as outlined in this manual 3 Reinstall the battery 4 Remove the spark plug Turn the engine a few times by pushing the electric starter button Reinstall the spark plug 5 Make sure that the v...

Page 105: ......

Page 106: ...10 10 1 CONSUMER INFORMATION SERIAL NUMBER LOCATION 10 2 LOCATION OF LABELS 10 2...

Page 107: ...hown in the photograph The engine serial number 2 is stamped on the left side of the crankcase assembly Write down the serial numbers here for your future reference LOCATION OF LABELS Read and follow...

Page 108: ...f control can result in severe injury of death ALWAYS maintain proper tire pressure as shown below NEVER exceed the Vehicle Load Capacity of 285 lbs 130 kg LOAD UP TO 285 lbs 130 kg FRONT 3 6 psi 0 25...

Page 109: ...10 4 6 7 8 9 0...

Page 110: ......

Page 111: ...m Wet sump DRIVE TRAIN Clutch Wet multi plate automatic centrifugal type Transmission 5 forward constant mesh and 1 reverse Gearshift pattern forward All up foot lever operated Gearshift pattern rever...

Page 112: ...phase A C generator Fuse 15A Headlight 12V 45 45W Brake light Taillight 12V 21 5W Neutral indicator light 12V 3 4W Reverse indicator light 12V 3 4W CAPACITIES Fuel tank includingreserve 8 5 L 2 2 1 9...

Page 113: ...IVE CHAIN ADJUSTMENT 5 19 DRIVE CHAIN CLEANING AND OILING 5 18 E ENGINE OIL 1 3 5 11 ENGINE OIL AND FILTER CHANGE 5 11 ENGINE OIL CHANGE 7 2 F FLAG BRACKET 2 14 FRONT AND REAR WHEEL REMOVAL 5 26 FUEL...

Page 114: ...6 RIDING IN COLD WEATHER 3 20 RIDING IN REVERSE 3 23 RIDING OVER OBSTACLES 3 18 RIDING THROUGH WATER 3 19 RIGHT HANDLEBAR 2 9 S SEAT LOCK 2 13 SERIAL NUMBER LOCATION 10 2 SKIDDING OR SLIDING 3 14 SPA...

Page 115: ......

Reviews: