22
Operating Maintenance Installation CLASSIC PIZZA 860005-02
• When the oven sections are separated from each
other they can be carefully lifted down and moved
to the place of assembly.
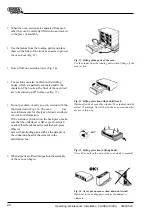
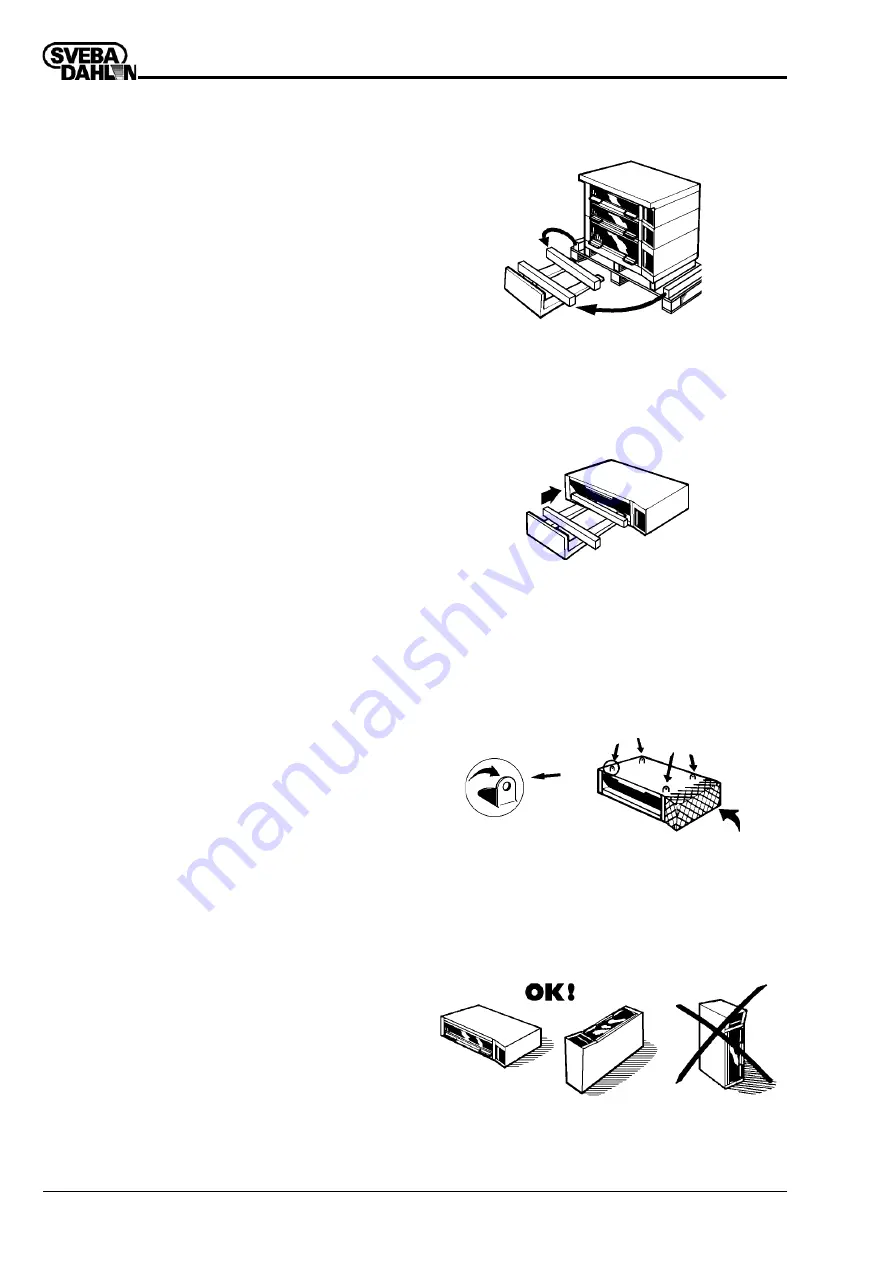
• Use the planks from the loading pallet and place
these on the forks of the truck as spacers to protect
the oven door (Fig. 13).
• Now lift off one section at once (Fig. 14).
• The sections can also be lifted in their lifting
hooks, which are partially concealed under the
insulation. The hooks at the front of the oven roof
are to be turned up 90° before use (fig. 15).
• Do not put down or carry an oven section with the
short side down (Fig. 16). The oven
has
no reinforcements for this type of strain, and there
is a risk for deformation.
If the section is put down on the back-piece, make
sure that the underlayer is flat. A spot load such
as a door threshold can easily crack the back-piece.
Observe
care with protruding parts such as the damper or
the connection head of the element in the
distribution box.
• When all parts are lifted into position the assembly
of the oven can begin.
Fig. 13 Lifting of the parts of the oven.
Use the planks from the loading pallet when lifting off the
oven section.
Fig. 14 Lifting of section with fork-lift truck.
Watch out for the door and the window! The planks should be
at least 75 mm high. Never lift more than one oven chamber
at once in this way!
Fig. 15 Lifting of section in lifting hooks.
Never lift or pull on the area of the oven which is marked!
Fig. 16 Never put an oven section down on its side!
Watch out for extruding parts such as the damper or
elements.


