background image


SW-Stahl und Werkzeugvertriebs GmbH 

Tel. +49 (0) 2191 / 46438-0 

Leverkuser Strasse 65 

Fax +49 (0) 2191 / 46438-40 

D-42897 Remscheid 

E-Mail: info@swstahl.de 

64340L 

www.swstahl.de 

B

E

D

IE

N

U

N

G

S

A

N

L

E

IT

U

N

G

 /

 I

N

S

T

R

U

C

T

IO

N

 M

A

N

U

A

L


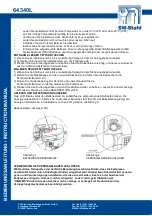
CHARGER OPERATION 

CHARGING THE BATTERY PACK 
Before using your Rechargeable Grease Gun for the first time, the battery pack should be charged for a 
minimum of 1.5 hours. If the battery pack is already installed in the Rechargeable Grease Gun, remove it 
by following the instructions under INSTALLING or REMOVING BATTERY PACK. As the battery pack 
approaches the discharged state, you will notice a sharp drop in tool performance. When the tool is unable 
to perform the task at hand, it is time to recharge the battery pack. Recharging the battery pack before this 
condition is reached will reduce the total work life of the pack. Discharging the pack beyond this point can 
damage the pack. 
NOTE: Battery temperature will increase during and shortly after use. Batteries may not accept a full 
charge if they are charged immediately after use. Allow the battery pack to cool to room temperature 
before charging for best results. 

CAUTION 

Vent slots in top and bottom of charger must not be obstructed. Do not charge battery when 
temperature  is BELOW 0°C or ABOVE 40°C.


NORMAL CHARGING
 
Make sure the power circuit voltage is the same as that shown on the charger specification plate, then 
connect to power source. 
REMOVING THE BATTERY PACK 
Depress the two battery release buttons (one button on each side of battery pack) and pull the battery 
pack from the grease gun. 
INSTALLING THE BATTERY PACK 
Align battery pack with opening in handle, and push battery pack into handle until it locks into place. 
 

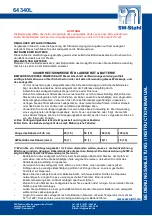
SAFETY INSTRUCTIONS FOR CHARGER & BATTERY 

SAVE THESE INSTRUCTIONS!! This section of the Manual contains important safety and operating 
instructions for the charger. 
•  

Before using a battery charger, read all instructions and cautionary markings on the battery pack, 
battery charger, battery and Rechargeable Grease Gun. 

•  

Do not expose charger to rain, snow or frost. 

•  

Do not pull on or otherwise abuse cord. Never pull charger by the cord when disconnecting 
charger. Have damaged or worn power cord replaced immediately. 
Do not attempt to repair the power cord. 

•  

Make sure cord is located so that it will not be stepped on, tripped over, or otherwise subjected to 
damage or stress. 

•  

Do not use an extension cord unless absolutely necessary. Use of improper extension cord could 
result in a risk of fire and electric shock. If an extension cord must be used, make sure: 


A: That the extension cord is properly wired and in good electrical condition. 
B: Wire size of cord is at least as specified in the following chart: 

 
Length of Cord in feet (m) 

 
25 (7.5) 

 
50 (15) 

 
100 (30) 

 
150 (45) 

 
AWG Size of Cord (mm2) 

 
18 (1) 

 
18 (1) 

 
18(1) 

 
16 (1.5) 

C: If an extension cord is to be used outdoors, it must be marked with the suffix W-A following the 
    cord type designations. For example, SJTW-A to indicate it is acceptable for outdoor use. 

• Do not operate charger with a damaged cord or plug. Have the cord replaced immediately to avoid a 
  hazard. Do not attempt to repair the power cord. 
• Do not operate the charger if it has received a sharp blow, been dropped, or otherwise damaged in any 
  way. Take it to a qualified serviceman for repair. 
• Do not disassemble the charger or the battery pack. Take it to a qualified serviceman when service or 
  repair is required. Incorrect reassembly may result in risk of 
  electrical shock or fire. 
• Unplug charger from outlet before attempting any maintenance or cleaning to reduce risk of electrical 
  shock. 

Summary of Contents for 64340L

Page 1: ...gvertriebs GmbH Tel 49 0 2191 46438 0 Leverkuser Strasse 65 Fax 49 0 2191 46438 40 D 42897 Remscheid E Mail info swstahl de 64340L www swstahl de BEDIENUNGSANLEITUNG INSTRUCTION MANUAL Akku Fettpresse...

Page 2: ...ufladevorgang 5 Regul rer Aufladevorgang 5 Entnahme der Batterie 5 Einlegen der Batterie 5 Verwendung des 12V DC Adapters und der W rmedecke 5 Verwendung des DC AC Adapters f r Zigarettenanz nder sowi...

Page 3: ...C bis 50 C Betriebsstrom 4 A Fettaussto 2 6 oz 1000psi Gewicht 3 15 kg ZUBEH R Arbeitsleistung 12 V DC Kapazit t 1700 mAh BATTERIELADEGER T Ladezeit 2 Stunden Leistung 12 V DC Eingangswert 120v 60Hz V...

Page 4: ...hen Verwenden Sie nur mitgeliefertes und empfohlenes Zubeh r f r die aufladbare Fettpresse Dieses Werkzeug ist ein hoch belastbares und tragbares Kraftschmierinstrument Verwenden Sie nur Zubeh r welch...

Page 5: ...so dass niemand darauf treten dar ber stolpern oder das Kabel in einer anderen Art und Weise besch digen kann Verwenden Sie ein Verl ngerungskabel nur wenn dies absolut notwendig ist Die Verwendung ei...

Page 6: ...s er vollst ndig freiliegt und am Sicherungshebel einrastet 2 Ziehen Sie die Plastikkappe von der neuen Kartusche ab und f hren Sie die Kartusche in die Schmiermittelkammer ein 3 Ziehen Sie die Versie...

Page 7: ...LLUNG DER PRESSE MIT HILFE EINER F LLPUMPE 1 Stecken Sie den Auff llstutzen der Presse in die entsprechende Aufnahmevorrichtung der F llpumpe Bet tigen Sie die F llpumpe um die Schmiermittelkammer de...

Page 8: ...e Kabel rot muss mit dem positiven Pol des Motors verbunden werden Den positiven Pol des Motors erkennen Sie an dem kleinen Kunststoffpunkt neben dem Pol 3 Das gr ne Massekabel muss unterhalb der Befe...

Page 9: ...eitigen Sie Verschmutzungen Fettpresse gibt kein Fett ab Schmiermittelkammer ist leer Druckverlust Testventileinheit funktioniert nicht Teil 12 Abbildung 6 Pr fen Sie ob die Schmiermittelkammer ausrei...

Page 10: ...kzeugvertriebs GmbH Tel 49 0 2191 46438 0 Leverkuser Strasse 65 Fax 49 0 2191 46438 40 D 42897 Remscheid E Mail info swstahl de 64340L BEDIENUNGSANLEITUNG INSTRUCTION MANUAL Rechargeable Grease Gun IN...

Page 11: ...9 Assembly and Maintenance Notes 10 Service Parts Diagrams 10 11 Troubleshooting 11 GENERAL DESCRIPTION This Rechargeable Grease Gun is a fully automated battery powered grease gun developed for manua...

Page 12: ...pack Use of any other batteries may create a risk of fire Batteries are shipped in an uncharged state Charge batteries for 1 5 hours before first use PERSONAL SAFETY Always wear eye protection The Rec...

Page 13: ...into place SAFETY INSTRUCTIONS FOR CHARGER BATTERY SAVE THESE INSTRUCTIONS This section of the Manual contains important safety and operating instructions for the charger Before using a battery charge...

Page 14: ...Press the locking lever and carefully release the follower handle to eject the empty cartridge from container tube INSTALLING GREASE CARTRIDGE 1 Pull back on the follower handle until the follower ro...

Page 15: ...the filler pump socket Operate the filler pump to fill the container Stop the filler pump when the follower rod extends to approximately 8 inches 20 cm See Figure 4 2 Push the follower rod into the g...

Page 16: ...438 40 D 42897 Remscheid E Mail info swstahl de 64340L BEDIENUNGSANLEITUNG INSTRUCTION MANUAL SERVICE PARTS DESCRIPTION 1 Battery 2 Handle Assembly 3 Flexible Hose 4 Self locking trigger 5 Coupler 6 R...

Page 17: ...se connections Pressure relief valve opens to discharge grease Blocked line Blocked bearing Blocked grease fitting Check lines brazing and grease fitting to remove or clean obstructions Grease Gun fai...

Reviews: