background image


BayRaider 


Owners Manual 


SwallowBoats Ltd, Gwbert Rd, Cardigan, Wales, SA43 1PN 

Summary of Contents for BayRaider

Page 1: ...BayRaider Owners Manual SwallowBoats Ltd Gwbert Rd Cardigan Wales SA43 1PN...

Page 2: ...ater Ballast 5 Self Righting Side Decks and Asymmetric Capsize Buoyancy 5 Capsize Recovery 6 Re boarding 7 The Ketch Rig 7 Commissioning 8 Introduction 8 Trailering 8 Raising the Masts 8 The First Sai...

Page 3: ...lease keep this manual in a safe place and hand it on to a new owner if you decide to sell the boat Specification Your boat has a Hull Identification Number which is a 14 digit number required by Euro...

Page 4: ...y sailed alone though in these circumstances we recommend the use of the water ballast She should carry no more than 300kg load in addition to the water ballast which also weighs 300kg Safety Equipmen...

Page 5: ...ree surface effect and the resulting slight reduction in stability that can occur due to water sloshing port to starboard In practice we have not noticed any problems in this regard as the water is co...

Page 6: ...Watch out for the boat righting on top of you so try and only grab the tip of the board She should right well before you need to stand on the board If this works well you might like to test her with...

Page 7: ...his possible Rigging up a rope loop is a reasonable method but it needs to be long enough only to drop just below the chine the hard angle in the hull If it is much lower than this your foot will slip...

Page 8: ...e boat has been designed to trailer with the rudder in place with the blade hoisted vertical Raising the Masts Start with the jib This is easily identified as the small sail with the wire luff leading...

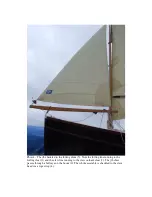
Page 9: ...ler to test the luff tensions When you unfurl the jib the back end of the jib boom should be pulled up and cleated off with the clew line see point 3 photo 1 The action of raising the jib boom at the...

Page 10: ...g drum 5 Note the furling line running to the furling cleat 1 and the clew line running to the clew outhaul cleat 3 The jib sheet passes through a bullseye on the boom 2 The whole assembly is shackled...

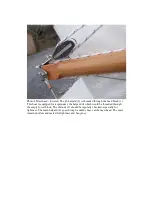
Page 11: ...hackled to the top swivel 2 which is shackled to the jib halyard 4 Photo 3 The rope strop 1 should be regularly inspected for wear Note how the strop is folded over the boom thus theoretically multipl...

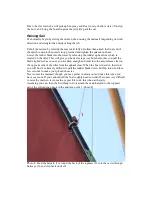
Page 12: ...is equipped for a spinnaker the halyard of which would be threaded through the empty lower block The shrouds 3 should be regularly checked especially for tightness The main halyard 4 goes through a d...

Page 13: ...Photo 5 Note the non return clam cleat on the mast 1 for the jib halyard which is then cleated off more permanently at 3 The main halyard is cleated at 4...

Page 14: ...out of it to lock the mast in place in the event of capsize Wood epoxy owners should ensure their mizzen is tied in Snap the mizzen sheets onto the boom using the clip and rope provided see point 2 ph...

Page 15: ...had time to familiarise yourself with her without the pressure of onlookers Don t be afraid to cancel if conditions look a little marginal When you arrive at the launch site remove the trailer board i...

Page 16: ...pull the blade right down as soon as you are deep enough and cleat into the auto release cleat on the opposite side of the tiller from the uphaul cleat When the boat is hard on the wind you will find...

Page 17: ...the topmast up to maximum height You should now be ready to hoist the sail by hauling on the main halyard Tell crew to watch their heads as the topmast and boom are lifted off the deck Pull the main h...

Page 18: ...he rope about 6 inches in from the end with the bead on it and pushing the pinched end through the eye in the sail This forms a loop Push the bead through the loop and pull the whole lot tight Check t...

Page 19: ...e sail and tie into place with the reefing pennants provided Do not try to tie the sail to the boom as in some reefing systems Raise the sail as per normal tension the outhaul and sail on It sounds ea...

Page 20: ...f the boat up onto the back of the trailer if you can too Walk forward to the winch holding the tension in the strap to try to minimise the stern being swept sideways Wind the winch as quick as you ca...

Page 21: ...enough to hold a screw Therefore if you want to add any fittings or modify your boat the best way is to glue a pad of timber to the area in question after first scraping or sanding off any paint If y...

Page 22: ...y 5 The use of the boat for commercial purposes shall void this warranty 6 Warranty claims for materials or equipment not manufactured by Swallowboats can be made directly to the relevant manufacturer...

Reviews: