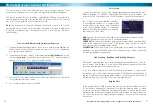
NetViewer - About the Software
The included software “NetViewer” is an invaluable tool for accessing, operating,
controlling and backing up footage from your DVR. It interfaces with your DVR via
your local network or remotely via the Internet, so it’s also the primary method of
remotely accessing your DVR as well. The software can be installed on as many
computers as you like.
Using the NetViewer software, you’ll be able to remotely:
View live images coming from the DVR.
•
Playback and backup events from the DVR hard drive directly to the remote
•
terminal you are accessing the DVR from.
Change the settings and preferences in the DVR menu system (such as the
•
recording schedule and quality settings).
System Requirements
Minimum
Recommended
Processor
1.0 GHz or more
2.0 GHz or Dual/Quad Core
RAM
256MB
512MB
or
higher
Graphics
Card
64MB
128MB
or
higher
Screen Resolution
1024 x 768
1280 x 1024 or higher
Internet Connection
128kbps upload speed
256kbps upload speed or higher
Operating System(s)
Microsoft Windows
®
XP
32-bit
Microsoft Windows
®
Vista
32-bit
Microsoft Windows
®
7
32-bit
Notes:
We suggest ensuring that your network is functioning properly before installing
•
this software - you can test remotely accessing your DVR via an Internet
browser window.
At the time of writing, the software does not support the newer 64-bit versions
•
of these operating systems.
The NetViewer software is not compatible with Mac OS or Unix/Linux
•
systems.
Microsoft Windows
is a registered trademark of Microsoft Corporation in the United States and other countries.
56
13
Using the On-Screen Keyboard
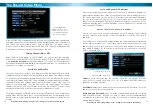
As the DVR doesn’t have a keyboard, when you have to enter text the DVR will
present you an on-screen ‘keyboard’. This will automatically appear when you
select a text fi eld which allows you to enter a value.
If you want to change the type of characters
being entered, click the ABC button on the right
of the keyboard - this will cycle through the
modes available. You can enter letters, numbers
or symbols, each with their own mini-keyboard.
Getting Started
If you’ve just unpacked your DVR and are not sure where to begin setting up your
system, here’s a quick rundown of the most important things that need to be set up.
Test your system.
•
Before installing cables into walls, it’s a great idea to plug
everything in and make sure it all works. This is particularly true if you’re
using additional cameras to any that came with the DVR (this DVR is available
stand-alone or in a kit with cameras). We do our very best to ensure that the
equipment reaching you is of the highest quality and will work out of the box,
but accidents do occur in shipping and sometimes components fail. Better to
fi nd out now than once everything is screwed in place!
Then, once the DVR is on and working, the fi rst thing to do is to
•
set your
password
(see page 42 for details on how to do it).
Set the Date and Time
•
(page 41 for details) to ensure that, once you start
recording, you are able to index and search the recorded footage easily. Also,
if using the DVR’s footage in any legal proceedings, then having an accurate
date and time on your footage becomes quite crucial.
Check your hardware
•
- specifi cally, and most importantly, the hard drive
(see pages 30 & 31). This is where all your footage will be stored, so it’s quite
important to ensure that it is functioning correctly.
Setup your recording modes and/or schedule
•
(pages 18 - 21) to make
sure that the DVR will record what you want it to, and at the right time.
OPTIONAL (Advanced Users):
•
Confi gure your network settings (pages 22 -
23 & 50 - 51).


