background image

8

HOW TO USE

PRIMING THE PUMP

OK so your Steam Generator Iron is now switched on and heating up nicely. When the  
indicator on the display stops flashing, it has reached temperature.

1.  Lift the iron from the base
2.  Hold it lower than the base (on first time use like this, gravity helps to get water 

to the hand unit more quickly)

3.  Press and HOLD the steam release button for up to 40 seconds
4.  The pump will make a vibration noise that will become quieter as it becomes 

primed with water.

5.  When fully primed and ready, steam (and lots of it) will come from the hand unit 

and the pump will make a quiet pulsing noise.

6.  If this is the first time use, we recommend ironing a piece of scrap linen or cotton 

material to ensure any residual material from the manufacturing process is 
removed from the iron and sole plate.

7.  Your new iron is now primed and ready for work!

TEMPERATURE SETTINGS

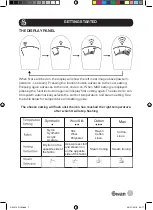
Please refer to the ironing temperature guide above. When you begin your ironing 
session, start with the LOWER temperature fabrics first because the iron takes 
longer to cool down than it does to heat up.

If you need to go from high temperature to low temperature then set the thermostat 
to lower temperature and wait until the display stops flashing (NOTE: there is no 
steam function on the very low setting)

DRY IRONING

If the garment requires dry ironing then don’t press the steam release button 
during ironing. On the lower temperature setting eg NYLON the steam function is 
not available, since the sole plate doesn’t get hot enough to produce steam at this 
temperature. 

If you are unsure about the correct setting for your iron or if the garment label is 
missing then try ironing a small inconspicuous area of the garment first.

SI14310N_IM.indd   8

29/01/2018   09:17

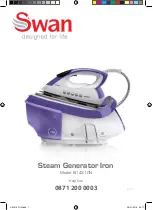
Summary of Contents for SI14310N

Page 1: ...Steam Generator Iron Model SI14310N Help line 0871 200 0003 v1 0 SI14310N_IM indd 1 29 01 2018 09 17...

Page 2: ...ervised Keep the appliance and its cord out of reach of children aged less than 8 years Check the power cord and plug regularly for any damage If the cord or the plug is damaged it must be replaced by...

Page 3: ...ure that the lead is suited to the power consumption of the appliance to avoid overheating of extension cord appliance or plug point Do not place the extension cord in a position where it can be pulle...

Page 4: ...fe operation of this product Your appliance must never be switched on through an external timer or any kind of separate remote control system The water inlet must be closed during use Only place the u...

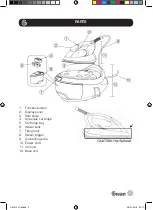
Page 5: ...on button 2 Display panel 3 Sole plate 4 Anti scale cartridge 5 Cartridge tray 6 Water tank 7 Filling door 8 Steam trigger 9 Connecting tube 10 Power cord 11 Iron unit 12 Base unit SI14310N_IM indd 5...

Page 6: ...er it does have limits and is not covered by your warranty Replacement filters are available from our website at www swan brand com but depending on where you live a filter can last 2 years in Halifax...

Page 7: ...ronic con trol system automatically selects the correct temperature and steam setting See the table below for temperature and setting guide The chosen setting will flash until the iron has reached the...

Page 8: ...removed from the iron and sole plate 7 Your new iron is now primed and ready for work TEMPERATURE SETTINGS Please refer to the ironing temperature guide above When you begin your ironing session start...

Page 9: ...then hold the iron in vertical position about 5cm to 15cm away from the hanging fabrics Press the steam release button which will create vertical steam This feature is especially used for removing cr...

Page 10: ...on any part of the iron Never immerse the base or hand unit in water Never run the base or hand unit under the tap DE SCALING We highly recommend using bottled water as it is inexpensive and it could...

Page 11: ...e store The following conditions apply The product must be returned to the retailer with proof of purchase The product must be installed and used in accordance with the instructions contained in this...

Page 12: ...ducts Ltd PO Box 3117 Stoke on Trent ST4 9GD Est 1 931 We love what we do s 2year GUARANTEE we re proud of our quality Scan this QR code to hear about our story Find us on Facebook on selected product...

Reviews: