11
sWaP Dual SIM
user guide
www.s-w-a-p.co.uk
Contents
SMS message settings
1 From the standby screen, press the
Menu
softkey.
2 Choose the
icon.
3 Choose
Message settings
, then
Text message
and
then choose either SIM1 or SIM2 message settings, as
appropriate.
•
Profile settings
allows you to determine which profile
should be used for SMS messaging. This includes
which service centre number to use, the validity period
for messages held at the centre and the messaging
format to use.
•
Voicemail server
allows you to add/edit the number
used to contact your voicemail service. See the section
Voicemail server
for details.
•
Common settings
provides the following options:
Delivery report
- when ticked, requests a return
message when messages have been delivered;
Reply
path
- when ticked, forces any reply sent to be go
through the original service centre;
Save sent message
- when ticked, retains a copy of outgoing message.
•
Memory status
shows the remaining space for
messages in the various memory areas.
•
Preferred storage
allows you to choose which
memory to use as standard.
•
Preferred connection
allows you to choose a
whether to use GPRS connections (if available) to send
messages or to remain with GSM.
MMS messages
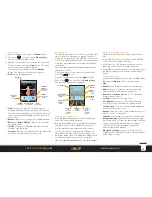
MMS messages are structured in a similar way to slide
show presentations. Each message consists of one or
more slides, with each slide able to contain text, an
image, an audio file, a video clip, a file attachment or
any combination of these. When the message is played,
each slide and it’s contents are shown in order. You can
optionally adjust the timing of the slides, for instance,
to keep showing an image until a clip of music has
finished playing.
Note: MMS messages require a GPRS connection as
part of your service provider agreement. Also, not all
mobile phones can accept or display MMS messages.
You must also choose the correct initial settings to
match your network. Please see
MMS message settings
.
Writing an MMS message
1 From the standby screen, press the
Menu
softkey.
2 Choose the
icon.
3 Choose
Compose message
and then choose
Multimedia message
.
4 Write your message using the keypad. As you type,
the character choices (or word choices, if predictive
text is enabled) are shown at the base of the screen.
Where necessary, use repeated presses of a particular
key to advance through the characters that it
represents.
• Use the
0
key to add a space.
• To change case or to use other language characters:
Press the
Options
softkey and choose
Input method
.
• To enable or disable predictive text: Press the
Options
softkey and choose
Predicted Text
.
• To insert a picture, a sound or a video clip: Press the
Options
softkey and choose
Add ...
(picture, sound
or video)
. Locate the required item within memory and
press the Select button.
• To add an attachment or WAP bookmark: Press the
Options
softkey and choose
Slide options
, then
choose
Insert attachment
or
Add bookmark
.
• To add a new slide: Press the
Options
softkey and
choose
Slide options
, then choose
Add slide behind
or
Add slide before
, as appropriate.
• To adjust slide transition timing: Press the
Options
softkey and choose
Slide options
, then choose
Slide
timing
. Enter the time in seconds to display each slide.
• To add a subject title: Press the
Options
softkey and
choose
Add subject
, then enter your title.
• To change between slides, use the left and right parts
of the navigation ring.
5 When you have completed the slides you can see how
they will play. Press the
Options
softkey and then
choose
Preview MMS
.
6 When your message is complete, press the
Options
softkey and then choose
Send to
. You can now choose
how to send the message:
• Choose
Enter number
to add a new destination
phone number.
• Choose
Search contacts
to add a contact from your
Phonebook.
You can add as many new phone numbers and/
or phonebook contacts as required. To remove a
recipient, highlight the entry, press the
Options
softkey and choose
Remove recipient
.
7 When you have entered your recipient(s), press the
Options
softkey and choose
Send
.

