11
sWaP Rebel
user guide
www.s-w-a-p.co.uk
Contents
MMS messages
MMS messages are structured in a similar way to slide
show presentations. Each message consists of one or
more slides, with each slide able to contain text, an
image, an audio file, a video clip, a file attachment or
any combination of these. When the message is played,
each slide and it’s contents are shown in order. You can
optionally adjust the timing of the slides, for instance,
to keep showing an image until a clip of music has
finished playing.
Note: MMS messages require a GPRS connection as
part of your service provider agreement. Also, not all
mobile phones can accept or display MMS messages.
You must also choose the correct initial settings to
match your network. Please see
MMS connection
configuration
at the end of this MMS section.
Writing an MMS message
1 From the clock face, tap
Menu
.
2 Tap (twice, if necessary).
3 Tap
MMS
, then tap
Compose Message
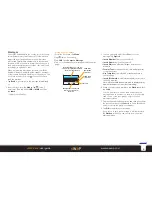
. A series of
blank fields will be shown. Each has a different
function:
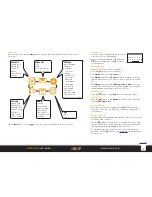
1
-To;
2
-Cc (copy);
3
-Bcc (blind copy);
4
-Subject;
5
-Edit content
Tap on a field that you want to use, and then tap
Edit
.
For fields
1
,
2
and
3
you can enter any number of
phone numbers and/or email addresses.
Field
4
is the message Subject and will invoke the
standard text editor.
Field
5
is where you create and determine the content.
When you tap
Edit Content
for field 5 for the first
time, you will see the text editor for the first slide.
4 Enter/edit your text and then tap
Option
.
To add an item to the current slide, tap
Add Picture
,
Add Audio
,
Add Video
or
Add Attachment
.
In each case, tap
Phone
or
Memory Card
to choose
the location of the item. Your sWaP Rebel applications
use
Phone
storage as standard, however, this can be
changed within each application (the memory card has
a much larger capacity).
You will then see the folders located within the chosen
storage area, e.g. Images, Audio, Photos, Video, etc.
Tap the appropriate folder name to view the contents.
Tap the required item to add it to your slide.
5 For each item type, repeat step 4. Remember that you
can only have one of each item type per slide. If you
add a second image to a slide, it will overwrite the first
one.
6 If necessary, add one or more new slides to
accommodate multiple items of the same type. From
the text editor, tap
Option
and then tap either
Add
Slide Before
or
Add Slide After
. You will now see the
blank text editor for the new slide. It is not necessary
to have text on every slide. Repeat steps 4 and 5 to
populate the new slide.
7 To change between slides, tap
Option
and then tap
either
Previous Slide
or
Next Slide
, as appropriate.
8 When you have completed the slides you can see how
they will play. Tap
Option
and then tap
Preview
. If
necessary, you can change the timing. Tap
Option
and
then tap
Slide Timing
. Use the editor to change the
time (in seconds) that each slide is displayed.
9 Once the message is complete, tap
Option
and then
tap
Done
. You will now see the initial group of fields
where the addressing is performed.
If not already done, enter the recipient
phone numbers and/or email addresses and then tap
Done
.
10 You can now choose to
Send Only
,
Save and Send
or
Save to Drafts
.
If you did not enter any recipients, the only option will
be
Save to Drafts
.

