background image

12

   User Manual 

Commissioning

Assembling the Lawn Mower

Checking the Cylinder Adjustment

Take the mower out of the box. The best practice is to carefully cut the box open from the front and draw the machine 
out to a free area. Do not ever use the handle on the mowing cartridge for lifting the mower or its transport.

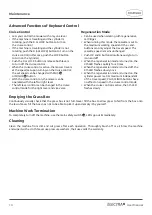
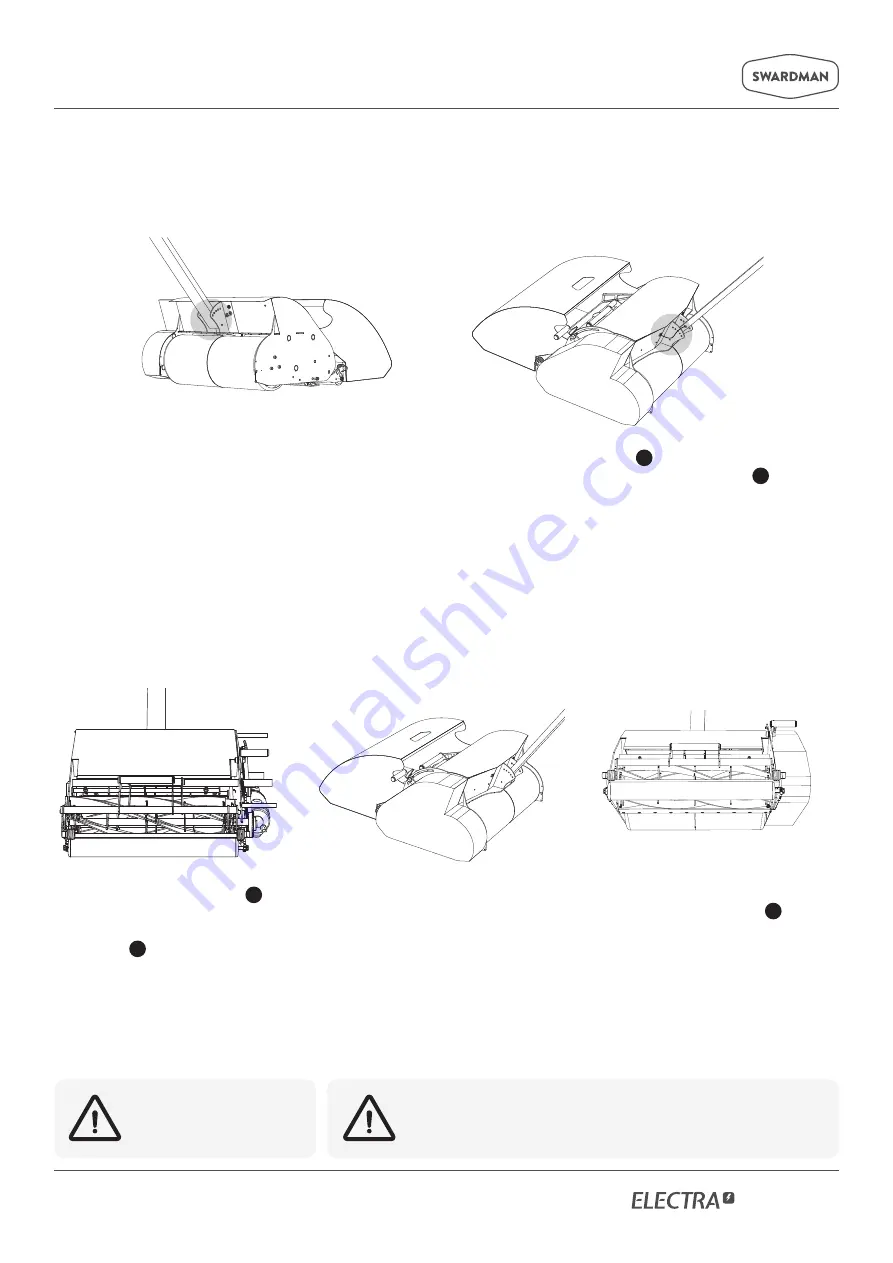
Regularly check adjustment of the cylinder against the bed-knife before each mowing. When adjusting, use the 8 mm 
wrench. 
Mower with 45 cm (18in) cutting width has 2 adjusting screws on the cylinder and 55 cm (22in) cutting width 
has 3 adjusting screws.

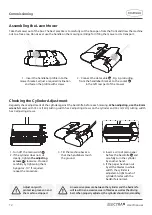
1.  Insert the handlebar profi le into the 

mower bracket, adjust a required inclination 

and fasten the profi le with screws.

1. Turn off  the main switch 

12

2. If the cylinder does not cut 

clearly, tighten the adjusting 
screws 

21

 clockwise. Proceed 

carefully by tightening them 
by approx. 10°. If required, 
repeat the procedure.

3. Tilt the machine back so 

that the handlebars touch 
the ground.

4. Insert a strip of plain paper 

before the bed-knife 

20

 and 

carefully turn the cylinder 
by another hand.

5. If the paper has been cut 

by all the blades in whole 
width, the cylinder is 
adjusted. A light touch of 
cylinder blades with the 
bedknife is normal.

2.  Connect the data cable 

28

 , Fig. 6, protruding 

from the handlebar bracket, to the socket 

29

in the left rear part of the mower.

1

1

2

2

3

3

4

4

5

5

6

6

7

7

8

8

A

A

B

B

C

C

D

D

E

E

F

F

Swardman vykres.idw

SWARDMAN

Kreslil

Materiál

Polotovar

N/A

Hmotnost

07.12.2017

Vytvořeno

Měřítko

INDEX ZMĚNA

01

02

03

04

DATUM PODPIS

1:1

1

1

2

2

3

3

4

4

5

5

6

6

7

7

8

8

A

A

B

B

C

C

D

D

E

E

F

F

SWARDMAN

09.01.2018

Designed by

Checked by

Approved by

Date

1 / 1 

Edition

Sheet

Date

Adjust only with 
protective gloves on and 
the machine stopped.

An excessive pressure between the cylinder and the bed-knife 
will result in an excessive wear of blades as well as the driving
belt. When properly adjusted, the cylinder should turn smoothly.

1

1

2

2

3

3

4

4

5

5

6

6

7

7

8

8

A

A

B

B

C

C

D

D

E

E

F

F

BOHEMIATEX

04.01.2018

Designed by

Checked by

Approved by

Date

1 / 1 

Edition

Sheet

Date

1

1

2

2

3

3

4

4

5

5

6

6

7

7

8

8

A

A

B

B

C

C

D

D

E

E

F

F

BOHEMIATEX

04.01.2018

Designed by

Checked by

Approved by

Date

1 / 1 

Edition

Sheet

Date

1

1

2

2

3

3

4

4

5

5

6

6

7

7

8

8

A

A

B

B

C

C

D

D

E

E

F

F

BOHEMIATEX

04.01.2018

Designed by

Checked by

Approved by

Date

1 / 1 

Edition

Sheet

Date
Summary of Contents for Electra 44

Page 1: ...USER MANUAL Cylinder Lawn Mower ...

Page 2: ...chine as its rise resulted from pure love for beautiful healthy and precisely mowed lawns We believe that your Swardman cylinder lawn mower will generously contribute to your lawn to be your pride and joy shared by all people around you Tomáš Šena Swardman CEO and Founder ...

Page 3: ...n 5 Contents of Package 6 General Safety Instructions for Walk behind Cylinder Lawn Mower 7 Technical Data 9 Product Description Explanations 10 Commissioning 12 Maintenance 14 Acknowledgements 15 Troubleshooting 16 Warranty Information 17 Declaration of Conformity 18 Accessories and Manufacturer Information 19 ...

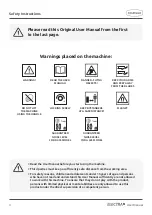
Page 4: ...o have not read and understood this User Manual sufficiently are not allowed to work with this machine To ensure that they do not play with the product persons with limited physical or mental abilities are only allowed to use this product under the direct supervision of a competent person KEEP YOUR ARMS AND FEET AWAY FROM THE BLADES MAGNET DANGER FLYING OBJECTS KEEP BYSTANDERS AT A SAFE DISTANCE G...

Page 5: ...nder lawn mowers are exclusively designed for mowing lawns in private gardens and gardens around the house having the area less than 1 400 m2 or for their being in operation for 100 running hours per year The use for any other purpose is considered inconsistent with the intended purpose The manufacturer is not responsible for any damage to health or machine thereof and these risks are unconditiona...

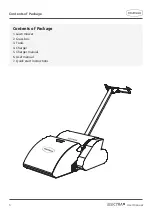
Page 6: ... 3 Tools 4 Charger 5 Charger manual 6 User manual 7 Quick start instructions 1 1 2 2 3 3 4 4 5 5 6 6 7 7 8 8 9 9 10 10 11 11 12 12 A B C D E F G H Swardman vykres idw SWARDMAN Kreslil Materiál Polotovar N A Hmotnost 07 12 2017 Vytvořeno Měřítko INDEX ZMĚNA 01 02 03 04 DATUM PODPI ...

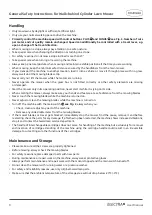
Page 7: ... height of 20 25 mm The result as well as the battery time depend on local conditions density and composition of the grass cover Never mow if there are other persons nearby especially children or animals Before as well as during each mowing make sure there are no foreign or undesirable objects on the lawn that may cause damage to the machine or injury to the user These above all include stones sti...

Page 8: ...the mowing blades Never touch the mowing blades while the machine is turned on Never adjust or clean the mowing blades while the machine is turned on Turn off the machine with the main switch 12 see Fig 2 always when you Check clean or adjust any part of the machine Remove any undesirable items from the mowing blades If the mower blades or travel gets blocked immediately stop the mower find the ca...

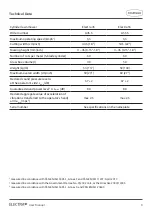
Page 9: ...3 69 27 Declared sound pressure level A at the operator s side1 LpAd dB 67 2 67 2 Guaranteed sound power level2 A LWA G dB 80 80 Declared aggregate value of acceleration of vibrations transferred to the operator s hand arm3 ahvd mps 2 max 2 5 max 2 5 Serial number See specifications on the nameplate 1 measured in accordance with ČSN EN ISO 5395 1 Annex F and ČSN EN ISO 11201 April 2010 measured in...

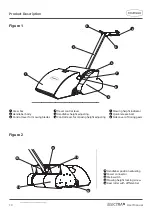
Page 10: ...height adjusting 6 Control lever for mowing height adjusting 7 Mowing height indicator 8 Quick release bolt 9 Side cover of timing gears 10 Handlebar position adjusting 11 Power connector 12 Main switch 13 Mowing height locking screw 14 Rear roller with differential 1 1 2 2 3 3 4 4 5 5 6 6 7 7 8 8 A A B B C C D D E E F F Swardman vykres idw SWARDMAN Kreslil Materiál Polotovar N A Hmotnost 07 12 20...

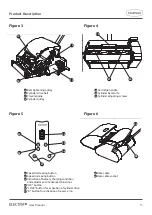
Page 11: ...functions 25 OK button 26 LOCK button for activation of cylinder drive 27 R button for activation of reverse run 1 1 2 2 3 3 4 4 5 5 6 6 7 7 8 8 A A B B C C D D E E F F BOHEMIATEX 04 01 2018 Designed by Checked by Approved by Date 1 1 Edition Sheet Date 15 16 17 18 1 1 2 2 3 3 4 4 5 5 6 6 7 7 8 8 A A B B C C D D E E F F BOHEMIATEX 04 01 2018 Designed by Checked by Approved by Date 1 1 Edition Shee...
Page 12: ... paper has been cut by all the blades in whole width the cylinder is adjusted A light touch of cylinder blades with the bedknife is normal 2 Connect the data cable 28 Fig 6 protruding from the handlebar bracket to the socket 29 in the left rear part of the mower 1 1 2 2 3 3 4 4 5 5 6 6 7 7 8 8 A A B B C C D D E E F F Swardman vykres idw SWARDMAN Kreslil Materiál Polotovar N A Hmotnost 07 12 2017 V...

Page 13: ...fter 60 sec inactivity The 1st LED flashes the battery is flat and there are several minutes of travelling left The reversing speed is constant and cannot be changed with PLUS and MINUS buttons Push the R button 27 when the mower is stationary the left travel lever is turned off Min cylinder power of 20 when the mower is stationary Lock off the cylinder by pushing the LOCK button 27 the 5th LED fl...

Page 14: ...ush the LOCK button to turn on the cylinder Push the R or LOCK button or release both levers to turn off the cruise control When the cruise control is active the mower travels at the speed set upon turning on the cruise control the set speed can be changed with PLUS 23 or MINUS 22 button With the cruise control on the mower can be operated with the left or right lever The left lever control can be...

Page 15: ...l Perform a preventive check of adjustment before each mowing For better illustration see the video manual at www swardman com Adjust as follows shown in the paragraph Checking the Cylinder Adjustment page 10 1 Stop the machine 2 Turn off the main switch by pushing it in 12 3 Put on protective gloves 4 Take off the grass box 5 Tilt the machine onto the handlebars 6 Take a strip of plain paper and ...

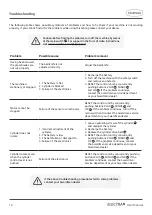
Page 16: ...g buttons PLUS 23 MINUS 22 and OK 25 If the problem continues contact the Swardman service department or your Swardman dealer Motor cannot be stopped Failure of the sensor or electronics RESET the control unit by concurrently pushing buttons PLUS 23 MINUS 22 and OK 25 If the problem continues turn off the main switch and contact the Swardman service department or your Swardman dealer Cylinder does...

Page 17: ...ing spare parts not manufactured or approved by Swardman This warranty does not affect your statutory rights in connection with defective products When the time comes to dispose of the product please consider the environment and recycle the product For information on where to properly dispose of the product please contact your local authorities A warranty repair will be made if The warranty cannot...

Page 18: ...18 User Manual Declaration of Conformity ...

Page 19: ...ww swardman com E info swardman com Service T 420 602 675 279 Cylinder 5 6 10 blades Rotary brush cartridge Scarifier cartridge Verticutter cartridge Interchangeable Cartridges Mobile phone holder Cartridge holder Leather handlebars Beverage holder Handlebars Grooved front roller Front and rear roller wipers Front roller Colours and materials SILVER RAL 3011 RAL 9016 RAL 3020 RAL 5015 RAL 6018 Opt...

Page 20: ...Swardman s r o Pod Svahem 1582 12 147 00 Prague Czech Republic www swardman com info swardman com 420 602 675 279 passion for lawns ...

Reviews: