


Design and specifications are subject to change without notice.
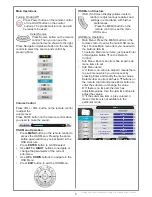
Menu > Channel
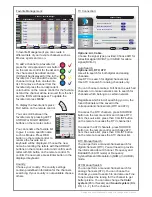
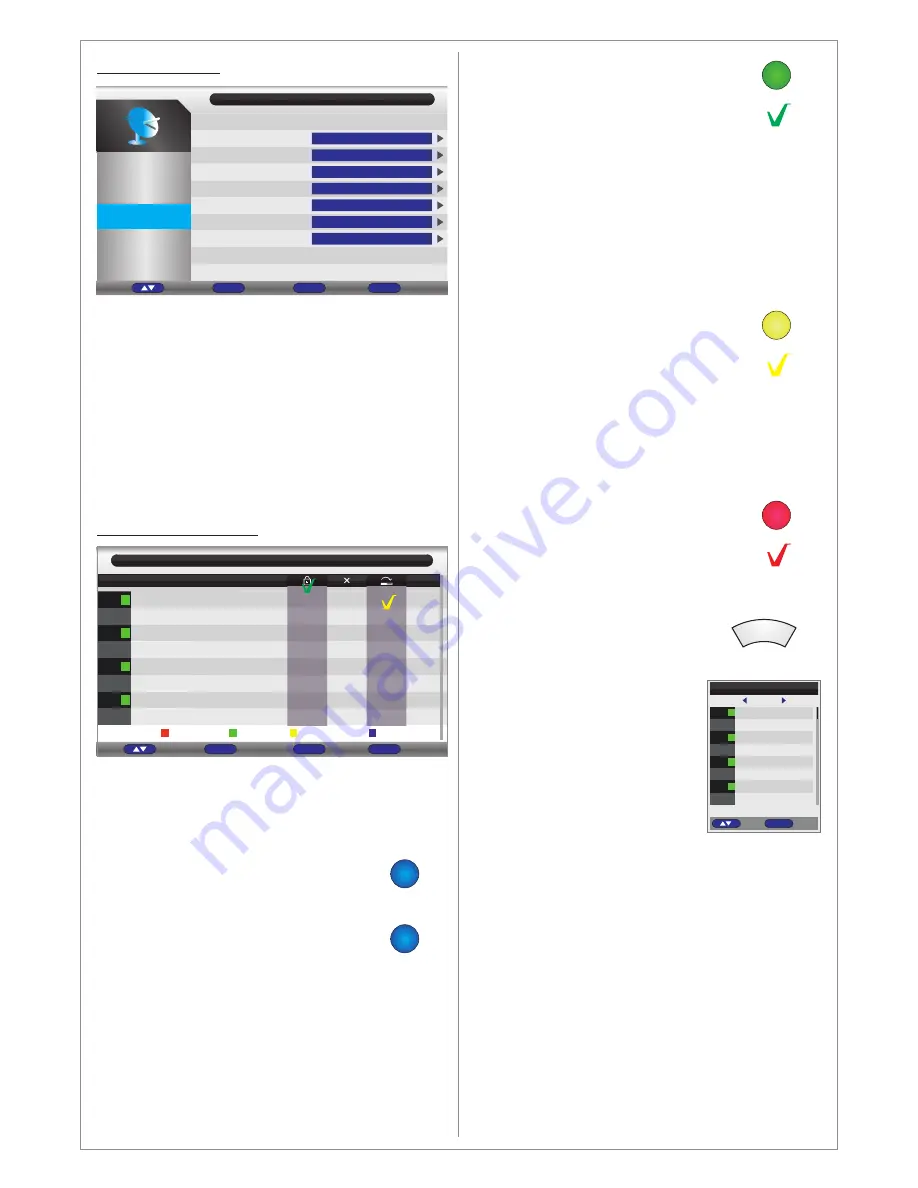
Channel Management:
In Channel Management you can sort the
channels in desired sorting by swapping the
channels. To sort the channels by swapping
follow the following steps in channel manager:
Choose the channel you want to move
to another position and press BLUE
button on the remote control, the
channel line will start flashing.
Choose the new position for the channel
to be moved to and press BLUE button
on the remote control again and the channel will
be moved.
You can lock channels. Locking the channels will
require the password in order to unlock the
channel for viewing (the factory password is
and can be modified in Future-Lock
menu).
0 0 0 0
The TV model of this product is equipped with the
following Tuners
Analog TV Tuner, supports Pal and Secam
DVB-T, supports MPEG-4 extended ASP
DVB-C,supports 16,32,64,128 and 256-QAM
Supports H.264MP/HP@L4.1for SD and HD
decoding
In this menu you can search for TV channels and
manage them.
Channel
Picture
Channel
Feature
Setup
Channel Management
Favorite Management
Country
TV Connection
Auto Search
DTV Manual Search
ATV Manual Search
ENTER
ENTER
Country
Air
ENTER
ENTER
ENTER
Sound
Return
Menu
Exit
Exit
Enter
Ok
Move
0001
0002
0003
0004
0005
0006
0007
0008
$
$
$
$
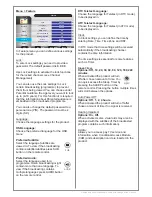
Channel - Channel Manager
Exit
Exit
Return
Menu
dtv
dtv
dtv
dtv
dtv
dtv
dtv
dtv
No.
Program Name
Type
Swap
Skip
Lock
Del
Tv01
Tv02
Tv03
Tv04
Tv05
Tv06
Tv07
Tv08
Page + -
CH+-
Move
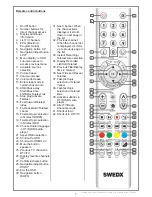
To lock a channel choose it and press
GREEN button on the remote control.
An ICON will be displayed for locked
channels. To unlock a channel choose it
a press GREEN button again. The lock icon will
disappear. When you have locked the channels
press MENU to exit and update the channel list.
You can skip channels. Skipped channels will be
”
jumped over
”
when zapping channels with CH+-
buttons.
To skip a channel choose it and press
YELLOW button on the remote control.
An ICON will be displayed for skipped
channels. To unskip a channel choose it
and press YELLOW button again. The
skip channel icon will disappear. When
you have locked the channels press MENU to
exit and update the channel list.
You can delete channels. Deleted channels will
disappear from the channel list.
To delete a channel choose it and press
RED button on the remote control. An
icon will be displayed for the marked
channel for deleting. To complete the
deleting press MENU to update the channel list.
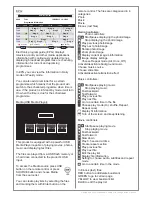
To display the channel list press
CH. LIST button on the remote
control.
In DTV mode the received
channels can be TV channels or
Radio channels. In the channel
list you can choose to display
ALL channel, TV channels
(DTV) or Radio channels
(Radio). You can scroll between
the channel lists by pressing
LEFT ARROW or RIGHT
ARROW buttons on the remote control.
Channel List
All
0001
0002
0003
0004
0005
0006
0007
0008
Tv01
Tv02
Tv03
Tv04
Tv05
Tv06
Tv07
Tv08
$
$
$
$
Enter
OK
Move
dtv
dtv
dtv
dtv
dtv
dtv
dtv
dtv
CH. LIST