Design and specifications are subject to change without notice.
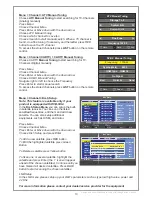
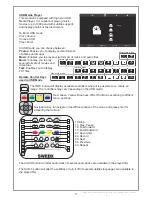
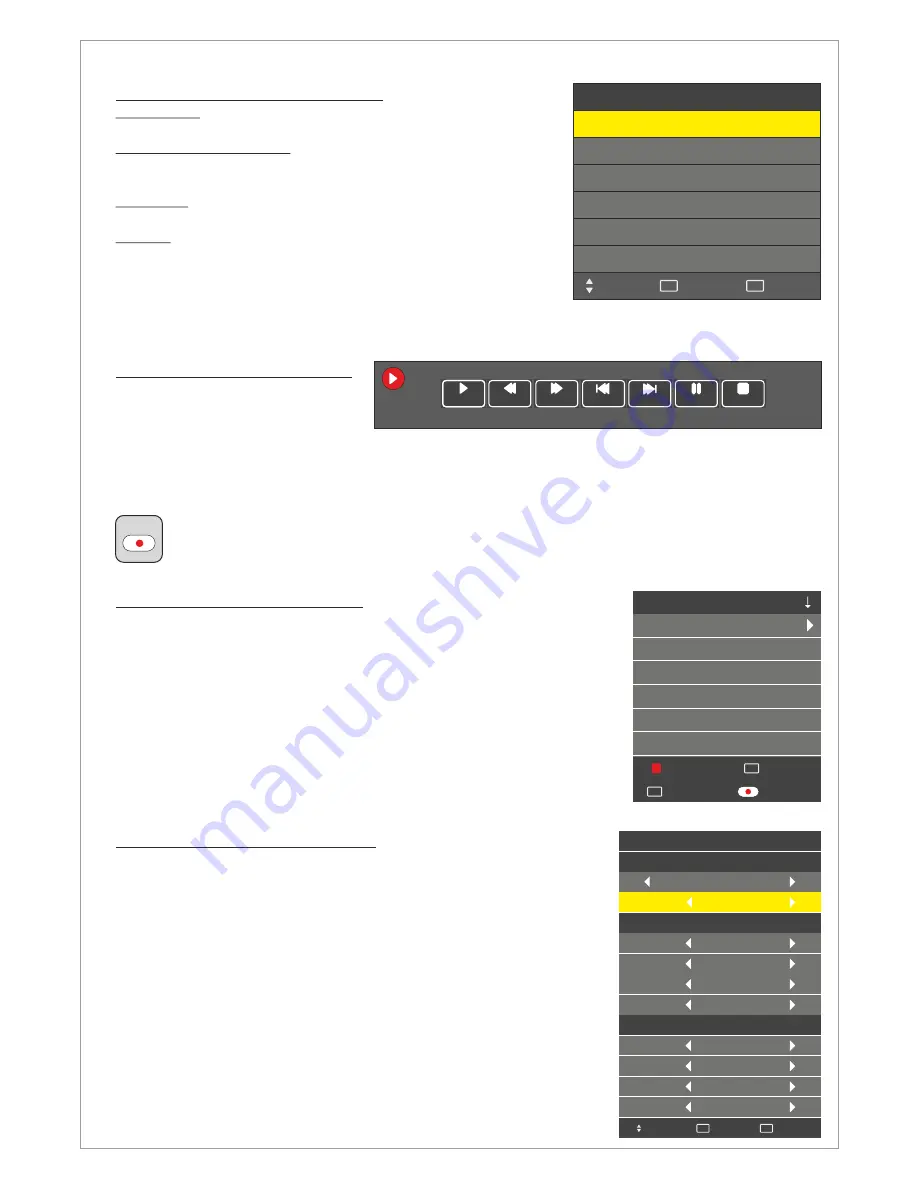
Menu > Channel > Recorded List
Use the
Recorded Start List Menu
to display a list of the recorded
programs. The Recorded List
Pressing the RED button will delete the recorded program
Pressing Enter button will play the recorded program
Pressing Info button will display information about the recorded
program such as date, time, duration, program title, channel name and
program description
Pressing the Recorded List button will change the sorting. 3 types of
sorting alternatives are available, by channel name, time and program
title.
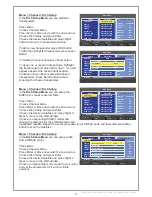
Menu > Channel > Record Start
Use the
Record Start Menu
to
start recording a program. When
you start the recording a menu will
be displayed where you can
control the recording and get information about the current recording time, max recording time and
channel number and name. When you stop the recording the LCD will save the recording to the
disk. The file format for saving is .TS (MPEG-2 transport stream)
You can start the recording instantly
by pressing the recording button on the remote control
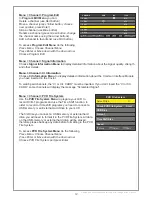
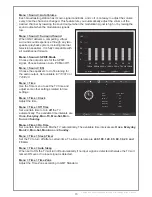
Menu > Channel > PVR File System
Select Disk: Choose the disk you want to use
Check PVR File System: Choose to check the disk status and
compatibility
USB Disk: It provides information if the disk is status
Format: Choose to format the disk. Two formatting standards
are available, FAT32 and Hi Speed FS. You can also choose
the PVR File System Size you want to format. After formatting
the LCD will report the estimated recording time for the
formatted disk both for Standard Definition and High Definition
recording and let you choose the Time Shift Size (see
Time Shift Function
for more information)
PVR File System
Select Disk
Check PVR File System
USB Disk
Time Shift Size
Exit
EXIT
Move
Format
C:
Success
Pass
Speed
Pass
1 GB
3432 KB/s
HD Support
Select
OK
Prev.
Next
Stop
FB
Play
FF
Pause
Max Recording Time: [0001:51:40]
Recording Time: [0000:25:10]
005 Channel Name
SIZE
Idol
60 Minutes
Recorded List
Select
OK
Record List
Name
Info
INFO
Delete
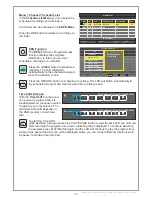
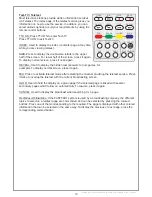
Menu > Channel > Recorded Mode
Use the
Recorded Mode Menu
to schedule recordings. In the
Recorded Mode Menu you can choose the following
Channel to Record
Recording Mode: Once, daily, weekly, auto
Time to start the recording
Time to end the recording
All scheduled recordings will be listed in the recording list.
Note: You can turn off the LCD after scheduling the recordings.
The LCD will execute the recording schedule while it is off.
While recording the LCD’s LED (power indicator) will flash.
BBC
Once
10 Dec 10:27
Select
OK
Recorded Mode
Mode
Start Time
Minute
Hour
Date
Month
Minute
Hour
Date
Month
End Time
00
21
12
Dec
05
22
12
Dec
Move
Back
MENU
13


