background image

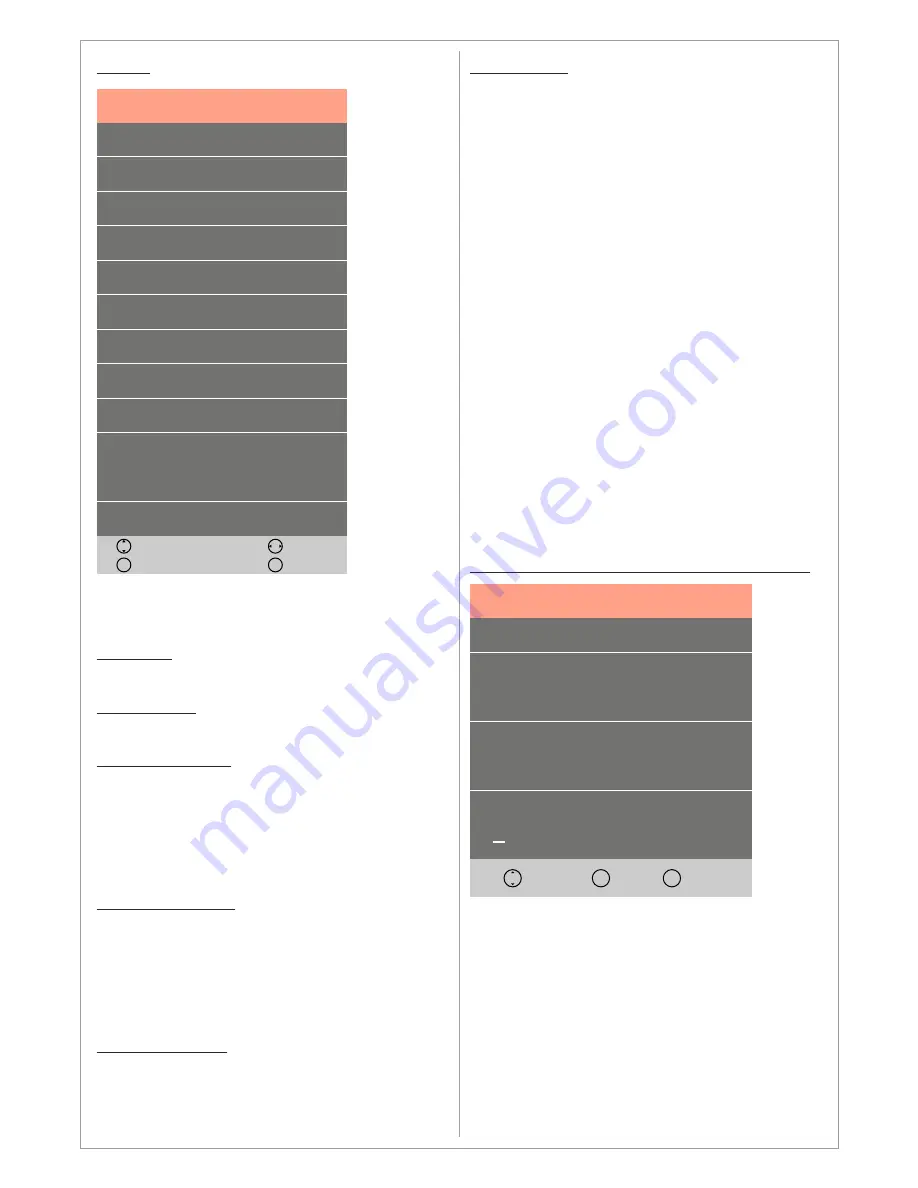
SETUP

In this Menu you can choose the setup settings 
for the TV.

Language

Choose the OSD language

TT Language

Choose the language for TeleTEXT

Audio Languages

Choose the default first and second audio 
languages for DTV channels when more than 
one language is available in the broadcasted 
channel. The default language is English if the 
broadcast does not included the preferred 
chosen language

Subtitle Language

Choose the default first and second subtitle 
languages for DTV channels when more than 
one subtitle language is available in the 
broadcasted channel. The default language is 
English if the broadcast does not included the 
preferred chosen language

Hearing Impaired

The hearing impaired function will display 
additional subtitles customized subtitle for 
hearing impaired persons when it is activated.

Aspect Ratio

Set the various picture options such as picture 
size and aspect ratio.

Depending on the input source, the picture size 
options may vary.
Your cable box/satellite receiver may have its 
own set of screen sizes as well. However, we 
highly recommend you use 16:9 when using 
cable boxes and PointToPoint / Just Scan mode 
when using the TV as a monitor.

Auto

Automatically adjusts the picture size to the 
broadcasted signal

Zoom1&2

Magnifies the picture size.

4:3

Sets the picture to basic (4:3) mode.

Do not watch in 4:3 format for a long time. Traces 
of borders displayed on the left, right and center 
of the screen may cause image retention (screen 
burn) which are not covered by the warranty.

PointToPoint / Just Scan

Displays the full image without any cut-off when 
HDMI (720p / 1080i / 1080p / 2160p) signals. The 
PointToPoint mode will display a smoother 
picture while Just Scan mode will display crispier 
picture.

PVR File System (Personal Video Recording)

Use the 

PVR File System


Menu

 to prepare the 

TV to record DVB-T/T2/C/S/S2 programs and 
use the Time Shift function. In order to record or 
time shift programs you need to connect a USB-
memory or an Externa Hard Drive to the TV.

The first time you connect a  USB-memory or 
external hard drive you will need to format it in 
the PVR File System. All data on the USB-
memory or external hard drive will be erased, 
therefore please backup any data before 
formatting in the PVR File System.

Language

Setup

TT Language

Audio Language

Subtitle Language

Hearing Impaired

Aspect Ratio

First Time Installation

Reset

Software Update (USB)

HDMI CEC

Move

Back

MENU

Adjust

Exit

EXIT

>

>

>

>

>
>
>

>

>
>

>

>
>
>
>

English

West

Off

16:9

Off

PVR File System

Blue Screen

Select Disk

PVR File System

Check PVR File System

USB

Format

Timeshift Size

Start

Speed

>

>

Free Record Limit

+

6 Hr.

Back

MENU

Move

Ok

OK

11

Summary of Contents for SS-40K16

Page 1: ...User s Guide SS 40K16 SS 42K16 SS 50K16 SS 58K16 SS 65K16 SS 75K16 ...

Page 2: ...ignage Screens SWEDX Kiosk SWEDX Lamina SWEDX V SWEDX Soundbar SWEDX Matrix Video Walls SWEDX offers a wide range of LED TVs and digital signage products and its accessories For more information please visit www swedx com SWEDX Direct ...

Page 3: ... 9 Main Operations 10 Volume Control 10 OSD Menu Operations 10 OSD Menu Structure 10 Setup Menu 11 Channel Menu Satellite 12 Channel Menu DTV 16 Picture Menu 18 Sound Menu 19 Time Menu 20 Lock Menu 21 USB Media Player 22 Supported file formats and codecs 23 Text TV Teletext 24 Product base assembly 25 Wall mount assembly 26 Troubleshooting 27 Warranty and Service 28 How to get service 29 Limitatio...

Page 4: ...t device the disconnect device shall remain readily operable Battery shall not be exposed to excessive heat such as sunshine fire or the like Excessive sound pressure from earphones and headphone can cause hearing loss Please install the product at proper position such as wall or ceiling Please install it under the guidance of professional staff This device complies with Part 15 of the FCC Rules O...

Page 5: ...ations than those provided or suggested by the manufacturer If you have a wall mount check that it is steady Do not place any material on the product Do not block or cover the ventilation openings on the product The product must be plugged with a tension source of 110 240 volts and 50 60 Hz Power cord and cables must be properly routed and protected to prevent from stepping on them Keep the power ...

Page 6: ...3 Ver 1 4 Supports maximum resolution 3840x2160 30 Hz Supports MHL Mobile High definition Link 2 SAT Input for Satellite receiver DVB S S2 Supports Full HD channels 3 DTV ATV Input for digital analog TV channels Supports analog and DVB T T2 C 4 COMPONENT Input for Component YPBPR sources Supports maximum resolution 1080p 60 Hz Component YPBPR and AV shares the same audio input 5 AV Input for AV Au...

Page 7: ...itch between Infrared and 2 4 GHz mode press and hold the buttons for 5 seconds The Red LED will flash 3 times and switch from the current mode to the other one To pair the remote with the TV follow the steps below 1 Connect the product e g screen to power outlet 2 Make sure that the remote is in 2 4 GHz mode 3 Press and hold the buttons on the remote control simultaneously for about 5 seconds The...

Page 8: ... 21 Previous Title Display time in Teletext 22 Display Recorded List Hold Teletext 23 Mute the built in speakers 24 Available sources selection 25 Shortcut to DTV TV 26 Previous TV channel in DTV TV 27 Next channel When the channel list is displayed it scrolls down to next page in the list 28 Previous channel When the channel list is displayed it scrolls up to previous page in the list 29 Enter sl...

Page 9: ...e and country In the energy mode you can choose between Home and Dynamic mode The home mode will reduce the back light intensity in order to save energy while the Dynamic mode will increase the back light intensity to the maximum Language First Time Installation Country English Sweden Home Mode Auto Tuning OK Energy Mode 09 ...

Page 10: ... the main OSD menu OSD Menu Operation Main Menu Press MENU on the remote control to enter the main OSD menu First choose Main menu item you need with the buttons To select a Main menu items just press OK Sub Menu Each menu item has its own sub menu items to set Sub Menu items A If there is no value to adjust it means there is a sub menu which you can access by pressing OK and modify the menu value...

Page 11: ...re size to the broadcasted signal Zoom1 2 Magnifies the picture size 4 3 Sets the picture to basic 4 3 mode Do not watch in 4 3 format for a long time Traces of borders displayed on the left right and center of the screen may cause image retention screen burn which are not covered by the warranty PointToPoint Just Scan Displays the full image without any cut off when HDMI 720p 1080i 1080p 2160p si...

Page 12: ...en will be displayed when no signal is received First Time Installation The function will activate the First Time Installation menu See the description of this function in the previous pages Reset This function will reset the TV to the default settings Software Update USB This function will update the TVs firmware by using the USB input Contact SWEDX to check if an update for the TV firmware is av...

Page 13: ...ocking You can also use the PVR function which allows to record or time shift TV programs The TV model of this product is equipped with the following tuners Analog TV Tuner supports Pal and Secam DVB T T2 supports MPEG 4 H 264 DVB C supports 16 32 64 128 and 256 QAM Supports H 264MP HP L4 1for SD and HD decoding DVB S S2 It is strongly recommended that you set the Dish Setup settings before perfor...

Page 14: ...such as DiSEq and motor To Add a new satellite press YELLOW button To Edit the highlighted satellite press GREEN Button To Delete a satellite press RED button To Scan one or several satellite highlight the satellite and press OK the icon will appear ahead of the chosen satellites Continue until you have marked all desired satellites Press BLUE button to start scanning the chosen satellites When ed...

Page 15: ...ording time and channel number and name When you stop the recording the LED will save the recording to the disk The file format for saving is TS You can start the recording instantly by pressing the recording button on the remote control Recorded List Use the Recorded Start List Menu to display a list of the recorded programs Pressing the RED button will delete the recorded program Pressing OK but...

Page 16: ... and or DTV If you care searching DVB C channels and it is necessary to input the search parameters please input it in the relevant section Regardless which kind of searching you do the found channels will be saved in the correspondent channel lists DTV and ATV Antenna CHANNEL Auto Tuning ATV Manual Tuning DTV Manual Tuning Programme Edit Schedule List Recorded List DTV Move Back MENU Adjust Exit ...

Page 17: ...ual Tuning You can perform a manual channel search for digital channels DTV You will need to provide the information about Channel Frequency and Bandwidth in AIR mode or Frequency SymbolRate and Modulation QAM In CABLE mode For Schedule List and Recorded List see previous pages ATV Manual Tuning Colour System Sound System Fine Tune AFC Current CH PAL BG Unregistered On Search 1 Back MENU Adjust Mo...

Page 18: ...cture Use the Picture menu to adjust the picture settings to meet your requirements Picture mode Standard Suitable for a normal room Mild Suitable for a dark room Personal In Personal mode you can adjust the Contrast Brightness Color Sharpness and Tint to meet your own requirements Dynamic Suitable for a bright room Color Temperature Choose between predefined settings Normal Warm Cold Noise Reduct...

Page 19: ...matically adjust the volume of the desired channel by lowering the sound output when the modulation signal is high or by raising the sound output when the modulation signal is low Surround Sound In TrueSurround or SRS TrueSurrond mode the TV delivers a compelling virtual surround sound experience through the internal television speakers It is fully compatible with all multichannel formats SPDIF Mo...

Page 20: ... turns on Volume Audio volume level when the TV turns on Time Use the Time menu to set the TV time and adjust some other settings related to time settings Clock Set or adjust the time Time Zone Adjust the Time Zone according to GMT Standard Clock Time Time Zone Off Time On Time Sleep Timer Auto Standby OSD Timer Move Back MENU Adjust Exit EXIT London GMT Off 4 H 35S Date Clock Month Year Hour Minu...

Page 21: ...For this function it is required that the information about Parental Guidance is embedded in the broadcasted programme You can also change the default password to a personal one PIN The password must be 4 digits 0 9 Hotel Mode In Hotel Mode it is possible to define features suitable for using the TV in hotel environment When the Hotel Mode is activated you can choose to Lock certain sources Set a ...

Page 22: ...s and images Music Enables you to play several formats of music and audio files Movie Enables you to play several formats of movies and video files Text Enables you to display TXT files Remote Control Keys used in USB Mode The INFO button will display available controllers where it is possible to i e rotate an image The controllers may vary depending on the USB mode Navigation Key to navigate in t...

Page 23: ...920x1080 MP4 MPEG 2 MPEG 4 H 264 Xvid MJPEG MPEG4 TS MPEG 1 MPEG 2 H 264 VC 1 TRP MPG MPEG 1 MPEG 2 MPEG NOV MPEG4 H 264 MJPEG MKV MPEG 2 4 H 264 Xvid RV30 40 VC 1 VOB MPEG2 AAC COOK DAT MPEG1 Mp1 RM RV30 40 MP1 2 3 PCM RV30 800x600 RMVB RV40 1280x720 Images Format Max resolution BMP 1920x1080 JPG PNG Music MP3 Mp3 32K 48KHz Bit Rate 32K 320Kbps Channel Mono Stereo WAV PCM 32K 48KHz Bit Rate 32K 3...

Page 24: ...ames for example To display normal screen press it again MIX Press to activate teletext mode after selecting the channel providing the teletext service Press it twice to overlap the teletext with the current broadcasting screen HOLD Used to hold the display on a given page if the selected page is linked with several secondary pages which follow on automatically To resume press it again CANCEL Used...

Page 25: ...e contains the following parts A Wooden base B Metal part C M6 screw 4 pcs 10mm Part No 064 0178 00 D M6 screw 4 pcs 16mm Part No 064 0147 00 Assemble the base with the LED TV according to the following illustrations A B C D D C D B A C 25 ...

Page 26: ...nt devices which can be purchased from your dealer or www swedx com See the Wall mounting parameters in the illustrations 40 42 inch 50 inch 200 mm 200 mm 200 mm 400 mm 65 inch 400 mm 400 mm 58 inch 300 mm 400 mm 400 mm 400 mm 26 75 inch 400 mm 600 mm ...

Page 27: ... distorted sound l Check the direction location and connections of your aerial l This interference is often due to the use of an indoor aerial Remote control malfunctions l Ensure that the remote is in correct mode l Replace the remote control batteries l Clean the upper edge of the remote control transmission window l Check the battery terminals l Turn off the TV and unplug the AC cable from the ...

Page 28: ...ulting from A Accident misuse neglect fire water lightning or other acts of nature unauthorized product modification or failure to follow instructions supplied with the product B Repair or attempted repair by anyone not authorized by SWEDX C Any damage of the product due to shipment D Removal or installation of the product E Causes external to the product such as electric power fluctuations or fai...

Page 29: ...trictions apply and these programs are subject to change without prior notice Limitation of liability If your SWEDX product fails to work as warranted above your sole and exclusive remedy shall be repaired or replaced SWEDX s maximum liability under this limited warranty is expressly limited to the lesser of the price you have paid for the product or the cost of repairing or replacement of any har...

Page 30: ...www swedx com ...

Reviews: