Installation
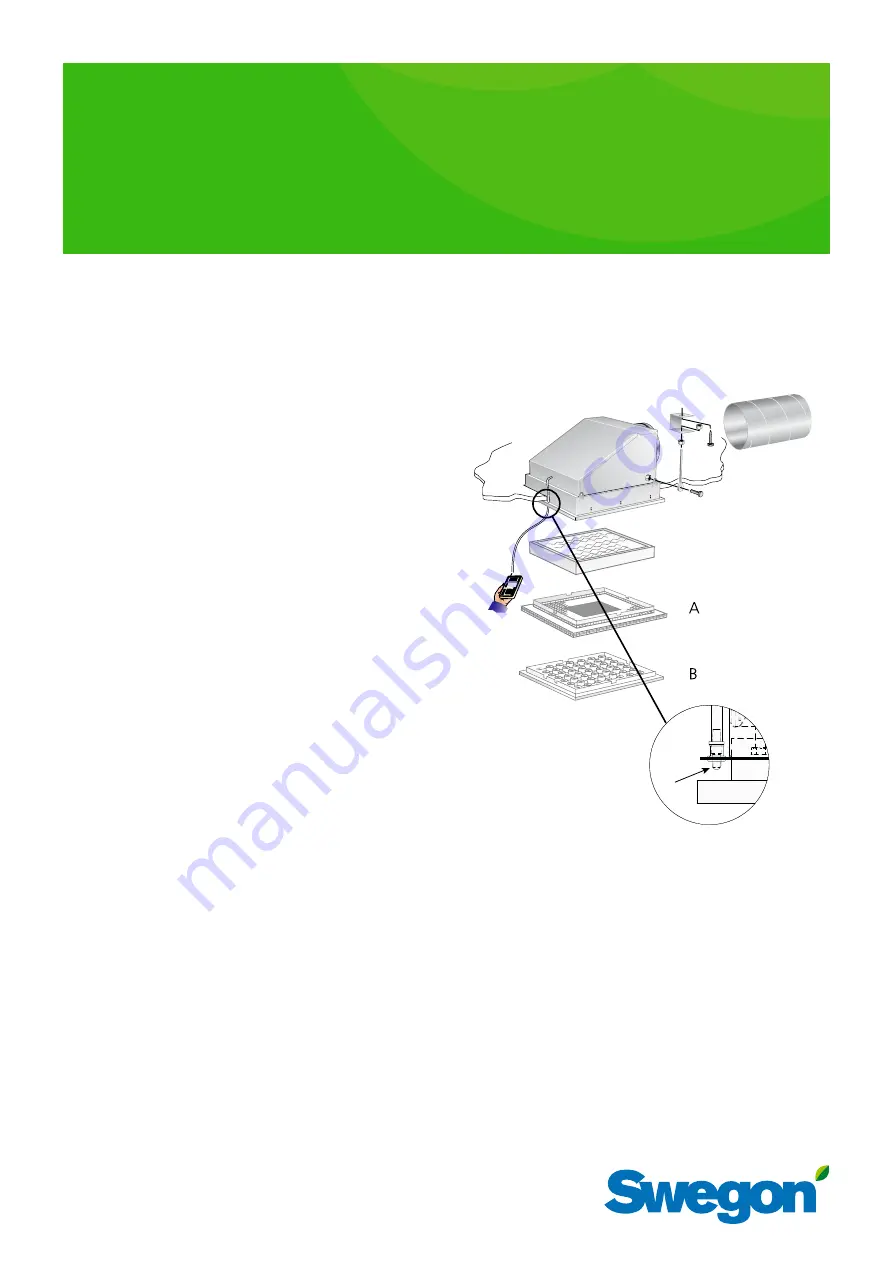
• There are four hanging eyes for suspended installation.
Figure 1, 4 & 6
- Installation fittings/hanger rods are not included.
- It’s important that all four hanger brackets are on the
same horizontal plane (±1.0 mm) to ensure that the filter
fits tightly. See figure 1.
• The rectangular duct connection has a flange design. See
Figure 5.
• The circular connection has a insertion design. See Figure 4.
• Avoid leakage to/from area above the suspended ceiling:
- Seal all joints between the air diffusers and ceiling system
to prevent air in or out from/to the area above the suspen-
ded ceilin
- Duct connections to CDH/CLH must be sealed, check for
leakage.
- Grid system 600x600. Important to mount the diffuser
backing box’s flange under the grid section. Important to
ensure the tightness between the air diffuser and ceiling
system too, see figures on page 2.
Commissioning
The product lacks a commissioning damper. It is recommended
that the ducts before the diffuser are provided with some sort
of commissioning.
Filter
• Recommended final pressure drop depends on the type of
filter and activity.
• Final pressure drop of max 600 Pa or double the initial pres-
sure drop is recommended.
• The pressure drop across the filter is measured in the mea-
surement tapping on the diffuser backing box flange and is
measured in relation to atmospheric pressure, see Figure 1.
• It is necessary to first remove the diffuser plate to access the
measurement tapping.
• There is a test protocol in the filter packaging as well as pro-
duct labels from the filter supplier.
Changing the filter
• Maintenance and care of filters, see page 4.
• Loosen the diffuser plate by carefully pulling it down to
release it from its spring brackets.
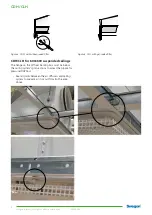
• Filter replacement CDH rubber sealed filter:
- Remove 4 M8x40 bolts from the U-beams that hold the
filter against the air diffuser backing box, see figure 2.
Install a new filter as described above but in the reverse
order.
• Use a torque wrench to tighten the bolts with a torque of 4 Nm.
• Filter replacement CLH gel sealed filter:
- Press in the springs that hold the filter in position, see
figure 3. To install a new filter, carefully press the filter into
position until the springs firmly grip the filter.
• NOTE! Max. temperature 70 °C in continuous operation.
Figure 1. Mounting.
A = Perforated diffuser plate.
B = Diffuser plate with nozzles
C = Measurement tapping for DOP test
*)
and pressure
measurement across the filter.
*)
Test of leakage on the product and check of the filter’s particle separa-
tion
efficiency with DOP testing.
C
DOP-testing
For DOP-testing, use the spigot hidden behind the diffusers
front face.
Maintenance
The diffuser should be cleaned when necessary or routinely
using either lukewarm water with detergent added or alcohol.
CDH
b
/CLH
b
Installation – Commissioning – Maintenance
20200626


