1
DOMO
TM
c
Installation - Commissioning - Maintenance
20150715 / Art. 1545178
Installation
Remove the diffuser face and set the required diffusion pattern.
Note that the transparent air deflector has a slightly wedge-sha-
ped cross section. Install the deflector so that its thinner edge is
positioned towards the bottom of the air diffuser. Press the air
diffuser to secure it to the duct or joint. It will then be held in
place by its built-in spring clips. If required, the air diffuser can
be secured by screws to the duct or to the wall/ceiling. Ultima-
tely, refit the front. See Figures 2 to 5.
NOTE! Never apply any pressure to the diffuser face (cover).
Commissioning
Commissioning must be carried out after the diffuser has been
mounted and completely assembled. Remove the diffuser face
and connect the measurement hose to the measurement tap-
ping and to a manometer. Then refit the diffuser face. The air
flow can be determined using the C-factor of the air diffuser. If
necessary, break off one or more rings from the commissioning
plate to increase the air flow. See table 1. K-factors are specified
on the product’s identification label and in this document.
Maintenance
The air diffuser can be cleaned, if necessary, using lukewarm
water with dishwashing detergent added. The duct system can
be access ed after removing the diffuser face and the commis-
sioning plate.
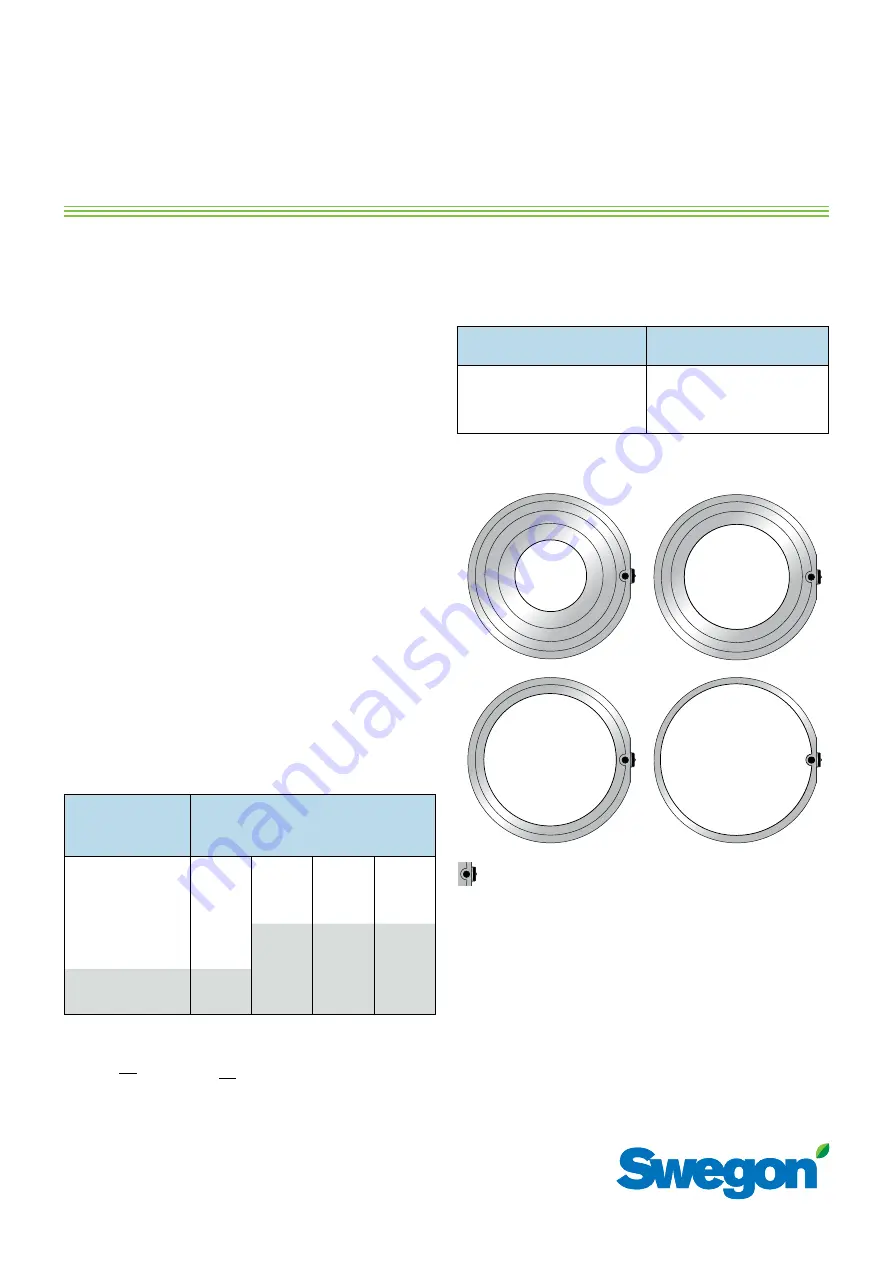
Figure 1. Separable commissioning plate. R1-4 illustrates the dif-
ferent commissioning options with measuring socket positioned
at 3 o’clock.
Calculating airflow using K-factor:
q = k •
√
p
i
[l/s] p
i
=
(
q
)
2
[Pa]
q = flow reading (l/s)
p
i
= current pressure reading (Pa)
k = commissioning factor
k
Table 1 – Commissioning quick guide
White fields indicate sound levels lower than 30 dB(A).
K indicates K-factor (COP).
Pressure in
measuring tube (Pa)
Air flow (l/s)
R1
K = 1,3
R2
K = 2,3
R3
K = 3,3
R4
K = 3,9
10
4
7
10
12
20
6
10
15
17
30
7
13
18
21
40
8
15
21
25
50
9
16
23
25
60
10
18
26
30
70
11
19
28
33
= measuring socket
R1
R2
R3
R4
Table 2 – Duct connection alternatives
Placement of the measuring socket depending on duct connec-
tion alternatives.
Duct connection
Positioning of the
measuring socket
straight connection
3 or 9 o’clock
90° bend, connection up/down
3 or 9 o’clock
90° bend, connection left/right
6 or 12 o’clock


