21
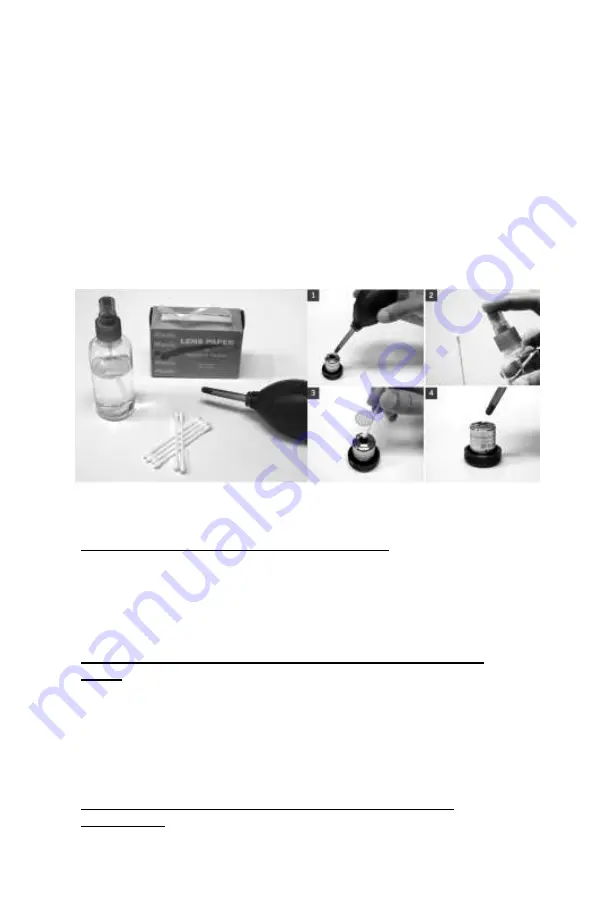
In order to make things easier and safer, screw the objective onto
one of the objective cases supplied with microscope. By doing it
this way, the objective will be in a stable position avoiding
possible falls.
(1)
Proceed by cleaning it using pressurized dry air - or an air
gun if available
– and, if after this is done we still observe spots of
dust or dirt,
(2)
Clean with a cotton swab dampened with a low
graduation of alcohol 70% or with a mixture of alcohol and ether
(ratio alcohol: 3 to ether: 7).
(3)
With a spiral movement (starting
from the center of the lens) we will then clean the surface of the
lens.
(4)
Dry its surface by using pressurized dry air and check
that the lens is clean either with the help of a magnifying glass or
by screwing the lens back on the revolving nosepiece of the
microscope.
For objectives that work with immersion oil
it is essential to
clean them after each observation session. To clean use a
cleaning cloth for lenses slightly dampened with a low graduation
of alcohol. Proceed by cleaning the frontal objective lens
(normally 100X-Oil). It is important for those objectives that work
at a very close distance to the sample.
For optical components such as eyepieces, condensers,
filters
, etc. we recommend using the same cleaning method. First
cleaning it with pressurized dry air, then cleaning it with a cotton
swab or a cleaning cloth for lenses (slightly moistened with a low
graduation of alcohol) and finally drying it with pressurized dry air.
Once the cleaning process is finalized if the image is still not
clear, you can either contact us or you can contact your Swift
Optical supplier.
For users that have a digital camera mounted on the
microscope
and whom observe dirt on the digital image, it is
important that the first step is to proceed with objectives
maintenance, as explained above. If the dirt persist, it must be


