

3
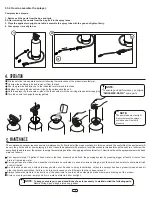
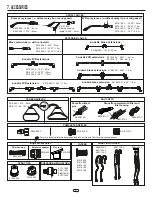
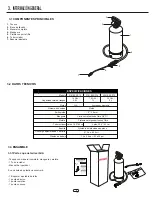
Compression sprayers:
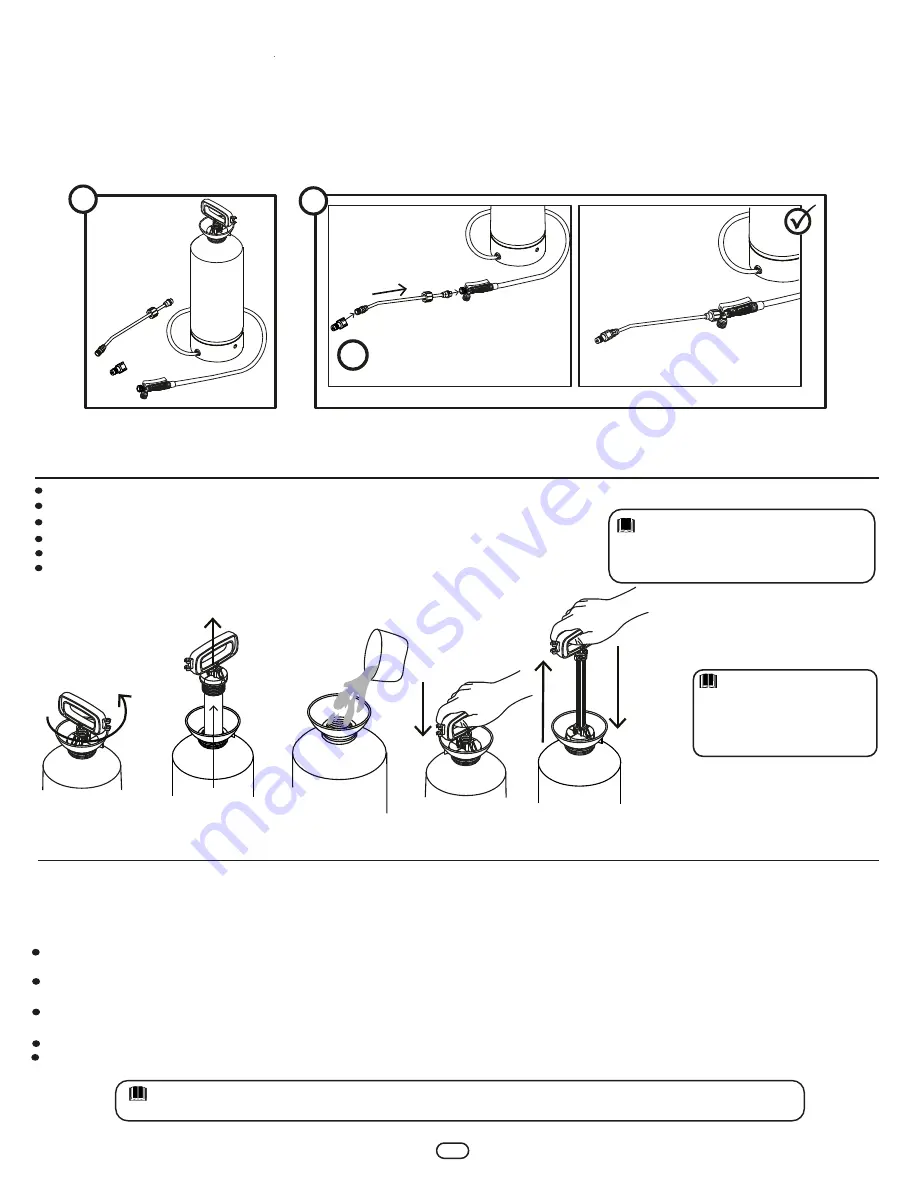
1. Remove all the parts from the box and tank.
2. After removing the nozzle from the bag fix it in the spray lance.
3. Place the applicator upright on a table, assemble the spray tube with the gun and tighten firmly.
4. Your sprayer is ready to use.
3.3.2 How to assemble the sprayer:
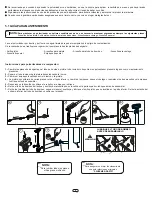
MAINTENANCE
5.
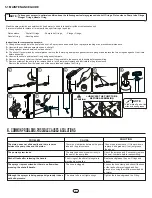
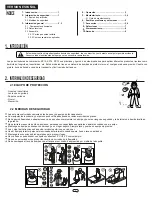
The compression sprayer requires minimum maintenance. Follow in detail the steps mentioned in this manual and the useful life of the equipment will
be very long. At the end of your spraying job, don’t leave the applicator with pressure, let all the pressure release through the nozzle, or unscrew the
pump handle and turn over the sprayer to empty the remaining solution in an appropriate container for it. Now rinse the entire sprayer system with fresh
water, as follows:
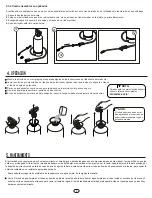
OPERATION
4.
Mix the solution in a separate container following the instructions of the product manufacturer.
Unscrew the pumping tube and remove it from the tank.
Pour the pre-mixed solution up to the indicated level marked in the tank.
Replace the pump tube and screw it tightly, then pressurize the unit.
Hold the sprayer by the handle or place it on the shoulder with the carrying strap and start applying.
Turn the nozzle to change the spray pattern.
The pump tube must be tight
firmly otherwise the sprayer
will leak and will not hold
pressure.
NOTE:
1
2
3
NOTE:
To ensure good performance use original
“SWISSMEX-RAPID”
spare parts
Pour approximately 1/2 gallon of fresh water in the tank, pressurize and flush, the pumping system by pressing trigger at least 2 minutes, then
drain all remaining water.
Carrying straps are made of non-absorbent materials, nevertheless in case of solution spillage, wash them with fresh water to eliminate all risk
of skin irritation.
A unit that has been used with herbicides should never be used to spray insecticides, unless the sprayer has been properly cleaned and all
other chemicals neutralized. Failure to do this could cause you to kill plants that have been sprayed.
Always follow manufacturer’s instructions of the chemicals in use to avoid accidents and take maximum advantage of the product.
Store your sprayer clean, empty and dry in a place protected from sunlight.
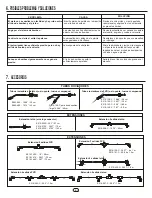
To keep your sprayer in good conditions of use is necessary to maintain oiled the following parts:
Nozzle O-rings, gun o-rings, piston ring, gasket.
NOTE:


