3
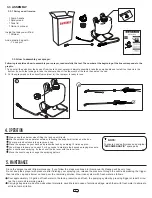
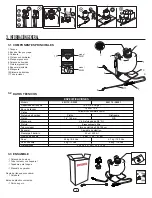
3.3 ASSEMBLY
- 1 Owner’s manual
Inside the tank you will find:
- 1 Strainer
And a plastic bag with:
- 1 Lock pin
- 1 Pump handle
- 1 Spray wand
- 1 Tank lid
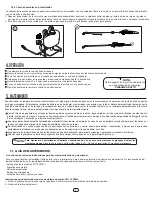
Always use the strainer when filling the tank up with liquid.
Mix the solution in a separate container, following the supplier directions on the box.
Pour pre-mixed solution into sprayer and cap.
Place the sprayer on your back and pressurize tank by pumping 12 times approx.
You will need to pump once each 3 or 4 seconds to maintain the desired spraying pressure.
For a continuous spraying, fix the shut-off valve lever with the lever lock.
Move the nozzle cap to change the spraying pattern.
NOTE:
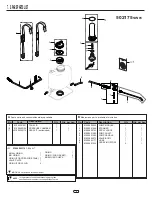
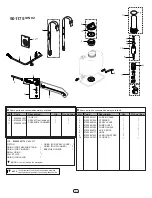
To ensure good performance use original
“SWISSMEX-RAPID”
spare parts
OPERATION
4.
3.3.2 How to assemble your sprayer:
3.3.1
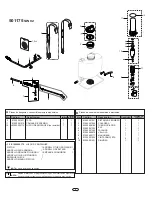
Parts you will receive:
1. Take out all the parts from the box and from the tank, your sprayer is almost assembled, take the pump handle and install it on the axis in the
bottom, fix it with the locking pin; take the strainer and put it on the mouth of the tank, then put on the cap.
2. Put the spray wand on the shut-off valve (srew in). Your sprayer is ready for use.
Following is explained how to assemble your sprayer, read carefully the text. The number at the beginning of the line corresponds to the
graphic.
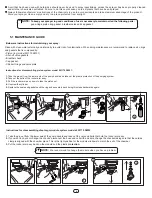
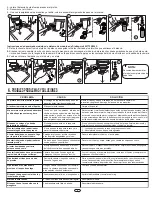
Pour approximately 1/2 gallon of fresh water in the tank, pressurize and flush, the pumping system by pressing trigger at least 2 minu-
tes, then drain all remaining water.
Carrying straps are made of non-absorbent materials, nevertheless in case of solution spillage, wash them with fresh water to eliminate
all risk of skin irritation.
MAINTENANCE
5.
Since the sprayer needs little maintenance, if you follow the steps mentioned in this manual its lifespan will be very long.
Do not keep the sprayer with pressure after finishing your spraying job, release the pressure through the nozzle depressing the trigger,
then take the cap and strainer out and pour the remaining solution. Now rinse system with fresh water as follows:
1
2


