background image

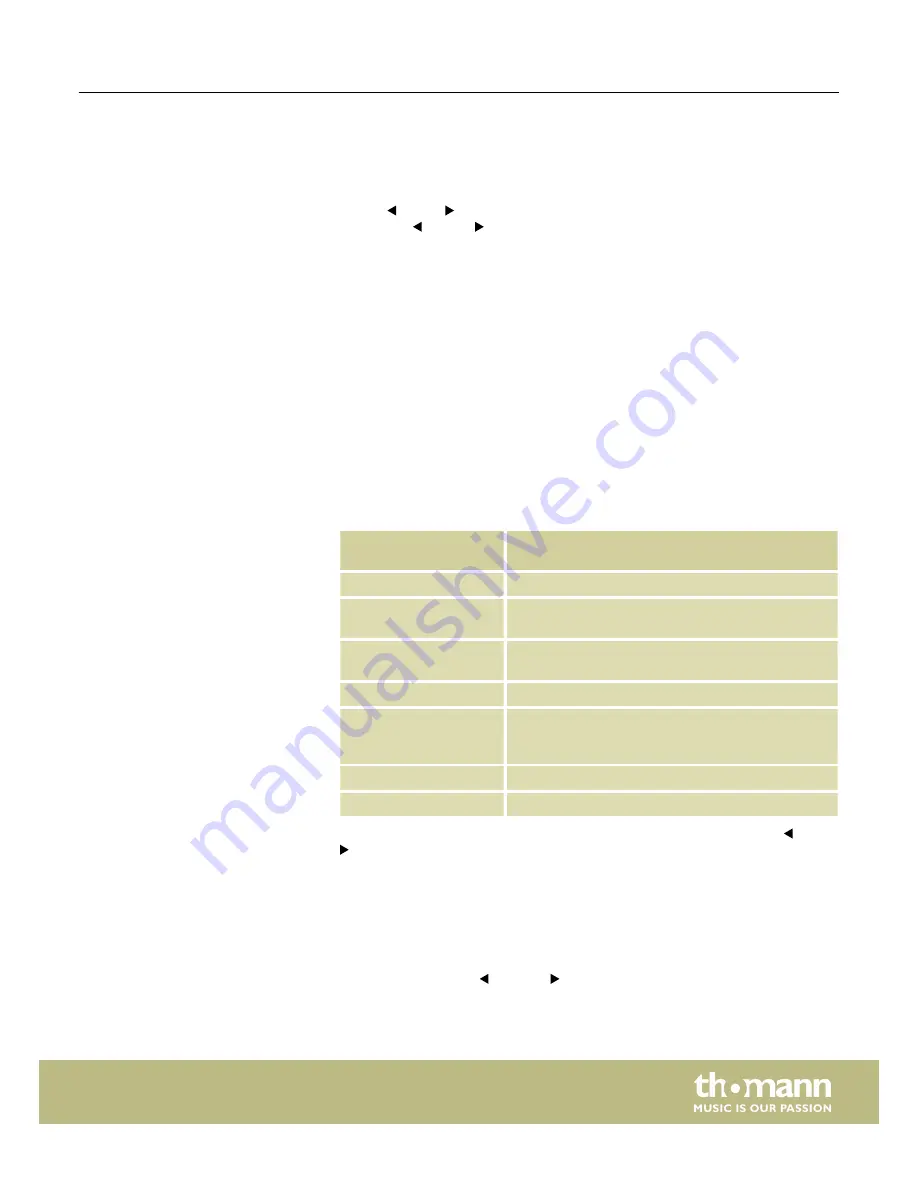
In this mode, you can adjust various keyboard parameters. Press 

[MENU]

 to activate

the Setup mode. In setup mode, no MIDI data will be transmitted. The following

parameters can be user-specifically adapted:

n

‘CONTROL ASSIGN’

: Operate the desired element (rotary encoder, fader, button),

use   

[PAGE ]

   to switch between the available parameters (see following table)

and use   

[VALUE]

   to adapt the values). Any change must be confirmed with

[ENTER]

 . Unconfirmed changes will be discarded upon activation of another con‐

trol.

n

‘SCENE SAVE TO’

: Saving current scene to a certain memory location.

n

‘KBD VELOCITY’

: Setting the touch sensitivity of the piano keyboard.

n

‘KBD AFTERTOUCH’

: Enabling / disabling the Aftertouch function.

n

‘MIDI ROUTE’

: Enabling / disabling sending MIDI messages from the keyboard to

a connected MIDI device.

n

‘PAD ROLL TEMPO’

: Speed of the keyboard's internal MIDI clock in BPM (beats per

minute).

n

‘PAD ROLL DIVIDER’

: Setting the note value of the Pad-Roll function. The speed of

the pad-roll function depends on the note value selected here and the speed of

the MIDI Clock.

n

‘MIDI CLOCK’

: Determines whether the internal MIDI clock of the keyboard or the

external MIDI clock of a computer (DAW) sets the pace for the pad-roll function.

n

‘RESET’

: Reset of all parameters to factory default settings.

Setting parameter

‘CONTROL ASSIGN’

Definition

CC

Controller number.

MODE

Toggle, the first keystroke sends note on (CC 127), the

second sends note off (CC 0).

M

Momentary, note on (CC 127) is sent when the button

is pressed, note off is sent on release (CC 0).

CH

Channel number.

PORT

Two ports are assigned to each control. This parameter

specifies to which port the element sends the com‐

mand.

MAX

Highest value.

MIN

Lowest value.

All settings are assigned to the currently active bank. If desired, you can use   

[BANK]

 to switch to another memory bank.

The assignment of the controls and functions varies depending on the DAW soft‐

ware.
To confirm your selection and exit setup mode, press 

[ENTER]

. With 

[EXIT]

 you exit the

menu without changes.

With the arrow buttons   

[OCTAVE]

   you can transpose the pitch of the entire key‐

board up to three octaves downwards and four octaves upwards. The display shows

the selected step (

‘–3’

‘0’

‘4’

).

Operating mode ‘Setup’

Octave transposing

Functions


ControlKey 49, ControlKey 61, ControlKey 88

15

Summary of Contents for ControlKey 49

Page 1: ...ControlKey 49 ControlKey 61 ControlKey 88 MIDI keyboard user manual ...

Page 2: ...Musikhaus Thomann Thomann GmbH Hans Thomann Straße 1 96138 Burgebrach Germany Telephone 49 0 9546 9223 0 E mail info thomann de Internet www thomann de 10 12 2015 ID 337456 337460 337462 ...

Page 3: ...instructions 6 3 Features 7 4 Installation and starting up 8 5 Connections and operating elements 9 6 Functions 14 7 MIDI routing 19 8 Factory defaults 23 9 Other presets 25 10 Note values 26 11 Technical specifications 27 12 Troubleshooting 28 13 Protecting the environment 29 Table of contents ControlKey 49 ControlKey 61 ControlKey 88 3 ...

Page 4: ...al is also available as PDF file for you to download Keyword search Use the search function in the electronic version to find the topics of interest for you quickly Online guides Our online guides provide detailed information on technical basics and terms Personal consultation For personal consultation please contact our technical hotline Service If you have any problems with the device the custom...

Page 5: ...ross references on page 5 1 3 Symbols and signal words In this section you will find an overview of the meaning of symbols and signal words that are used in this manual Signal word Meaning DANGER This combination of symbol and signal word indicates an immediate dangerous situation that will result in death or serious injury if it is not avoided NOTICE This combination of symbol and signal word ind...

Page 6: ...ren Choking hazard Ensure that children do not detach any small parts e g knobs or the like from the unit They could swallow the pieces and choke Never let children unattended use electrical devices NOTICE Operating conditions This device has been designed for indoor use only To prevent damage never expose the device to any liquid or moisture Avoid direct sunlight heavy dirt and strong vibrations ...

Page 7: ...t rotary encoders n eight mute and solo buttons n nine faders n Menu and transport buttons n Octave transpose function n 30 memory locations for scenes n backlit LCD n Connectors for Sustain and Expression pedal n 5 pin MIDI output USB output n MAC and Windows compatible n Power supply via 9 V mains adapter or USB cable Features ControlKey 49 ControlKey 61 ControlKey 88 7 ...

Page 8: ...n Expression pedal to the device pedals are not included Turn on the device using the main switch on the rear panel Start the DAW installed on your computer and adjust the software and MIDI settings System requirements n Windows XP Vista 7 mind 800 MHz 256 MB RAM min n Mac OS X V 10 4 9 and higher mind 733 MHz mind 512 MB RAM To operate the device with any MIDI device such as a sound module you ne...

Page 9: ...5 Connections and operating elements Model overview Connections and operating elements ControlKey 49 ControlKey 61 ControlKey 88 9 ...

Page 10: ...Function select buttons see Ä Function select buttons 5 on page 11 6 E1 E8 Rotary encoder 7 S1 S8 Fader with LED chain display 8 A1 B1 A8 B8 Mute solo buttons 9 TRACK Button for the simultaneous shifting of all encoders and faders 10 MASTER Master fader 11 P1 P8 P16 Programmable trigger pads Top view Connections and operating elements MIDI keyboard 10 ...

Page 11: ...een the parameters and functions available all modes 17 PATCH Buttons to send programme change commands 18 VALUE Buttons to adjust select values options in Edit and Scene mode 19 CHANNEL Buttons to switch between the available channels 20 EXIT Button to exit the open menu or menu function 21 ENTER Button to confirm parameter changes Function select buttons 5 Connections and operating elements Cont...

Page 12: ...en the mode is active 26 HOLD Button to activate the Hold mode of the trigger pads The button lights up when the mode is active 27 ROLL Button to activate the Roll mode of the trigger pads The button lights up when the mode is active 28 A TOUCH Button to disable the Aftertouch function of the trigger pads The button lights up when the function is deactivated 29 MODE Button to toggle between the tr...

Page 13: ...he pedal is either completely open or completely closed In this way you establish the maximum volume position Always start by connecting the pedal Then turn on the keyboard and then start up the software 32 SUSTAIN Socket for connecting a Sustain pedal 33 USB Use the included USB cable to connect the USB port on the rear panel of the MIDI keyboard to the USB port of a com puter Besides the data tr...

Page 14: ...hannel n Use the MASTER fader to control the overall volume n With the rotary encoders E1 E8 you can control the Pan setting of the assigned channel n With the function buttons A1 A8 you can solo the assigned channel except for Logic A1 A8 record enabled n With the function buttons B1 B8 you can mute the assigned channel n With BANK and CHANNEL you can change the channel assignment in the soft war...

Page 15: ...ed of the MIDI Clock n MIDI CLOCK Determines whether the internal MIDI clock of the keyboard or the external MIDI clock of a computer DAW sets the pace for the pad roll function n RESET Reset of all parameters to factory default settings Setting parameter CONTROL ASSIGN Definition CC Controller number MODE Toggle the first keystroke sends note on CC 127 the second sends note off CC 0 M Momentary n...

Page 16: ...ton light on or enable button light off With VEL CURVE you can adjust the touch sensitivity of all trigger pads in four levels soft hard fixed normal With 8 LEVELS you can set the touch sensitivity of all trigger pads to a fixed value 16 32 48 64 80 96 112 and 127 The button lights up when the mode is active With FULL LEVEL you set the touch sensitivity of all trigger pads to the maximum value 127...

Page 17: ...rs send With the function buttons TRACK the active channels are being shifted to the left or right with each keystroke In Toggle mode T you can use these function buttons to trigger an ON command 127 that is being cancelled with an OFF command 0 by pressing this button again In Momentary mode M you can use these function buttons to trigger an ON com mand 127 that is being cancelled with an OFF com...

Page 18: ...d simultaneously to activate the Panic function The Panic command is transmitted to all ports via all channels and resets all notes and controls The display shows the mes sage PANIC The Panic function is not supported by all MIDI devices Panic function Functions MIDI keyboard 18 ...

Page 19: ...Controller 2 Breath control Controller 24 Undefined Controller 3 Undefined Controller 25 Undefined Controller 4 Foot controller Controller 26 Undefined Controller 5 Portamento time Controller 27 Undefined Controller 6 Data Entry Controller 28 Undefined Controller 7 Channel Volume Controller 29 Undefined Controller 8 Balance Controller 30 Undefined Controller 9 Undefined Controller 31 Undefined Con...

Page 20: ...ined Controller 57 Undefined Controller 87 Undefined Controller 58 Undefined Controller 88 Undefined Controller 59 Undefined Controller 89 Undefined Controller 60 Undefined Controller 90 Undefined Controller 61 Undefined Controller 91 Reverb Send Level Controller 62 Undefined Controller 92 Tremolo Depth Controller 63 Undefined Controller 93 Chorus Send Level Controller 64 Damper pedal Controller 9...

Page 21: ...hers 116 Undefined Controller 146 Song Select Song Others 117 Undefined Controller 147 Tune request Others 118 Undefined Controller 148 Start Others 119 Undefined Controller 149 Continue Others 120 All Sound Off Controller 150 Stop Others 121 Reset All Controllers Controller 151 System Reset Others 122 Local control on off Controller 152 Master Volume SysE 123 All notes off Controller 153 Master B...

Page 22: ...ion Type CC Description Type 164 RECORD EXIT MMC 168 CHASE MMC 165 RECORD PAUSE MMC 169 COMMAND ERROR RESET MMC 166 PAUSE MMC 170 MMC RESET MMC 167 EJECT MMC 171 Pitch Bend Pitch Bend MIDI routing MIDI keyboard 22 ...

Page 23: ...C 7 Volume Ch 3 S4 Slider CC 7 Volume Ch 4 S5 Slider CC 7 Volume Ch 5 S6 Slider CC 7 Volume Ch 6 S7 Slider CC 7 Volume Ch 7 S8 Slider CC 7 Volume Ch 8 S9 Slider CC 152 A1 Button CC 16 Ch C T A2 Button CC 17 Ch C T A3 Button CC 18 Ch C T A4 Button CC 19 Ch C T A5 Button CC 20 Ch C T A6 Button CC 21 Ch C T A7 Button CC 22 Ch C T A8 Button CC 23 Ch C T B1 Button CC 24 Ch C T B2 Button CC 25 Ch C T B3...

Page 24: ... Pedal Pedal CC 64 Sustain C M P1 BANK A Pad NOTE 36 Ch 10 N M P2 BANK A Pad NOTE 37 Ch 10 N M P3 BANK A Pad NOTE 38 Ch 10 N M P4 BANK A Pad NOTE 39 Ch 10 N M P5 BANK A Pad NOTE 40 Ch 10 N M P6 BANK A Pad NOTE 41 Ch 10 N M P7 BANK A Pad NOTE 42 Ch 10 N M P8 BANK A Pad NOTE 43 Ch 10 N M P1 BANK B Pad NOTE 52 Ch 10 N M P2 BANK B Pad NOTE 53 Ch 10 N M P3 BANK B Pad NOTE 54 Ch 10 N M P4 BANK B Pad NOT...

Page 25: ...9 Other presets Parameter Setting Value range Bank 1 1 2 Channel 1 1 9 Pad Bank A A B Scene PO1 P1 P30 Other presets ControlKey 49 ControlKey 61 ControlKey 88 25 ...

Page 26: ...3 34 35 2 36 37 38 39 40 41 42 43 44 45 46 47 3 48 49 50 51 52 53 54 55 56 57 58 59 4 60 61 62 63 64 65 66 67 68 69 70 71 5 72 73 74 75 76 77 78 79 80 81 82 83 6 84 85 86 87 88 89 90 91 92 93 94 95 7 96 97 98 99 100 101 102 103 104 105 106 107 8 108 109 110 111 112 113 114 115 116 117 118 119 9 120 121 122 123 124 125 126 127 Note values MIDI keyboard 26 ...

Page 27: ...ions 1 USB 1 MIDI OUT 2 PEDAL 1 4 jack Operating voltage supply via USB cable or DC 9 V power adapter Dimensions W H D 911 mm 87 mm 320 mm Weight 8 61 kg Keyboard 88 semi weighted keys and adjustable touch velocity Connections 1 USB 1 MIDI OUT 2 PEDAL 1 4 jack Operating voltage supply via USB cable or DC 9 V power adapter Dimensions W H D 1 283 mm 87 mm 320 mm Weight 11 76 kg Swissonic ControlKey ...

Page 28: ...el settings Check sequencer settings Correct settings if necessary and or establish connections cor rectly Expression pedal not reacting The device is designed exclusively for stereo pedals with the required control range of 0 10 kΩ Always start by connecting the pedal Then connect the key board and then start up the software If needed reset the keyboard using RESET ALL Continuous tone Toggle the ...

Page 29: ...w the notes and markings on the packaging This product is subject to the European Waste Electrical and Electronic Equipment Directive WEEE Do not dispose with your normal household waste Dispose of this device through an approved waste disposal firm or through your local waste facility When discarding the device comply with the rules and regulations that apply in your country If in doubt consult y...

Page 30: ...Notes MIDI keyboard 30 ...

Page 31: ......

Page 32: ...Musikhaus Thomann Hans Thomann Straße 1 96138 Burgebrach Germany www thomann de ...

Reviews: