Step 10)
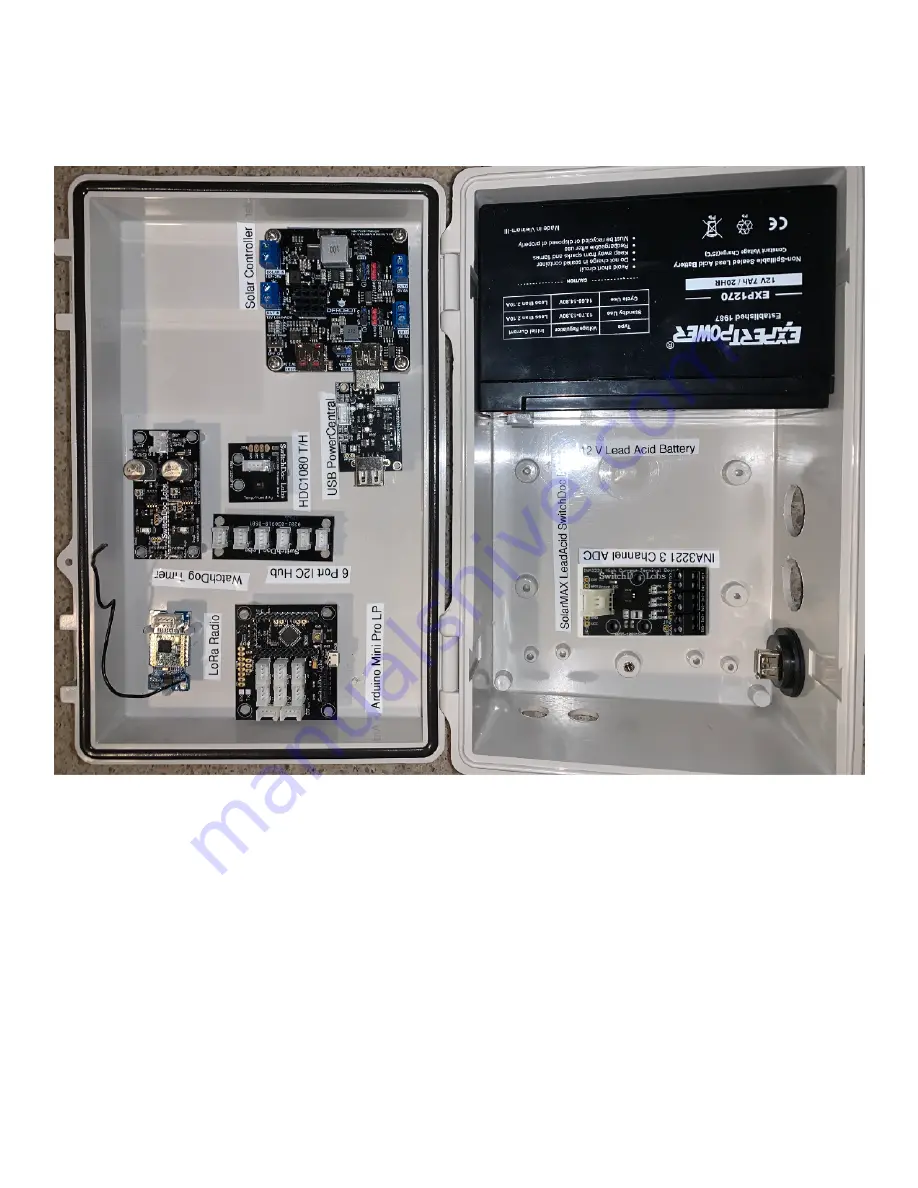
Using the super glue, attach all the boards to the locations shown in the two two part identification
pictures above. Let dry. The plug in the USB PowerCentral board (Part E) into the Solar Charger Board (Part
D). Note you won’t have the battery in the box yet. But it’s OK if you do.
Step 11)
Label all parts - optional - but you will be happy you did.
Step 12)
Using some Silicon Caulking, attach some door screen over the center and left 1” hole to keep the
bugs out of the box.
Now we move on to the wiring of the SolarMAX Lead Acid.
Page
12
Version 1.4 December 2019


