SWS Warning Lights Inc. – 7695 Blackburn Pkwy., Niagara Falls, ON, Canada
Tel: 1-877-357-0222 | Fax: 1-905-357-9122 | Email: sales@swssafety.com
300392_Rev1
3
|
P a g e
Dimming:
Magnetic Mount lights
do not
have the ability to dim.
The ORANGE wire allows for optional dimming. If you are not using the dimming feature, isolate and stow away
the orange wire.
To use the AutoDim feature, permanently connect the ORANGE wire to the BLACK (GROUND) wire. The
internal sensor will be activated and automatically adjust the light output when darkness is detected.
To manually dim the light, connect the ORANGE wire to the RED (POSITIVE) wire. This should be done via an
external switch.
Sync./Alt.
Magnetic Mount versions
do not
have the ability to sync./alt.
The BLUE and WHITE wires are used for the intelligent network to synchronize up to 16 lights. If the light is to
operate independently or if there is only one light present, these wires can be stowed away for future use if
desired.
Choose a master. The master light will control the operation (except power) and features (dimming, pattern
select etc.) of itself and all slaves in the network. To make the light a
master
, connect its WHITE wire with all
other WHITE wires of the lights to be in the network.
To make the light a
slave
, connect its WHITE wire with all other white wires and isolate and stow away its
GREEN and ORANGE wires as the light will take commands from the master light.
To make the slave light
synchronize
, connect its BLUE wire to the RED (POSITIVE) wire.
To make the slave light
alternate
, connect its BLUE wire to the BLACK (NEGATIVE) wire.
Features
Selectable Battery Monitor
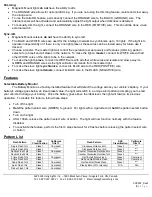
The Battery Monitor is a factory-installed feature that will detect the voltage across
your vehicle’s battery. If your
battery’s voltage goes below an ideal preset value, the light will switch to a unique alert pattern prompting you to start
your vehicle to charge your battery. Once the battery goes above the ideal level, the light will resume its previous
operation. To disable this feature, follow these steps:
Turn off the light
Hold
the pattern select wire (GREEN) to ground. For lights with a cigarette cord,
hold
the pattern select button
down.
Turn on the light
After 1 flash, release the pattern select wire or button. The light will now function normally with the feature
disabled.
To reactivate the feature, perform the first 4 steps but wait for 2 flashes before releasing the pattern select wire
or button.
Pattern List
Flash Pattern
SAE
Classification
California
Title 13
Flash Pattern
SAE
Classification
California
Title 13
Single Flash 1Hz
Class 1
Compliant
Clockwise Rotation 2Hz
Class 2
****
Single Flash 2Hz
Class 1
****
Clockwise Rotation 1HZ
Class 2
****
Double Flash 1Hz
Class 1
Compliant
Counter Clockwise Rotation 2Hz
Class 2
****
Double Flash 2Hz
Class 1
****
Counter Clockwise Rotation 1Hz
Class 2
****
Triple Flash 1Hz
Class 1
Compliant
Half & Half Single Flash
Class 1
Compliant
Triple Flash 2Hz
Class 1
****
Half and Half Double Flash
Class 1
Compliant
Quad Flash 1Hz
Class 1
Compliant
Half and Half Quad Flash
Class 1
****
Quint Flash 1Hz
Class 1
Compliant
Steady Burn (33% Intensity)
N/A
N/A
Flicker Flash 1Hz
Class 1
Compliant


