MODEL LST200 / DUAL EVENT DIGITAL WALL SWITCH TIMER
INSTALLATION & OPERATING INSTRUCTIONS
Introduction
The LST200 / can replace your regular or 3-way switch (where two
switches control the same device) to control a light or any device plugged into an
outlet with a load up to 15 Amps; the maximum rating on the timer label.
The LST200 / also has an exclusive manual On-Demand Delayed OFF
mode that enables the user to leave the room while the light is ON and the timer
automatically shuts the load OFF after a preset amount of time without interfering
with programmed AUTOMATIC times or controls.
The LST200 / timer can control incandescent lights, compact fluorescent
lights, fluorescent lights, flood lights, LED lights, fans and motors.
You will need to use a Decorator style wall plate with this timer which is not
supplied.
The timer must be mounted into a standard single or multi-ganged electrical box.
Read wiring instructions carefully and follow guidelines applicable to your
installation.
WARNING: TO BE INSTALLED AND/OR USED IN ACCORDANCE WITH
APPROPRIATE ELECTRICAL CODES AND REGULATIONS.
WARNING: IF YOU ARE UNSURE ABOUT ANY PART OF THESE
INSTRUCTIONS CONTACT A QUALIFIED ELECTRICIAN.
WARNING: TO AVOID FIRE, SHOCK OR DEATH; TURN OFF POWER AT
CIRCUIT BREAKER OR FUSE AND TEST THAT THE POWER IS OFF BEFORE
WIRING!
WARNING: DO NOT EXCEED THE 625 WATT INCANDESCENT RATING OF
THIS DEVICE.
CAUTION: USE THIS DEVICE WITH COPPER OR COPPER CLAD WIRE. WITH
ALUMINUM WIRE USE ONLY DEVICES MARKED CO/ALP OR CU/AL.
Installation Instructions
Single Switch or 3-way to replace an existing switch:
1.
TURN OFF POWER by REMOVING FUSE or turning the CIRCUIT
BREAKER OFF.
2.
Remove the existing wall switch.
Single Switch (Single Pole Installation):
3.
Connect the black building wire from the Main Power Panel to the black wire
from the timer, using the wire nuts provided. Connect the blue wire from the
timer to the black wire going to the load. Connect together the white wire from
the main power cable to the white wire from the timer and the white wire to
the load.
THE RED WIRE IS NOT USED FOR SINGLE SWITCH INSTALLATIONS.
Cap the red wire with a wire nut.
BE SURE that ALL the WIRE NUTS are TIGHT and SECURE.
3-way Switch Installation:
4.
A three way switch has three wires connected to it. One of the wires is
“common” (the terminal has a different colored screw or there are markings
on the old switch). Connect the Black wire from the timer to the common
wire, Connect the other two wires to the Blue and Red wires from the timer (it
doesn’t matter which goes to which.)
5.
Connect together the white wire from the main power cable to the white wire
from the timer and the white wire to the load.
6.
Tuck the wires into the wall box leaving room for the timer. BE SURE that ALL
the WIRE NUTS are TIGHT and SECURE.
7.
Using the screws provided, mount the timer securely to the wall box then
install the wall plate.
8.
Return the power to the circuit at the service panel. The display starts
flashing “12:00 AM” see Operating Instructions to program the device.
Alternate 3-way Switch Installation:
9.
For alternate 3-way Switch Installation, connect each wire as shown above.
10. Tuck the wires into the wall box leaving room for the timer. BE SURE that ALL
the WIRE NUTS are TIGHT and SECURE.
11. Using the screws provided, mount the timer securely to the wall box then
install the wall plate.
12. Return the power to the circuit at the service panel. The display starts
flashing “12:00 AM” see Operating Instructions to program the device.
Controls
Operating Modes
The LST200/ has 4 operating modes. The Mode switch determines which
mode you are in
1.
MAN / PRGM (Manual / Program) this mode allows the setting of the Clock
time and the Timer ON and OFF times. In this position the timer is
disabled.
2.
VARI (Variable) in this mode the timer is enabled and the ON and OFF
time settings will be altered plus or minus 15 minutes to confuse possible
intruders.
3.
AUTO RUN (Automatic Run) in this mode the timer ON and OFF settings
are enabled as programmed.
4.
Delayed OFF Mode. See Operation of Delayed OFF Mode below. The
position of the Mode switch is irrelevant.
Rocker Switch
The rocker switch at the base of the unit will override any current settings. If the
device is ON, the switch will turn it OFF, if OFF, it will turn the device ON.
If the device is in Delayed OFF mode and the light is ON, the switch will turn the
light OFF.
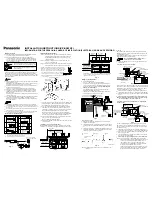
DISPLAY SWITCH
MODE SWITCH
ROCKER SWITCH
DOWN BUTTON
UP BUTTON
AM or PM
INDICATOR
ON or OFF
SETTING INDICATOR


