3-9
Configuration examples
3.2.2.1 Hardware installation
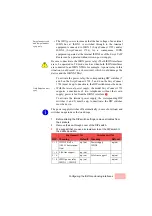
The following steps should be taken before configuring the Swyx
VoIP Router:
1.
Use the supplied LAN cable (green connectors) to connect the
LAN interface to an available network connector, a switch, or
directly to a PC.
2.
Connect the ADSL interface with the splitter by using the
supplied ADSL connector cable (transparent connectors).
3.
Connect one end of the supplied ISDN cable (light-blue
connectors) to an ISDN interface in TE mode (
⌧
with factory
settings). Plug the other end of this cable into an ISDN exchange
line (e.g. directly into the ISDN NTBA).
Example SwyxConnect
1723
4.
Connect the ISDN PBX with an ISDN interface in NT mode (
with factory settings).
5.
You can optionally connect analog terminal equipment such as
fax machines or DECT telephones to the analog interfaces.
6.
Use the supplied power supply unit to provide the device with
power.
Detailed information about each step of the hardware installation can
be found under ’Hardware Installation’.
3.2.2.2 Other requirements
Apart from the hardware installation, the following preparations are
necessary for configuring the Swyx VoIP Router:
Analog2 ( )
ETH2
USB Config (COM)
ETH1
ISDN1/Analog
( )
⌧
Analog1 ( )
ISDN2 ( )
ADSL 2+
ISDN PBX
DECT
Fax
Splitter
NTBA
Summary of Contents for SwyxConnect 1722
Page 112: ...I 5 ...


