background image

LIMITED WARRANTY

FUNAI CORP. will repair this SYLVANIA product, free of charge in the USA in the event of defect in materials

or workmanship as follows:

DURATION:

PARTS:

FUNAI CORP. will provide parts to replace defective parts without charge for one (1) year from

the date of original retail purchase. Two (2) years for Picture Tube. Certain parts are excluded

from this warranty.

LABOR:

FUNAI CORP. will provide the labor without charge for a period of ninety (90) days from the date

of original retail purchase.

LIMITS AND EXCLUSIONS:

THIS WARRANTY IS EXTENDED ONLY TO THE ORIGINAL RETAIL PURCHASER. A PURCHASE
RECEIPT OR OTHER PROOF OF ORIGINAL RETAIL PURCHASE WILL BE REQUIRED TOGETHER
WITH THE PRODUCT TO OBTAIN SERVICE UNDER THIS WARRANTY.

This warranty shall not be extended to any other person or transferee.

This warranty is void and of no effect if any serial numbers on the product are altered, replaced, defaced, missing
or if service was attempted by an unauthorized service center. This FUNAI CORPORATION Limited warranty
does not apply to any product not purchased and used in the United States.

This warranty only covers failures due to defects in material or workmanship which occurs during normal use. It
does not cover damage which occurs in shipment, or failures which are caused by repairs, alterations or product
not supplied by FUNAI CORP., or damage which results from accident, misuse, abuse, mishandling, misapplica-
tion, alteration, faulty installation, improper maintenance, commercial use such as hotel, rental or office use of this
product or damage which results from fire, flood, lightning or other acts of God.

THIS WARRANTY DOES NOT COVER PACKING MATERIALS, ANY ACCESSORIES (EXCEPT REMOTE
CONTROL), ANY COSMETIC PARTS, COMPLETE ASSEMBLY PARTS, DEMO OR FLOOR MODELS.

FUNAI CORP. AND ITS REPRESENTATIVES OR AGENTS SHALL IN NO EVENT BE LIABLE FOR ANY
GENERAL, INDIRECT OR CONSEQUENTIAL DAMAGES ARISING OUT OF OR OCCASIONED BY THE
USE OF OR THE INABILITY TO USE THIS PRODUCT. THIS WARRANTY IS MADE IN LIEU OF ALL
OTHER WARRANTIES, EXPRESS OR IMPLIED, AND OF ALL OTHER LIABILITIES ON THE PART OF
FUNAI, ALL OTHER WARRANTIES INCLUDING THE WARRANTY OF MERCHANTABILITY, AND FIT-
NESS FOR A PARTICULAR PURPOSE, ARE HEREBY DISCLAIMED BY FUNAI AND ITS REPRESENTA-
TIVES IN THE UNITED STATES.
ALL WARRANTY INSPECTIONS AND REPAIRS MUST BE PERFORMED BY A FUNAI AUTHORIZED
SERVICE CENTER. THIS WARRANTY IS VALID WHEN THE UNIT IS CARRIED-IN TO FUNAI AUTHO-
RIZED SERVICE FACILITY.

IMPORTANT:

THIS LIMITED WARRANTY GIVES YOU SPECIFIC LEGAL RIGHTS, YOU MAY HAVE OTHER RIGHTS

THAT VARY FROM STATE TO STATE, IF, AT ANY TIME DURING THE WARRANTY PERIOD, YOU ARE

UNABLE TO OBTAIN SATISFACTION WITH THE REPAIR OF THIS PRODUCT, PLEASE CONTACT

FUNAI CORP.

ATTENTION:

FUNAI CORP. RESERVES THE RIGHT TO MODIFY ANY DESIGN OF THIS PRODUCT WITH-
OUT PRIOR NOTICE.

To locate your nearest SYLVANIA Authorized Service Center or for general service procedure,
please call 1-800-968-3429 or write to the following:

FUNAI CORPORATION

Customer Service

100 North Street; Teterboro, NJ 07608

Tel :1-800-968-3429

http://www.funai-corp.com

PLEASE DO NOT SHIP YOUR UNIT TO THE TETERBORO ADDRESS.

Printed in Malaysia

0EMN02098

T4401UB * * * * *

Summary of Contents for 6309CD

Page 1: ...r energy efficiency ENERGY STAR is a U S registered mark If you need additional assistance for set up or operating after reading owner s manual please cal TOLL FREE 1 800 968 3429 Or visit our WEB SITE at http www funai corp com Please read before using this equipment INSTRUCCIONES EN ESPAÑOL INCLUIDAS This Owner s Manual is made of recycled paper ...

Page 2: ...om overheat ing and these openings must not be blocked or covered The openings should never be blocked by placing the TV VCR on a bed sofa rug or other similar surface This TV VCR should never be placed near or over a radiator or heat register This TV VCR should not be placed in a built in installation such as a bookcase or rack unless proper ventilation is provided or the manufacturer s instructi...

Page 3: ...age Requiring Service Unplug this TV VCR from the wall outlet and refer servicing to qualified service per sonnel under the following conditions a When the power supply cord or plug is damaged or frayed b If liquid has been spilled or objects have fallen into the TV VCR c If the TV VCR has been exposed to rain or water d If the TV VCR does not operate normally by following the operating instructio...

Page 4: ...fields Avoid moving TV VCR to locations where temper ature differences are extreme Do not handle the power cord with wet hands Do not pull on the power cord when disconnecting it from an AC wall outlet Grasp it by the plug If by accident water is spilled on your unit unplug the power cord immediately and take the unit to our Authorized Service Center for servicing Do not put your fingers or object...

Page 5: ...ING A TV PROGRAM 15 GAME MODE 15 DEGAUSSING 15 PICTURE CONTROL 15 C PLAYBACK 16 NORMAL PLAYBACK 16 AUTO REPEAT PLAYBACK 16 SEARCH 17 STILL PICTURE 17 NOISE CANCEL in the Still mode 18 VERTICAL HOLD CONTROL 18 TRACKING ADJUSTMENT 18 RENTAL PLAYBACK 18 C C RECORDING 18 NORMAL RECORDING 19 SKIPPING UNWANTED SCENES DURING RECORDING 19 OTR One Touch Recording 19 TIMER RECORDING 20 HINTS FOR AUTOMATIC T...

Page 6: ... Allows you to repeat the playing of a tape indefinitely without pressing the PLAY button Time search Let you set the TV VCR to advance the tape by entering the desired playback time you want to skip OTR One Touch Recording Instant timed recording from 30 to 480 minutes is possible at the push of the REC OTR button 1 Year 8 events including Daily and Weekly Timer Recording The built in timer allow...

Page 7: ...ly in forward during playback mode Forward Search B button When setting program for example setting clock or timer program press to determine your selec tion and proceed to the next step you want to input Press to determine setting modes from on screen menu Press to select a mode from a particular menu for example LANGUAGE or USER S SET UP REMOTE CONTROL VIDEO AUDIO STOP EJECT REW PLAY F FWD VOLUM...

Page 8: ...display the main menu on the TV screen 17 DISPLAY button Display the counter or the cur rent channel number and current time on the TV screen See page 24 18 SPEED button Press to choose the desired recording speed SP SLP 19 T PROG CLEAR button Press to cancel a setting of timer program See page 22 COUNTER RESET button Press to reset counter to 0 00 00 20 GAME button Sets the game mode and external...

Page 9: ...Note to CATV system installer This reminder is provided to call the CATV system installer s attention to Article 820 40 of the NEC that provides guidelines for proper grounding and in particular specifies that the cable ground shall be connect ed to the grounding system of the building as close to the point of cable entry as practical IN OUT ANT Dipole Antenna Supplied VHF UHF Antenna Not supplied...

Page 10: ...Always unplug the car battery from the cigarette lighter socket before you unplug it from the TV VCR You must disconnect the car battery cord from the TV VCR before you can use the AC power Be sure to replace the fuse with only the same type 5A 250V Be sure the AC cord is wound as shown below WARNING The driver should never watch the TV VCR while operating a motor vehicle CAUTION If you use the TV...

Page 11: ...el If you want to recall the selected channels you can select the desired channel directly with the remote control number buttons or CHANNEL K or L button SET UP B LANGUAGE ENGLISH ESPAÑOL AUTO PRESET SET UP LANGUAGE ENGLISH ESPAÑOL B AUTO PRESET TO SELECT A DESIRED CHANNEL You can select the desired channel by using the CHANNEL K or L button or directly pressing the number buttons on the remote c...

Page 12: ...VCR is turned on Confirm the TV VCR is receiving a RF Radio Frequency signal from either an antenna or cable system connection using the ANT IN jack on the rear of the TV VCR NOTE If a cable converter box is being used make sure it is powered on You must use the TV VCR remote control to per form the clock setting procedure 1 Select SETTING CLOCK Press the MENU button on the remote control Press th...

Page 13: ...n until your desired channel num ber appears You can also use the number buttons or the CHANNEL K L button to enter it Example CH8 M E N U TIMER PROGRAMMING PICTURE CONTROL SETTING CLOCK B CHANNEL SET UP USER S SET UP LANGUAGE ENGLISH ZERO RETURN TIME SEARCH CHANNEL SET UP B ADD DELETE CH TV AUTO PRESET 08 ADD DELETE If no number s appear on the TV screen there are no stations in your area which c...

Page 14: ... confirm that channel s has been deleted or added press the CHANNEL K or L button Added channel Light blue Deleted channel Light red DAYLIGHT SAVING TIME Select this feature and the TV VCR s clock automati cally will advance one hour in April then reverse one hour in October When Daylight Saving Time is ON the clock will change automatically as follows First Sunday of April At 2 AM the clock imme ...

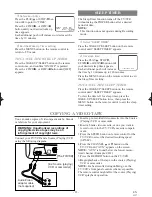
Page 15: ...OL The TV VCR s picture controls BRIGHT CON TRAST COLOR TINT and SHARPNESS are preset to factory specifications Although they are usually the best you may need to make some further adjustments for a natural looking image NOTES Procedures must be followed within 5 seconds or the Picture Control mode will be cancelled When setting the Picture Control the Game mode will be cancelled Make sure TV VCR ...

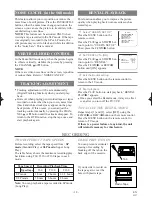
Page 16: ...ack from the beginning to the end of the tape BLANK REPEAT Repeat playback from the begin ning to a blank part which is blank for more than 10 seconds 1 Select USER S SET UP Press the MENU button on the remote control Press the PLAY K or STOP L but ton to point to USER S SET UP Then press the F FWD B button 2 Select ALL or BLANK Press the PLAY K or STOP L but ton to point to REPEAT PLAY Press the ...

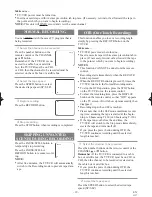
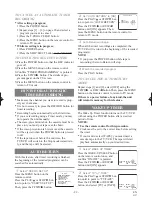
Page 17: ...nning point at which you want to review 2 Reset the counter to 0 00 00 Press the COUNTER RESET button repeatedly 3 Begin recording or playback Press the RECORD or PLAY button Press the STOP button when recording or playback is completed 4 To activate ZERO RETURN mode Press the MENU button on the remote control Press the PLAY K or STOP L but ton to point to ZERO RETURN Then press the F FWD B button...

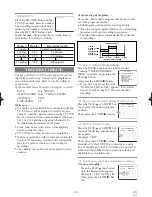
Page 18: ... USER S SET UP Then press the F FWD B button 2 Set RENTAL to ON Press the PLAY K or STOP L but ton to point to RENTAL Press the F FWD B or REW s button until ON appears 3 Exit the Rental setting Press the MENU button on the remote control to return to the TV mode 4 Start playback Press the PLAY button to start playback RENTAL PLAY B appears Once you select the Rental mode it stays in effect even a...

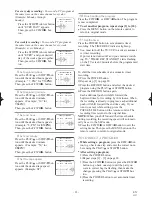
Page 19: ...ssette tape with its erase prevention tab in place If necessary rewind or fast forward the tape to the point at which you want to begin recording NOTES This function CANNOT be done from the remote control Recording starts immediately when the REC OTR button is pressed When the REC OTR button is pressed 18 times the TV VCR returns to the Normal Recording mode To stop the OTR operation press the STO...

Page 20: ...e recording Press the PLAY K up button until the desired date appears Example 7 05 for July 5th Then press the F FWD B but ton TIMER RECORDING 9 00AM 10 00AM 12 00PM Program 1 10 00AM 11 00AM Program 2 9 00AM 10 00AM Program 3 9 30AM 12 00PM 11 00AM Recording Sequence Recording period is SHADED You may set the TV VCR to start and end a record ing while you are away You can set 8 programs to record...

Page 21: ... repeat steps 2 to 10 Press the MENU button on the remote control to return to original mode 11 Set the timer Press the POWER button to set automatic timer recording The TIMER REC indicator lights up You must turn off the TV VCR to activate automat ic timer recording If power is not turned off and you continue watch ing TV TIMER REC STANDBY starts flashing on the TV screen 2 minutes before the pro...

Page 22: ...on to point to USER S SET UP Then press the F FWD B button 2 Set AUTO RETURN to ON Press the PLAY K or STOP L but ton to point to AUTO RETURN Press the F FWD B or REW s button until ON appears Then press the MENU button on the remote control to return to TV mode 3 Auto Return will begin When all the timer recordings are completed the TV VCR will rewind to the beginning of the recorded program s NO...

Page 23: ...rs To view the time left for sleep timer press the WAKE UP SLEEP button twice then press the MENU button on the remote control to exit the sleep timer setting SLEEP TIMER 2 00 WAKE UP ON OFF ON TIMER TV TAPE TV BTIME 12 00AM You can make copies of video tapes made by friends or relatives for your enjoyment Connect your TV VCR and a Source Playing VCR using the following diagram WARNING Unauthorize...

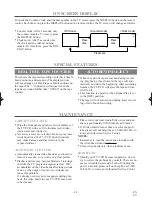
Page 24: ...to correct the problem by yourself There are no user serviceable parts inside Turn off unplug the power cord and please call our help line at 1 800 968 3429 to locate an Authorized Service Center ON SCREEN DISPLAY To check the Counter Clock and Channel number on the TV screen press the DISPLAY button on the remote control Each time you press the DISPLAY button on the remote control the TV screen w...

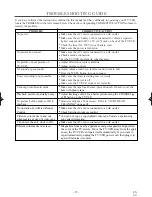
Page 25: ... the timer recording is set correctly Make sure the power is off Make sure the TV VCR clock is set correctly Cannot go into Record mode Make sure the tape has an erase prevention tab If need cover the hole with plastic tape Playback picture is partially noisy Adjust tracking control for a better picture using the CHANNEL K or L button on the TV VCR No picture but the audio is OK in Head cleaning m...

Page 26: ...annels with letters or letter number combinations Please check with your local cable company The following is a chart of common cable channel designations TV Display TV Display TV Display TV Display TV Display TV Display TV Display TV Display CATV channel TV Display W 80 W 81 W 82 W 83 W 84 W 65 W 66 W 67 W 68 W 69 W 70 W 71 W 72 W 73 W 74 W 75 W 76 W 77 W 78 W 79 W 55 W 56 W 57 W 58 A 4 A 3 A 2 A...

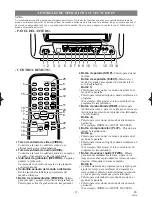
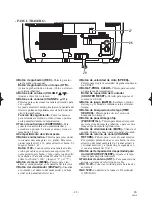
Page 27: ...ar un modo desde un menú particular Por ejemplo IDIOMA o ADJUST DE USER 8 Botón de reproducción PLAY Púlselo para iniciar la reproducción Botón K Púlselo para seleccionar los modos de ajuste en el menú de la pantalla Púlselo para introducir dígitos cuando establezca un programa Por ejemplo Para ajustar el reloj o establecer un programa de temporizador 9 Botón de avance rápido F FWD Púlselo para av...

Page 28: ... en la pantalla del televisor 17Botón del visualizador DISPLAY Visualiza el contador o el número del canal actual y la hora actual en la pantalla del televisor 18Botón de velocidad de cinta SPEED Púlselo para elegir la velocidad de grabación desea da SP SLP 19Botón T PROG CLEAR Púlselo para cancelar un programa de temporizador Botón de reposición del contador COUNTER RESET Púlselo para reponer el ...

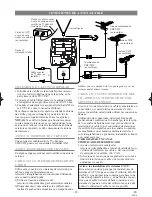
Page 29: ...LITE Si su servicio de televisión por cable le suministra un convertidor o si usted utiliza un sistema de emi siones vía satélite usted podrá utilizar las conexiones básicas Utilizando estas conexiones usted también podrá grabar canales codificados Sin embargo la selección de los canales deberá hacerse con el convertidor de televisión por cable con el convertidor de emisiones vía satélite Esto sig...

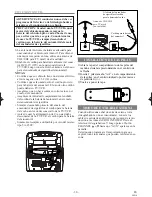
Page 30: ...Confirme que su vehículo tlene un sistema eléctrico a tierra negativo de 13 2 12 voltios Confirme que está usando sólo el cordón provisto para la batería del automóvil El uso de otro cordón puede dañar su TV VCR Asegúrese que no haya cenizas ni otro restos en el zócalo del encendedor Asegúrese de introducir completamente el enchufe del cordón de la batería del automóvil en el zócalo del encendedor...

Page 31: ...5 El sintonizador se para en el canal memorizado más bajo Si desea recuperar canales seleccionados usted podrá seleccionar directamente el canal deseado con los botones numerados del mando a distancia o con los botones CHANNEL K o L PREPARACIÓN DE CANALES POR PRIMERA VEZ Cerciórese La alimentación del televisor videograbadora deberá estar conectada En el ejemplo de abajo el reloj va a ajustarse as...

Page 32: ...cial use such as hotel rental or office use of this product or damage which results from fire flood lightning or other acts of God THIS WARRANTY DOES NOT COVER PACKING MATERIALS ANY ACCESSORIES EXCEPT REMOTE CONTROL ANY COSMETIC PARTS COMPLETE ASSEMBLY PARTS DEMO OR FLOOR MODELS FUNAI CORP AND ITS REPRESENTATIVES OR AGENTS SHALL IN NO EVENT BE LIABLE FOR ANY GENERAL INDIRECT OR CONSEQUENTIAL DAMAG...

Reviews: