background image

APPENDIX - E
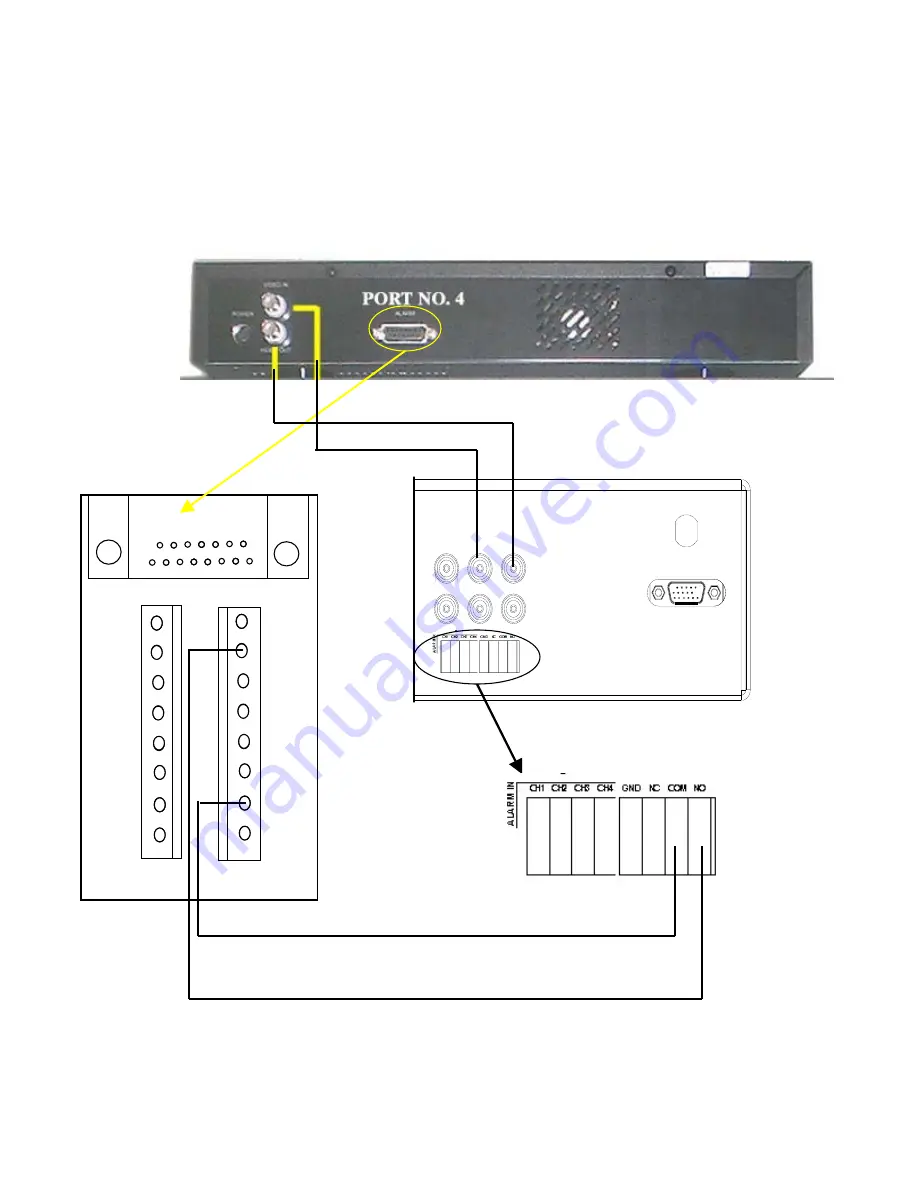
CONNECTING TO A SINGLE CHANNEL DIGITAL VIDEO RECORDER
FOR ALARM RECORDING

-23-

NO 8

NC 7

R/S 6

E/O 5

S/O 4

V/L 3

TX1 2

RX1 1

15 COM

14 A/I

12 D/F

13 A/R

11 RX2

10 TX2

9 GND

GND

AL

ARM

 IN

NC

NO

COM

VCR IN

RS-232

VGA IN

AC100-240V 50/60Hz

GND

CH8

CH7

CH6

CH5

CH4

CH3

CH2

CH1

AU

DI

O

V

ID

E

O

VCR OUT

MONITOR OUT

Summary of Contents for SG17TQ5540 Series

Page 1: ...17 COLOR TFT QUAD OBSERVATION SYSTEM SG17TQ5540 SERIES BEFORE OPERATING THIS SYSTEM PLEASE READ THIS MANUAL THROUGHLY AND RETAIN IT FOR FUTURE REFERENCE FOR MORE INFORMATION WWW STRATEGICVISTA COM...

Page 2: ...nd to learn about our complete range of accessory products please visit our website at www strategicvista com Explanation of two Symbols The lightning flash with arrowhead symbol within an equilateral...

Page 3: ...e protection against harmful interference in a residential installation This equipment generates Uses and can radiate radio frequency energy and if not installed and used in accordance with the instru...

Page 4: ...ANDARD WIRED CAMERA 15 12 MONITOR CONNECTIONS 16 13 TROUBLE SHOOTING 16 14 TECHNICAL SPECIFICATIONS 17 15 OPTIONAL ACCESSORIES 18 16 APPENDIX A CONNECTING MONITOR TO A STANDARD VCR 19 17 APPENDIX B CO...

Page 5: ...of any kind on this product 15 Servicing Do not attempt to service this product yourself as opening or removing covers may expose you to voltage or other hazards Refer all servicing to qualified serv...

Page 6: ...ution Monitor delivers superior image clarity Ultra high brightness and an excellent contrast ratio for sharp true to life image Pan Tilt Zoom capable Pelco D Protocol Metal cabinet with 4 camera inpu...

Page 7: ...S INCLUDED WITH MODEL SG17TQ5544 A 1 CAMERA INCLUDED WITH MODEL SG17TQ5541 A CONNECTING THE TFT STAND Use the supplied screws to connect the stand for the TFT monitor to the base Brackets and screws a...

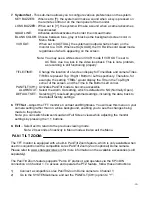
Page 8: ...These buttons perform the following functions a Displays a picture in Full Screen If you are in the Quad mode select the Channel 1 button and hold for 2 3 seconds to view Camera 1 in Full Screen To v...

Page 9: ...Press the Zoom button 3 Use the up down left right arrow keys to move the area which the monitor is zooming in on 4 Press Zoom again to escape Zoom mode b Main The second function of the Zoom Main but...

Page 10: ...ttons will also remove add a subpicture to create a Single PIP Dual PIP viewing mode PIP Sequence Holding this button for 3 seconds initiates Sequencing in Single or Dual PIP mode To exit PIP Sequenci...

Page 11: ...Change the time 24 hour clock iv DATE Change the date v DATE FORMAT There are three formats to display the date MM DD YYYY for U S A YYYY MM DD for Asian countries DD MM YYYY for European countries 2...

Page 12: ...e the setting to N O Normally Open Note some non Lorex PIR motion sensors have a default setting of N C normally closed In order to activate the alarm on such a PIR motion sensor change the setting to...

Page 13: ...ner PAN TILT CH1 Activates Pan Tilt mode to become accessible ALARM OUT Select the Alarm Out setting which is defaulted to NO Normally Open DEFAULT SET Selecting Y resets all programmed settings inclu...

Page 14: ...or 3 seconds or press the Pan Tilt button on the remote control 5 If you have selected MOVE you can use all four arrow keys to Pan and Tilt in all directions If you selected ZOOM or FOCUS use the arro...

Page 15: ...o Video Out Use with A V cables not supplied to transmit audio and video from the monitor to a VCR or DVR 6 VCR Audio Video In Use with A V cables not supplied to receive audio and video from an exter...

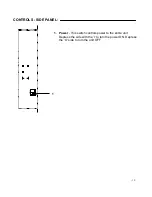
Page 16: ...13 USB POWER CONTROLS SIDE PANEL 1 1 Power This switch controls power to the entire unit Depress the side with the I to turn the power ON Depress the O side to turn the unit OFF...

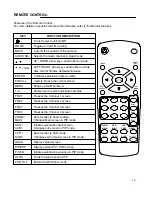
Page 17: ...rease increase VOL Selects the Audio channel in Quad mode AUDIO SEL Cuts off the sound from the camera MUTE UP DOWN arrow keys used in Menu mode Displays either PIP POP screen PIP POP Displays Quad sc...

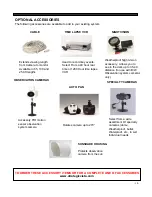
Page 18: ...from the monitor to the camera 6 Bracket Metal bracket connects to camera for mounting to walls ceilings or table INSTALLATION A Camera Unit Permanent installation using metal camera bracket IMPORTAN...

Page 19: ...oints TROUBLE SHOOTING VIDEO AUDIO DC12V CAMERA MONITOR PROBLEM REMEDY Too dark or bright picture Readjust the CONTRAST or BRIGHTNESS controls NO POWER Check for AC connection NO POWER Poor picture qu...

Page 20: ...han 25lbs Dimensions 40 5cm W x6 cm D x32cm H STANDARD CAMERA Image Device 1 4 CCD image sensor Resolution 330 TV Lines Shutter control Auto 1 60 1 100 000 Power requirement Powered from monitor via c...

Page 21: ...or 1280 Hour time lapse VCR SPECIALTY CAMERAS Rotates camera up to 270 NIGHTVISION Weatherproof Night vision accessory Allows you to see in the dark up to 35 40 distance for use with B W Observation s...

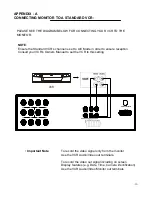
Page 22: ...portant Note To record the video signal only from the monitor Use the VCR Audio Video out terminals To record the video out signal including on screen Display features e g Date Time Camera identificat...

Page 23: ...or can be made through MONITOR OUT As show in the diagram below MONITOR ALARM IN NC NO COM VCRIN RS 232 VGAIN AC100 240V50 60Hz GND CH8 CH7 CH6 CH5 CH4 CH3 CH2 CH1 AUDIO VIDEO VCROUT MONITOROUT PAGE 2...

Page 24: ...ONFIGURATION FOR COMPLETE SYSTEM 21 ALARM IN NC NO COM VCRIN RS 232 VGAIN AC100 240V50 60Hz GND CH8 CH7 CH6 CH5 CH4 CH3 CH2 CH1 AUDIO VIDEO VCROUT MONITOROUT PAGE 2 PAGE 1 CH2 CH3 CH4 CH5 CH6 CH7 CH8...

Page 25: ...CR FOR ALARM RECORDING 22 ALARM IN NC NO COM VCRIN RS 232 VGAIN AC100 240V50 60Hz GND CH8 CH7 CH6 CH5 CH4 CH3 CH2 CH1 AUDIO VIDEO VCROUT MONITOROUT PAGE 2 PAGE 1 CH2 CH3 CH4 CH5 CH6 CH7 CH8 CH8 CH7 CH...

Page 26: ...O RECORDER FOR ALARM RECORDING 23 NO 8 NC 7 R S 6 E O 5 S O 4 V L 3 TX1 2 RX1 1 15 COM 14 A I 12 D F 13 A R 11 RX2 10 TX2 9 GND GND ALARM IN NC NO COM VCRIN RS 232 VGAIN AC100 240V50 60Hz GND CH8 CH7...

Page 27: ...APPENDIX F RACK MOUNT INSTALLATION 24 Brackets and screws for Rack Mounting applications are provided...

Page 28: ...n normal temperature environment Extreme temperatures can shorten the life of the electronic devices Handle the monitor carefully Dropping it can cause serious damage to the unit Occasionally clean th...

Reviews: