background image

1.Read instructions-

All the safety and operating instructions

should be read before the appliance is operated.

2.Retain Instructions-

The safety and operating instructions

should be retained for future reference.

3.Heed Warnings

-All warnings on the appliance and in the

operating instructions should be adhered to.

4.Follow Instructions-

All operating and use instructions

should be followed.

5.Cleaning-

Unplug TV/VCR/DVD from the wall outlet before

cleaning. Do not use liquid cleaners or aerosol cleaners. Use
a damp cloth for cleaning.

EXCEPTION:

A product that is meant for uninterrupted

service and, that for some specific reason, such as the possi-
bility of the loss of an authorization code for a CATV con-
verter, is not intended to be unplugged by the user for clean-
ing or any other purpose, may exclude the reference to
unplugging the appliance in the cleaning description other-
wise required in item 5.

6.Attachments-

Do not use attachments not recommended by

the TV/VCR/DVD manufacturer as they may cause hazards.

7.Water and Moisture-

Do not use this TV/VCR/DVD near

water-for example, near a bath tub, wash bowl, kitchen sink,
or laundry tub, in a wet basement, or near a swimming pool,
and the like.

8.Accessories-

Do not place this TV/VCR/DVD on an unstable

cart, stand, tripod, bracket, or table. The TV/VCR/DVD may
fall, causing serious injury to someone, and serious damage
to the appliance. Use only with a cart, stand, tripod, bracket,
or table recommended by the manufacturer, or sold with the
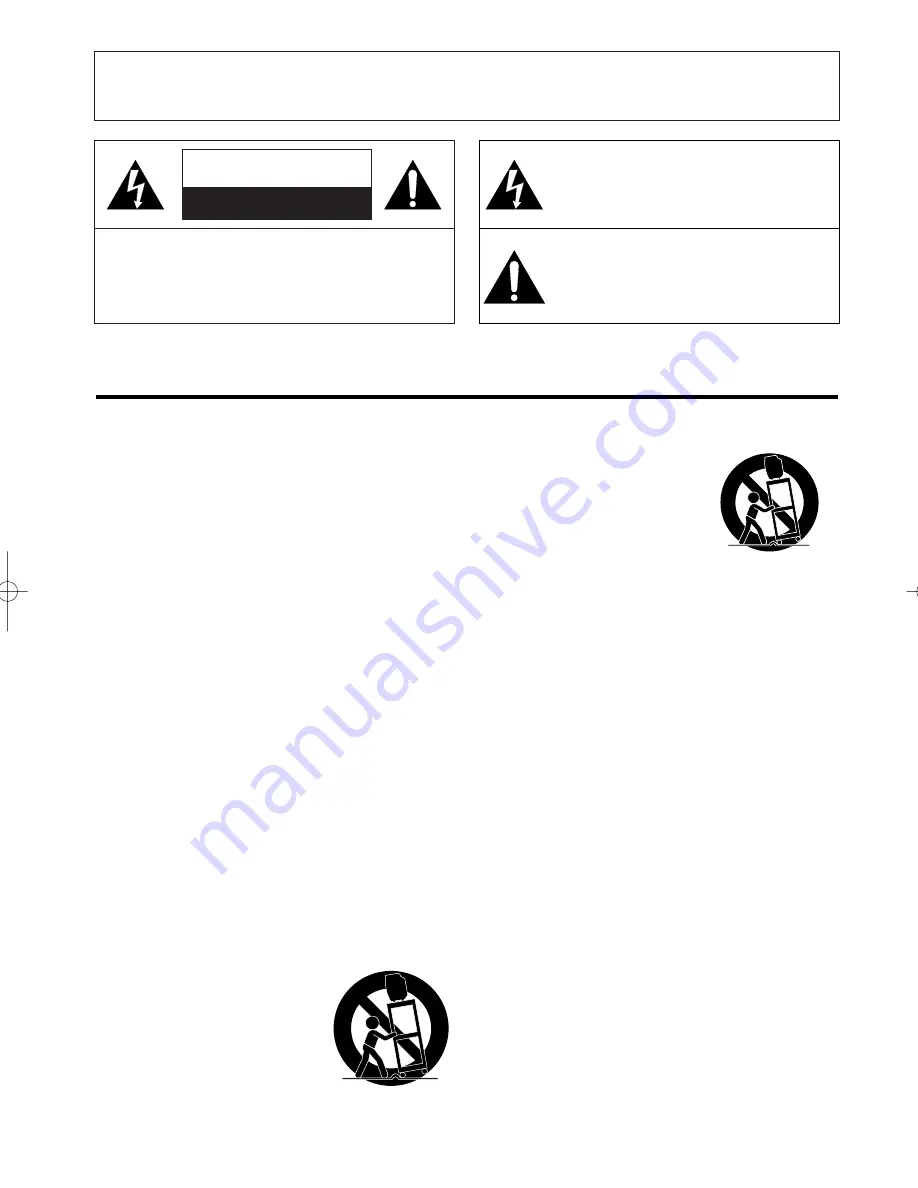
TV/VCR/DVD. Any mounting of
the appliance should follow the
manufacturer’s instructions and
should use a mounting accessory
recommended by the manufacturer.
An appliance and cart combination
should be moved with care.Quick
stops, excessive force, and uneven
surfaces may cause the appliance
and cart combination to overturn.

AMEUBLES-

Cet appareil ne doit

être placé que sur un meuble (avec
ou sans roulettes) recommandé par
le fabricant. Si vous l’installez sur
un meuble à roulettes, déplacez les
deux ensembles avec précaution.
Un arrêt brusque, l’utilisation
d’une force excessive et des sur-
faces irrégulières risquent de désta-
biliser l’ensemble et de le renverser.

9. Ventilation-

Slots and openings in the cabinet and the back

or bottom are provided for ventilation and to ensure reliable
operation of the TV/VCR/DVD and to protect it from over-
heating, and these openings must not be blocked or cov-
ered. The openings should never be blocked by placing the
TV/VCR/DVD on a bed, sofa, rug, or other similar surface.
This TV/VCR/DVD should never be placed near or over a
radiator or heat register. This TV/VCR/DVD should not be
placed in a built-in installation such as a bookcase or rack
unless proper ventilation is provided or the manufacturer’s
instructions have been adhered to.

10.Power Sources-

This TV/VCR/DVD should be operated

only from the type of power source indicated on the mark-
ing label. If you are not sure of the type of power supply to
your home, consult your appliance dealer or local power
company. For TV/VCR/DVDs intended to operate from
battery power, or other sources, refer to the operating
instructions.

11.Grounding or Polarization-

This TV/VCR/DVD is

equipped with a polarized alternating-current line plug(a
plug having one blade wider than the other). This plug will
fit into the power outlet only one way. This is a safety fea-
ture. If you are unable to insert the plug fully into the out-
let, try reversing the plug. If the plug should still fail to fit,
contact your electrician to replace your obsolete outlet. Do
not defeat the safety purpose of the polarized plug.

12.Power-Cord Protection

-Power-supply cords should be

routed so that they are not likely to be walked on or
pinched by items placed upon or against them, paying par-
ticular attention to cords at plugs, convenience receptacles,
and the point where they exit from the appliance.

- 2 -

EN

1B15

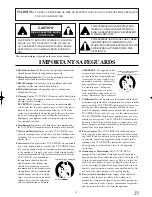
WARNING:

TO REDUCE THE RISK OF FIRE OR ELECTRIC SHOCK, DO NOT EXPOSE THIS APPLIANCE
TO RAIN OR MOISTURE.

CAUTION:

TO REDUCE THE RISK OF ELECTRIC

SHOCK, DO NOT REMOVE COVER (OR BACK).
NO USER SERVICEABLE PARTS INSIDE. REFER
SERVICING TO QUALIFIED SERVICE PERSON-
NEL.

CAUTION

RISK OF ELECTRIC SHOCK

DO NOT OPEN

THIS SYMBOL INDICATES THAT DAN-
GEROUS VOLTAGE CONSTITUTING A
RISK OF ELECTRIC SHOCK IS PRESENT
WITHIN THIS UNIT.

THIS SYMBOL INDICATES THAT THERE
ARE IMPORTANT OPERATING AND
MAINTENANCE INSTRUCTIONS IN THE
LITERATURE ACCOMPANYING THE
APPLIANCE.

The caution marking is located on the rear of the cabinet.

IMPORTANT SAFEGUARDS

PORTABLE CART WARNING

S3126A

SYMBOLE D'AVERTISSEMENT POUR 

LES COMPOSANTES

APPAREIL ET MEUBLE A ROULETTES

S3126A

T1055UF_EN(p1-35).QX3  04.6.3  2:43 PM  Page 2

Summary of Contents for SRCD420P

Page 1: ...or energy efficiency ENERGY STAR is a U S registered mark If you need additional operating assistance after reading this owner s manual please call TOLL FREE 1 800 968 3429 Please read before using th...

Page 2: ...and the back or bottom are provided for ventilation and to ensure reliable operation of the TV VCR DVD and to protect it from over heating and these openings must not be blocked or cov ered The openin...

Page 3: ...may expose you to dangerous voltage or other hazards Refer all servicing to qualified service personnel 19 Damage Requiring Service Unplug this TV VCR DVD from the wall outlet and refer servicing to q...

Page 4: ...ld lose the authority to oper ate this equipment if an unauthorized change or modification is made LASER SAFETY This unit employs a laser Only a qualified service person should remove the cover or att...

Page 5: ...heating a cold room or under conditions of high humidity If a DVD is played in a TV VCR DVD which has moisture it may damage the DVD and TV VCR DVD Therefore when the condensation occurs inside the u...

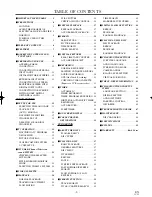
Page 6: ...TIME SEARCH 28 INDEX SEARCH 29 C SPECIAL FEATURES 29 REAL TIME TAPE COUNTER 29 AUTO REWIND EJECT 29 C RECORDING 30 NORMAL RECORDING 30 SKIPPING UNWANTED SCENES DURING RECORDING 30 OTR One Touch Recor...

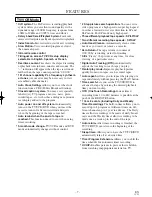
Page 7: ...video program at a high speed or super high speed in either a forward or reverse direction in LP and SLP mode For SP mode only high speed Three different playback tape speeds SP LP SLP Two different r...

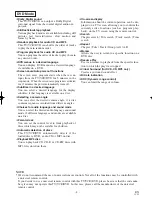
Page 8: ...sound mode if different languages and modes are available on a disc Parental lock You can set the control level to limit playback of discs which may not be suitable for children Automatic detection o...

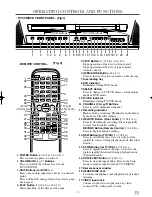
Page 9: ...ward Search 16 STOP EJECT Button TV VCR P 25 Press to stop the tape motion Press in the Stop mode to remove tape from the TV VCR DVD 17 Remote sensor window 18 HEADPHONE Jack To connect headphone not...

Page 10: ...LEAR Button Resets a setting 31 MODE Button DVD P 40 Activates program playback or random playback mode 32 SEARCH MODE Button DVD P 39 Press to locate a desired point on a DVD disc 33 AUDIO Button DVD...

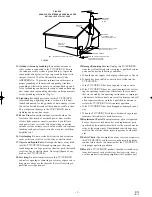
Page 11: ...or Automatic Timer Recording NOTE This TV VCR DVD will ONLY record and view the same channel VHF UHF SEPARATE ANTENNAS In some areas it will be necessary to use an outdoor antenna Antenna Cable Connec...

Page 12: ...ided to call the CATV sys tem installer s attention to Article 820 40 of the NEC that provides guidelines for proper ground ing and in particular specifies that the cable ground shall be connected to...

Page 13: ...nts in the system before connecting them together Refer to the Owner s Manuals for the components to be connected to the TV VCR DVD Set Dolby Digital to OFF for audio output in the setup mode when usi...

Page 14: ...sound as enjoyed in movie theaters Use audio coaxial digital cables available at retail stores for the audio connection NOTES Be sure to turn off the power to all components in the system before conne...

Page 15: ...clock setting to ON which will periodically correct the setting if necessary NOTE If you cannot receive a station with time signals auto clock setting cannot be performed Use manual setting only MANU...

Page 16: ...e converter box or satellite box the local PBS station must be selected on the cable box itself and the TV VCR DVD must be set to the output chan nel of the cable converter box or satellite box usu al...

Page 17: ...using the ENTER button SETTING CLOCK AUTO CLOCK ON AUTO CLOCK CH SEARCH AUTO CLOCK CH 02 MANUAL CLOCK SET B D S T ON NOTE During Auto Clock CH Search the picture may be distorted this is normal 4 Ent...

Page 18: ...desired channel number appears You can also use the number buttons or the CHANNEL K or L button to enter it Example CH8 You must precede single digit channel numbers with a zero Example 02 09 When se...

Page 19: ...ewed must be selected on the cable box or satellite box 3 Adjust sound Press the VOLUME button X X or Y Y to adjust the volume NOTES If you press the CHANNEL button K or L in the DVD mode you can chan...

Page 20: ...lays a black box on the TV screen this means that the TV VCR DVD is set to the TEXT mode To clear screen select CAPTION1 CAP TION2 or OFF Make sure TV VCR DVD s power must be turned on TV VCR 1 Select...

Page 21: ...for children under 14 TV MA Mature audience only V CHIP SET UP SUB RATINGS When you select the ratings of TV Y7 TV PG TV 14 or TV MA you will have the option of selecting sub rating categories 1 Sele...

Page 22: ...7 requires accompa nying parent or adult guardian NC 17 No one under 17 admitted X Mature audience only V CHIP SET UP TV RATING B MPAA RATING CHANGE CODE G VIEW PG VIEW PG 13 VIEW B R BLOCK NC 17 BLOC...

Page 23: ...While the TV VCR DVD is set in monaural MONO mode HIFI disappears from the TV screen NOTE If you play non HIFI tapes while the TV VCR DVD is set in HIFI HIFI will disappear from the TV screen and the...

Page 24: ...must select the recording mode either TV AUDIO STEREO or SAP when you record a broadcast Refer to MTS RECORDING MONITOR MODE If you select second audio when second audio is not available the TV VCR DV...

Page 25: ...has warmed to room temperature and the moisture has evaporated Avoid extreme heat high humidity and magnetic fields Do not tamper with the cassette mechanism Do not touch the tape with your fingers I...

Page 26: ...tape once and start playback again You can reduce the noise lines by pressing the CHANNEL button K or L in slow mode too Tracking adjustment in Slow mode will not be set automatically TV VCR STILL PI...

Page 27: ...h is blank for more than 10 seconds 1 Select USER S SET UP Press the SETUP button on the remote control Press the Arrow button K or L to point to USER S SET UP Then press the ENTER button 2 Select ALL...

Page 28: ...utton 3 Enter your desired time Press the Arrow button K or L until your desired time appears Example 2 50 stands for 2 hours 50 minutes If you wish to cancel the Time Search at this point press the S...

Page 29: ...ginning of desired program NOTE Every time an index signal is skipped the number in the program indicator decreases by one 4 After Index Search When the preset program is reached the TV VCR DVD will s...

Page 30: ...ted to a cable box or satel lite box the TV VCR DVD must be on CH3 or CH4 then the channel to be recorded must be selected on the cable box or satellite box 2 Select the tape speed Press the SPEED but...

Page 31: ...n on the TV VCR DVD Make sure TV VCR DVD power must be turned on Insert a cassette tape with its erase prevention tab in place If necessary rewind or fast forward the tape to the point at which you wa...

Page 32: ...ING Press the SETUP button on the remote control Confirm TIMER PROGRAM MING is pointed by pressing the Arrow button K then press the ENTER button If you have not yet set the clock MANUAL CLOCK SET app...

Page 33: ...ess the SETUP button on the remote control to return to TV mode While recording is in progress 1 Press the POWER button 2 Press the STOP EJECT button on the TV VCR DVD TV VCR 5 Set beginning hour Pres...

Page 34: ...the Arrow button K or L to point to USER S SET UP Then press the ENTER button 2 Set AUTO RETURN to ON Press the Arrow button K or L to point to AUTO RETURN Press the ENTER button until ON appears TV V...

Page 35: ...number combinations Please check with your local cable company The following is a chart of common cable channel designations TV Display TV Display TV Display TV Display TV Display TV Display TV Displ...

Page 36: ...n codes other than 1 or ALL DVD ROM DVD RAM Never play back otherwise malfunc tion may result CD ROM VSD CDV Only plays back the audio part CD G Only plays back the sound CD I Never play back otherwis...

Page 37: ...ay stop for a moment This happens when the 1st layer switches to the 2nd layer This is not a mal function GENERAL FEATURES DVD may contain menus to navigate the disc and access special features Press...

Page 38: ...s on the screen For DVDs fast forward reverse search speed is dif ferent depending on the disc Approximate speed is 1 2 2 8 3 50 and 4 100 For audio CDs approximate speed is 16 For MP3 approximate spe...

Page 39: ...tle Press the CLEAR button to erase the incorrect input For single digits press 0 first DVD V _ 2 TIME SEARCH 1 During playback press the SEARCH MODE button three times CD twice to display the Time Se...

Page 40: ...ou may determine the order in which tracks will play 1 In stop mode press the MODE button The PROGRAM screen will appear 2 Press the Arrow button or to select a track then press the ENTER button Press...

Page 41: ...tton to start random play back MP3 This feature allows you to program an MP3 disc to play in a desired sequence 1 In stop mode press the MODE button The PROGRAM screen will appear 2 Select a desired t...

Page 42: ...t shown after pressing the SUBTITLE button several times the disc does not have subtitles in that language If you choose a Language that has a 3 letter language code the code will be displayed every t...

Page 43: ...w the current Track The elapsed and remaining playing time of the cur rent track will be displayed 2 Press the DISPLAY button again to show current Total Track The elapsed and remaining playing time o...

Page 44: ...ans 4752 Albanian 6563 Amharic 4759 Arabic 4764 Armenian 5471 Assamese 4765 Aymara 4771 Azerbaijani 4772 Bashkir 4847 Basque 5167 Bengali Bangla 4860 Bhutani 5072 Bihari 4854 Bislama 4855 Breton 4864...

Page 45: ...ot appear press the PLAY button the STOP button then the SETUP button twice 2 Press the Arrow button L to select CUS TOM then press the ENTER button CUSTOM mode will appear 3 Press the Arrow button K...

Page 46: ...ENTER button 5 Press the Arrow button K L to select PARENTAL LEVEL then press the ENTER button 6 Press the Arrow button K L to select the desired level then press the ENTER button 7 Press the SETUP bu...

Page 47: ...is being used check for broken wire Adjust COLOR control Poor Reception on Some Channels Try a new channel if OK then possible station trouble Ghosts in Picture Is antenna connected to terminal on th...

Page 48: ...ny captions The tape box company accidentally left out the captioning signals during the mentions it being closed captioned copying process My TV screen shows a black box You are in the TEXT mode Sele...

Page 49: ...VCR DVD does not support DTS audio This is not a mal function Distorted picture There are some cases where pictures may be slightly distorted which are not a sign of a malfunction Although pictures ma...

Page 50: ...ctions included with the video head cleaner before use Clean video heads only when problems occur SERVICING Should your TV VCR DVD become inoperative do not try to correct the problem by yourself Ther...

Page 51: ...notice If there is a discrepancy between languages the default language will be English TV VCR DVD GENERAL SPECIFICATIONS ELECTRICAL SPECIFICATIONS Sound output 2 speakers 1W 8 ohm OTHER SPECIFICATION...

Page 52: ...idamente para empezar la grabaci n instant nea OTR Bot n RECORD Mando a distancia Presione para empezar la grabaci n manual 14 Bot n REW para TV VCR Presione este bot n para rebobinar la cinta o para...

Page 53: ...e conecta directamente a su televisor videograbadora DVD sin una caja de convertidor Con esta conexi n podr 1 Utilizar el mando a distancia del televisor videograbadora DVD para seleccionar canales 2...

Page 54: ...ia en el sentido de la flecha 2 Inserte 2 pilas AA en el compartimiento de las pilas en el sentido indicado por las marcas de polaridad 3 Vuelva a poner la cubierta PARA INSERTAR LAS PILAS CONEXI N A...

Page 55: ...no se visualizan stos empiezan a contar desde 00 cuando se pulsa SETUP en el mando a distancia Utilice esta fun ci n para sincronizar el reloj con la hora correcta AJUSTE DE CANAL Aseg rese de que Pul...

Page 56: ...oebuck and Co Get it fixed at your home or ours Our Home For repair of carry in items like vacuums lawn equipment and electronics call or go on line for the location of your nearest Sears Parts Repair...

Reviews: