background image

– 29 –

EN

3

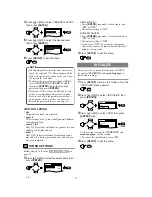
Press 

[

K

]

or

[

L

]

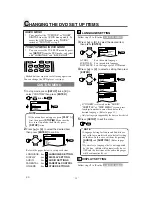
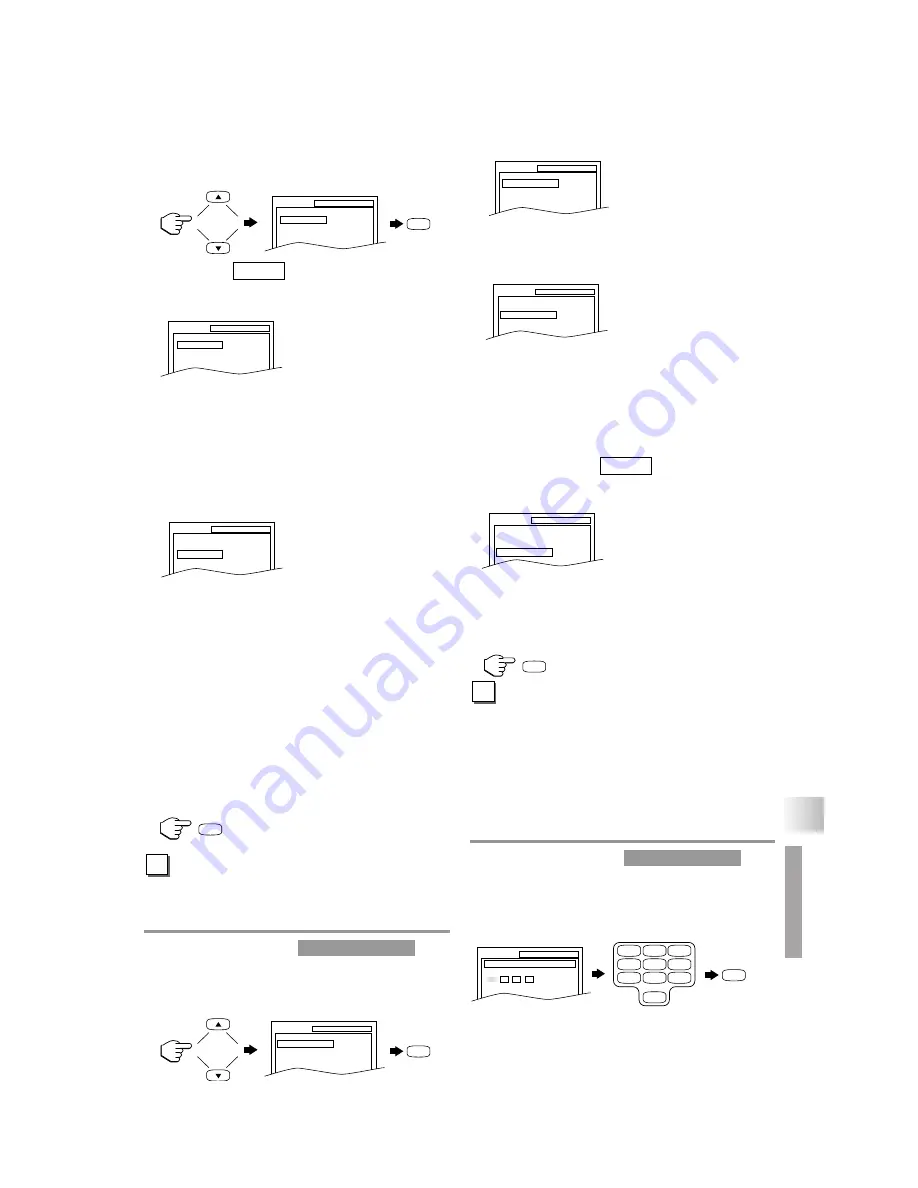
to select the below items then

press 

[ENTER]

.

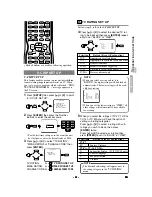
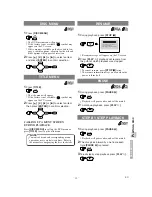
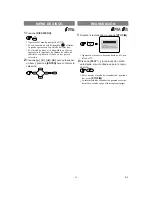
TV MODE:

You can change certain aspects of the DVD display
screens and on-screen messages on the TV screen.

4:3 LETTER BOX (default): To show black bars
on top and bottom of the screen.

4:3 PAN & SCAN: To show a full height picture
with both sides trimmed.

STILL MODE:

This function allows you to adjust picture resolu-
tion and quality in the still mode.

AUTO (default): Automatically select the best
resolution setting (FRAME or FIELD) based on
the data characteristics of the pictures.

FIELD: Select 

“FIELD”

when the pictures are

still unstable even if 

“AUTO”

is selected. 

FIELD stabilizes the pictures, although the pic-
ture quality may become coarse due to the limit-
ed amount of data.

FRAME: Select 

“FRAME”

to display relatively

motionless pictures in higher resolution.
FRAME improves the picture quality, although it
may unstabilize the pictures due to simultaneous
output of two field data.

4

Press 

[SETUP]

to exit the menu.

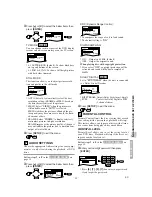
AUDIO SETTINGS

Choose the appropriate Audio settings for your equip-
ment as it only affects during the playback of DVD
discs.

Follow steps 

1

to 

2

in the 

on

page 28.

3

Press 

[

K

]

or

[

L

]

to select the below items then

press 

[ENTER]

.

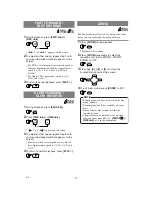
DRC (Dynamic Range Control):

To compress the range of soft to loud sound.

The default setting is 

“ON”

.

DOWN SAMPLING:

ON :  Output in 48 kHz. (default)

OFF :  Output the original sound.

When playing disc with copyright protection

If you select 

“OFF”

, copyright protection will be

activated and sound will be down sampled at
48kHz.

DOLBY DIGITAL:

Set to 

“BITSTREAM”

when the unit is connected

to a Dolby Digital Decoder.

BITSTREAM: Output a Dolby Digital signal (default)

PCM: 

Convert the Dolby Digital to PCM
(2 channel stereo)

4

Press 

[SETUP]

to exit the menu.

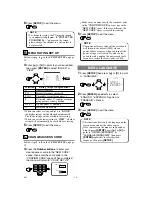
PARENTAL CONTROL

Parental Control limits the disc viewing that exceed
your setting (with a password or playback will stop).
This feature allows you to prevent discs with alterna-
tive scenes from being played by your children.

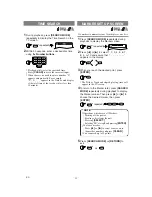
PARENTAL LEVEL

Parental Level allows you to set the rating level of
your DVD discs. Playback will stop if the disc’s rat-
ings exceed the level you set.

Follow steps 

1

to 

2

in the 

on

page 28.

3

Enter your four-digit password then press

[ENTER]

.

Press 

[4]

[7]

[3]

[7]

then enter your password

if you forget the password.

CUSTOM MENU

QUICK

CUSTOM MENU

QUICK

G

SETUP

PARENTAL

PASSWORD

Enter current password.

1

2

3

4

5

6

7

8

9

0

ENTER

TV MODE              4:3 LETTER BOX
STILL MODE          AUTO

SETUP

DISPLAY

TV MODE              4:3 LETTER BOX
STILL MODE          AUTO

SETUP

DISPLAY

ENTER

TV MODE              4:3 LETTER BOX
STILL MODE          AUTO

SETUP

DISPLAY

SETUP

DRC

ON

DOWN SAMPLING

ON

DOLBY DIGITAL

BITSTREAM

SETUP

AUDIO

DRC

ON

DOWN SAMPLING

ON

DOLBY DIGITAL

BITSTREAM

SETUP

AUDIO

DRC

ON

DOWN SAMPLING

ON

DOLBY DIGITAL

BITSTREAM

SETUP

AUDIO

ENTER

SETUP

F

DRC

ON

DOWN SAMPLING

ON

DOLBY DIGITAL

BITSTREAM

SETUP

AUDIO

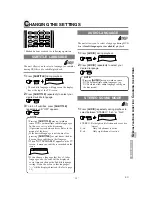
DVD SECTION

C

HANGING 

THE D

VD SET UP ITEMS

Summary of Contents for SSL15D6

Page 1: ...itional operating assistance after reading this owner s manual or to order replacement accessories please call TOLL FREE 1 800 968 3429 Or visit our WEB SITE at http www SylvaniaConsumerElectronics com SSL15D6 15 inch ...

Page 2: ...n arrêt brusque l utilisation d une force excessive et des surfaces irrégulières risquent de déstabiliser l ensemble et de le renverser 9 Ventilation Slots and openings in the cabinet and the back or bot tom are provided for ventilation and to ensure reliable operation of the unit and to protect it from overheating and these openings must not be blocked or covered The openings should never be bloc...

Page 3: ...e with your local recycling regulations Batteries should never be thrown away or incinerated but disposed of in accordance with your local regulations con cerning chemical wastes The serial number of this product may be found on the back of the unit No other unit has the same serial number as yours You should record the number and other vital information here and retain this book as a permanent re...

Page 4: ...ration Do not place the unit near strong magnetic fields Avoid moving the unit to locations where temperature differences are extreme Be sure to remove a disc and unplug the AC power cord from the outlet before carrying the unit Do not handle the power cord with wet hands Do not pull on the power cord when disconnecting it from an AC wall outlet Grasp it by the plug If by accident water is spilled...

Page 5: ...LAYING A DISC 18 BASIC PLAYBACK 18 DISC MENU 19 TITLE MENU 19 RESUME 19 PAUSE 19 STEP BY STEP PLAYBACK 19 FAST FORWARD FAST REVERSE 20 SLOW FORWARD SLOW REVERSE 20 ZOOM 20 SEARCH FUNCTION 21 TRACK SEARCH 21 TITLE CHAPTER SEARCH 21 TIME SEARCH 22 MARKER SET UP SCREEN 22 SPECIAL PLAYBACK FUNCTION 23 REPEAT 23 A B REPEAT 23 PROGRAM 24 RANDOM PLAYBACK 24 CHANGING THE SETTINGS 25 SUBTITLE LANGUAGE 25 A...

Page 6: ...VD menus in a desired language You can display DVD menus in a desired lan guage if available on a DVD Screen saver If the screen saver program is set to ON it starts when there is no input from the unit for 5 minutes in stop mode Subtitles in a desired language You can select a desired language for the display subtitles if that language is available on a disc Selecting a camera angle You can selec...

Page 7: ...ram random screen in stop mode Press to call up the Black Level Setting Virtual Surround screen during playback 13 SEARCH MODE button P 21 Press to locate a desired point 14 AUDIO button For TV mode P 14 Press to select TV sound mode STEREO SAP MONO For DVD mode P 25 Press to select a desired audio language if available 15 EJECT A button P 18 Press to remove a disc from the unit 16 SELECT button P...

Page 8: ... prevent damage or injury from possible battery leakage Do not try to recharge batteries not intended to be recharged they can overheat and rupture 31 MENU button Press to enter or exit the setup menu of TV DVD 32 STOP C button P 18 Press to stop operation of the disc 33 PLAY B button P 18 Press to playback of the disc 34 EJECT A button P 18 Press to remove a disc from the unit 35 VOLUME Y X butto...

Page 9: ...DIG ITAL AUDIO OUT C OAXIA L R L Y Pb Pr R L VIDE O S VIDE O VIDEO 2 CP MPO NE NT AUDIO AUDIO VIDEO 1 AN T HE AD PH ON E ANT OUT IN 75 ohm Coaxial Cable Cable Box or Satellite Box Rear of this unit from Cable Company or Satellite dish Note to CATV system installer This reminder is provided to call the CATV system installer s attention to Article 820 40 of the NEC that provides guidelines for prope...

Page 10: ...jack and S VIDEO jack simultaneously the S VIDEO jack is given priority over the VIDEO jack AUDIO OUTPUT VIDEO2 INPUT VIDEO1 INPUT EXTERNAL CONNECTION Audio Cable Video Cassette Recorder ex OUT OUT OUT S Video Cable Video Cable OR R L S VIDEO VIDEO VIDEO1 AUDIO NOTE L Y Pb Pr R COMPONENT VIDEO2 AUDIO Component Video Cable Audio Cable Video Game Video Camera ex OUT OUT Use this connection if your o...

Page 11: ...unit If the TV screen shows snow noise and there is no operation for more than 5 seconds HELPFUL HINTS appears Follow the instructions listed on screen If those settings do not work properly please call our help line on the front page of this owner s manual 2 Press CH K L or the Number buttons to select the desired channel number For channel number selection with number buttons To select single di...

Page 12: ...able box or satellite box ADDING DELETING CHANNELS The channels you no longer receive or seldom watch can be deleted from the memory Of course you can add the deleted channel into the memory again 1 Press SETUP then press K or L to point to CHANNEL SET UP 2 Press ENTER then press K or L to point to ADD DELETE CH 3 Press ENTER then press the Number but tons or CH K K L L to select the desired chann...

Page 13: ... Timer function turns off the unit without using POWER after a desired period of time 1 Press SLEEP 2 Press SLEEP repeatedly until the desired sleep time is displayed Each press increases the time by 10 minutes up to 90 minutes After 5 seconds the Sleep Timer setting will disappear automatically If you select SLEEP 0 MINUTE Sleep Timer setting is canceled 13 EN 13 EN PICTURE CONTROL BRIGHTNESS PIC...

Page 14: ...u select OFF Closed Caption System set ting is canceled 3 Press SETUP to exit the menu Even if there is a power failure of any kind the unit will retain its memory for this feature TO SELECT TV SOUND MODE 1 Press AUDIO repeatedly to select the MTS output mode The output mode changes as described below every time you press AUDIO Second Audio Program SAP Sometimes broadcasters add another channel of...

Page 15: ...ect the ratings of TV Y7 TV PG TV 14 or TV MA you will have the option of setting sub rating categories Press K or L to select a rating with sub ratings you wish to block then press ENTER twice Press K or L to select a sub rating then press ENTER to set it to BLOCK or VIEW The blocked sub ratings will appear next to the rating category in the TV RATING menu 15 EN V CHIP SET UP B TV RATING MPAA RAT...

Page 16: ...ing 5 Press SETUP to exit the menu Your personal access code will be erased and will return to the default 0000 when a power failure occurs or when you turn off the power using a wall switch If you have for gotten the code unplug the power cord for 10 seconds to restore the access code to 0000 1 Press SETUP then press K or L to point to LANGUAGE 2 Press ENTER repeatedly to select ENGLISH ESPAÑOL S...

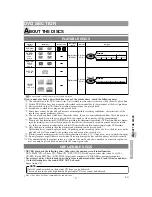
Page 17: ...compromised 7 You may play back the unfinalized DVD R RW disc recorded in the video format on our brand s DVD recorder However depend ing on the recording status of a disc the disc may not be played back at all or normally the picture or sound may not be smooth etc In this case you need to finalize the disc with the DVD recorder Refer to the manual accompanying the DVD recorder 8 Only the discs re...

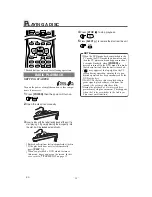
Page 18: ... disc from the unit When the DVD mode has been switched to the TV mode the DVD mode shuts down first and then the TV picture and sound appears in about 4 seconds Similarly when POWER is pressed to turn off in the DVD mode this mode shuts down first and then the unit is turned off may appear at the top right on the TV screen during operation warning that a pro hibited operation has been encountered...

Page 19: ...tions may vary between discs Refer to the manual accompanying the disc for details 1 During playback press STOP C Resume message will appear on the TV screen 2 Press PLAY O playback will resume from the point at which playback was stopped To cancel resume press STOP C twice The resume information stays on even when the power is turned off 1 During playback press PAUSE F Playback will pause and sou...

Page 20: ...he disc Approximate speed is 1 1 16 2 1 8 and 3 1 2 4 To return to normal playback press PLAY O The Zoom function allows you to enlarge the video image and to pan through the enlarged image 1 Press ZOOM during playback Playback will continue 2 Press ZOOM repeatedly to select the required zoom factor ZOOM1 ZOOM2 ZOOM3 or OFF 3 Press K L s or B to move the zoomed picture across the screen 4 To exit ...

Page 21: ...p subsequent tracks Press SKIP H to go back to beginning of the cur rent track Press it repeatedly to go to the previous tracks If SKIP H G is pressed while the play back is paused the playback will be paused again after skipping to the next track SKIP H G are not operative when playback is stopped 1 Press SEARCH MODE once for the Chapter search twice for the Title search during play back 2 Within...

Page 22: ...ears in the display 3 When you reach the desired point press ENTER The Title or Track and elapsed playing time will appear in the TV screen 4 To return to the Marker later press SEARCH MODE repeatedly during playback to display the Marker screen Then press s or B to choose the desired marker then press ENTER Operations which erase all Markers Turning off the power Ejecting a disc from the unit Pre...

Page 23: ...int A appears briefly on the TV screen 2 Press A B again at your chosen end point A B appears briefly on the TV screen and the repeat sequence begins 3 To exit the sequence press A B The A B repeat section can only be set within the current title for DVDs or current track for Audio CDs A B repeat is not available with some scenes in DVD To cancel the A point which was set press CLEAR A B repeat pl...

Page 24: ...gram canceled Up to 99 tracks can be entered To erase all tracks in the program at once select ALL CLEAR at the bottom of the list at step 2 If you like to repeat the current track in the program press REPEAT several times until TRACK appears during playback If you like to repeat the entire program press REPEAT several times until ALL appears during playback This function shuffles the playing orde...

Page 25: ... letter language code the code will be displayed every time you change the Subtitle language setting If you choose any other languages will be displayed instead Refer to page 31 The unit allows you to select a language during DVD disc if multi languages are available playback 1 Press AUDIO during playback 2 Press AUDIO repeatedly to select your desired language Pressing AUDIO may not work on some ...

Page 26: ...witch ON or OFF ON Makes the dark parts brighter OFF Shows the original picture as recorded Initial setting 2 Press MODE twice or RETURN to exit The setting will be saved even if the unit is turned off You can enjoy surround sound effect over two speak ers on this unit 1 Press MODE repeatedly during playback then press ENTER to set it 1 2 or OFF 1 Natural effect 2 Emphasized effect OFF Original So...

Page 27: ...t playback status Angle icon appears only when avail able on the DVD TT Title Current title number Total titles 1 3 0 00 00 1 23 45 Elapsed time of the current title Remaining time of the current title Current repeat setting appears only when the repeat setting is active C Chapter repeat T Title repeat A B A B repeat T L1 BIT RATE The amount of audio and video data currently being read Layer numbe...

Page 28: ...upported by the disc can be selected 5 Press SETUP to exit the menu Language Setting for Audio and Subtitle are not valid for some discs due to default setting of the disc In this case set them by pressing AUDIO and SUBTITLE Refer to page 25 If you select a language that is not supported by the disc subtitle will automatically be set OFF and the first item of the audio languages will be automatica...

Page 29: ...48 kHz default OFF Output the original sound When playing disc with copyright protection If you select OFF copyright protection will be activated and sound will be down sampled at 48kHz DOLBY DIGITAL Set to BITSTREAM when the unit is connected to a Dolby Digital Decoder BITSTREAM Output a Dolby Digital signal default PCM Convert the Dolby Digital to PCM 2 channel stereo 4 Press SETUP to exit the m...

Page 30: ...ral use prohibited OTHER SETTINGS Follow steps 1 to 2 in the on page 28 3 Press K or L to select the below items then press ENTER ANGLE ICON Press ENTER repeatedly to turn Angle icon ON or OFF The default setting is ON SCREEN SAVER Press ENTER repeatedly to turn Screen Saver ON or OFF The default setting is OFF If you select ON the screen saver program starts when there is no input from the unit f...

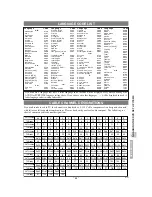
Page 31: ...o Croatian 6554 Sesotho 6566 Setswana 6660 Language Code Shona 6560 Sindhi 6550 Singhalese 6555 Siswat 6565 Slovak 6557 Slovenian 6558 Somali 6561 Spanish SPA 5165 Sundanese 6567 Swahili 6569 Swedish SWE 6568 T Tagalog 6658 Tajik 6653 Tamil 6647 Tatar 6666 Telugu 6651 Thai 6654 Tibetan 4861 Tigrinya 6655 Tonga 6661 Tsonga 6665 Turkish TUR 6664 Turkmen 6657 Twi 6669 U Z Ukrainian 6757 Urdu 6764 Uzb...

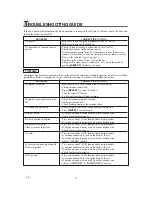
Page 32: ...hen possible station trouble Is antenna connected to jack on the back of the set If outside antenna is being used check for broken wire Adjust COLOR control Poor reception on some channels Try a new channel if OK then possible station trouble Ghosts in picture Is antenna connected to jack on the back of the set If outside antenna is being used check for broken wire Check for local interference Wea...

Page 33: ...tain closed caption program The decoder cannot read the compressed information and captions will be lost Black box in the TV screen You are in TEXT mode Select a CAPTION mode CAPTION1 CAPTION2 or Caption OFF PROBLEM CORRECTIVE ACTION Sound OK picture poor Try a new channel if OK then possible station trouble Is antenna connected to jack on the back of the set If outside antenna is being used check...

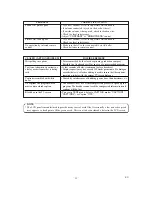
Page 34: ...ed The DVD does not contain sequences recorded from different camera angles This is not a malfunction Audio or subtitle language cannot be The DVD does not contain audio source or subtitles in the selected changed language This is not a malfunction Prohibited icon appears on the That operation is prohibited by the unit or the disc screen prohibiting an operation This is not a malfunction CD sound ...

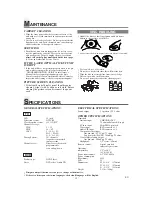
Page 35: ... case when it is not used To clean off use a soft cloth Do not use a hard cloth since this will mar the disc Wipe the disc in a straight line from center to edge Never wipe with a circular motion Do not use detergent or abrasive cleaning agents MAINTENANCE DISC HANDLING LCD 15 inch Television system NTSC M Closed caption system 15 119 FCC Channel coverage VHF 2 13 UHF 14 69 CATV 2 13 A W W 1 W 84 ...

Page 36: ...a pantalla de ajuste del nivel del negro o la pantalla de sonido envolvente durante la reproducción 13 Botón SEARCH MODE Presione para localizar un punto deseado 14 Botón AUDIO Para modo TV Presione para seleccionar el modo de sonido de TV ESTEREO SAP MONO Para modo DVD Presione para seleccionar un idioma de audio deseado si está disponible 15 Botón EJECT A Presione para extraer un disco de la uni...

Page 37: ...tón RETURN Presione para volver a la pantalla anterior en el menú de configuración 27 Botón A B Presione para repetir la reproducción de una sec ción seleccionada 28 Botón ANGLE Presione para cambiar el ángulo de la cámara y ver la secuencia que se está reproduciendo desde un ángulo diferente si existe 29 Botón REPEAT Repite la reproducción del disco título capítulo o pista actual 30 Botón SUBTITL...

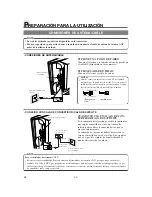
Page 38: ... CP MPO NE NT AUDIO AUDIO VIDEO 1 AN T HE AD PH ON E ANT SALIDA ENTRADA Cable coaxial de 75 ohmios Caja de convertidor o caja de satélite Parte posterior de este unidad desde Compañia de Cable o plato del satélite Para el instalador de sistemas CATV Esta nota tiene la finalidad de llamar la atención del instalador de sistemas CATV para que tenga en cuenta el Artículo 820 40 de la NEC que proporcio...

Page 39: ...n puede provocar daños a los altavoces NOTA Si su propio equipo es monofónico sólo tiene una toma de audio conecte el cable de audio a la toma AUDIO L de esta unidad Si conecta la toma VIDEO y la toma S VIDEO simultáneamente se da prioridad a la S VIDEO Puede conectar esta unidad a su equipo de audio vídeo Asegúrese de apagar todos los componentes del sistema antes de conectar otro componente Cons...

Page 40: ...one POWER para encender la unidad Si la pantalla del TV muestra interferencias de nieve y no funciona bien durante más de 5 segundos aparecerá SUGERENCIAS ÚTILES Siga las instrucciones de la pantalla Si este ajuste no funciona correctamente llame a nuestro teléfono de asistencia en la portada en este manual del usuario 2 Presione CH K L o los botones numéricos para seleccionar el número de canal d...

Page 41: ...utoprogramación del canal NO es nece saria cuando la unidad está conectada a una caja de convertidor o caja de satélite Sólo tiene que seleccionar el canal para caja de convertidor o entrada de satélite ej CA3 o CA4 de la unidad y a continuación seleccione el canal que desee en la caja de convertidor o la caja de satélite 1 Presione SETUP y a continuación presione K o L para seleccionar el IDIOMA ...

Page 42: ... modo DVD se desactiva primero y a continuación aparece la imagen y suena el sonido en el TV al cabo de unos 4 segundos De la misma manera cuando se presiona POWER para apagar la unidad en el modo DVD este modo se desactiva primero y a con tinuación se apaga la unidad Puede aparecer en la parte superior derecha de la pantalla del TV durante su fun cionamiento que avisa de que el DVD o el disco han...

Page 43: ...NTER para confirmar la selección REANUDACIÓN MENÚ DE DISCO DISC MENU ENTER STOP PLAY Presione PLAY para reproducir desde aquí Para reproducir desde el inicio primero presione STOP y luego PLAY REANUDACIÓN ACTIVADA 1 Durante la reproducción presione STOP C Aparecerá el mensaje de reanudación en la pan talla del TV 2 Presione PLAY O la reproducción contin uará desde el punto donde se paró la repro d...

Page 44: ...d THIS WARRANTY DOES NOT COVER PACKING MATERIALS ANY ACCESSORIES EXCEPT REMOTE CONTROL ANY COSMETIC PARTS COMPLETE ASSEMBLY PARTS DEMO OR FLOOR MODELS FUNAI CORP AND ITS REPRESENTATIVES OR AGENTS SHALL IN NO EVENT BE LIABLE FOR ANY GENERAL INDIRECT OR CONSEQUENTIAL DAMAGES ARISING OUT OF OR OCCASIONED BY THE USE OF OR THE INABILITY TO USE THIS PRODUCT THIS WARRANTY IS MADE IN LIEU OF ALL OTHER WAR...

Reviews: