7. Cylinder / Piston
7-7
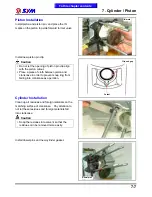
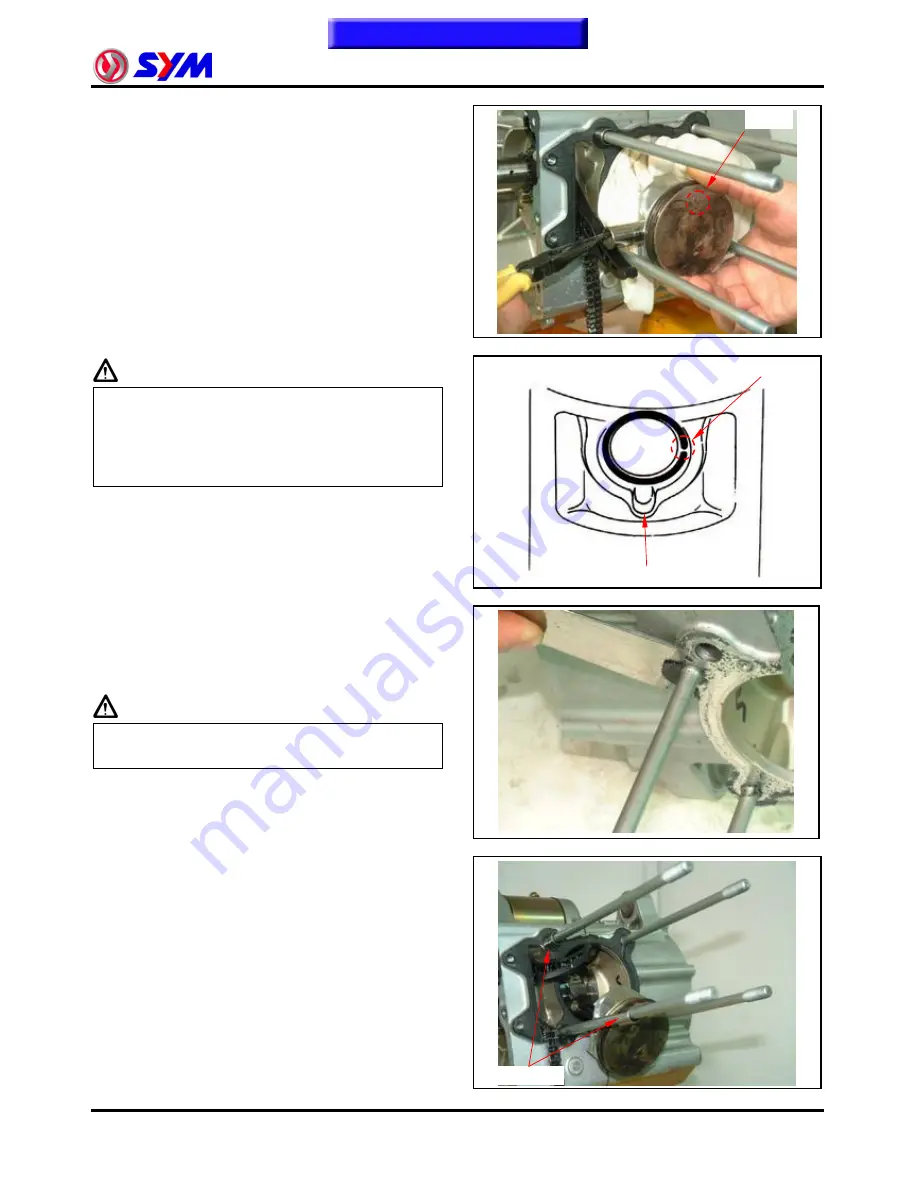
Piston Installation
Install piston and piston pin, and place the IN
marks on the piston top side forward to inlet valve.
Install new piston pin clip.
Caution
Do not let the opening of piston pin clip align
with the piston cutout.
Place a piece of cloth between piston and
crankcase in order to prevent snap ring from
falling into crankcase as operation.
Cylinder Installation
Clean up all residues and foreign materials on the
matching surface of crankcase. Pay attention to
not let these residues and foreign materials fall
into crankcase.
Caution
Soap the residues into solvent so that the
residues can be removed more easily.
Install dowel pins and new cylinder gasket.
Dowel pins
To this chapter contents
Clip end gap
IN mark
Cutout
Summary of Contents for Citycom.300i
Page 5: ...Serial Number Home page Contents...
Page 38: ...2 Maintenance Information 2 17 Note To this chapter contents...
Page 46: ...3 LUBRICATION SYSTEM 3 8 Notes To this chapter contents...
Page 106: ...4 Fuel Injection System 4 60 Note To this chapter contents...
Page 173: ...10 AC Generator Starting Clutch 10 10 Notes To this chapter contents...
Page 195: ...12 Cooling System 12 14 Notes To this chapter contents...
Page 223: ...14 Brake System 14 12 Note To this chapter contents...
Page 244: ...17 Electrical System 17 5 FUSE Fuse circuit diagram To this chapter contents...
Page 262: ...17 Electrical System 17 23 Note To this chapter contents...
Page 270: ...19 Electrical Diagram 19 1 Home page Contents LH30W EFi Electrical Diagram 19...


