10. FUEL SYSTEM
10-5
Remove carburetor, and allow it to cool off for 30
minutes.
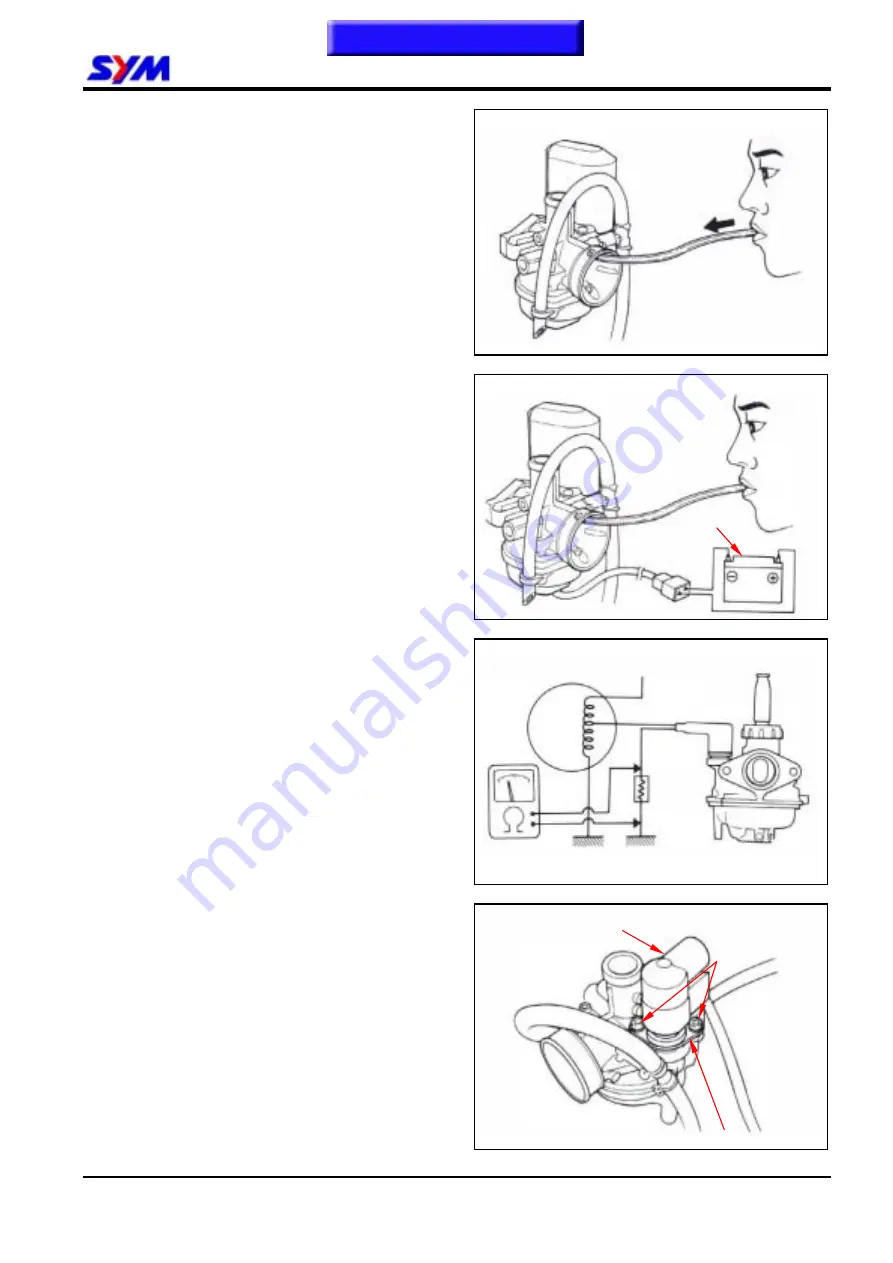
Connect fuel rich circuit with a hose and pump
compressed air to the hose.
Air should flow into fuel rich circuit.
Replace the auto by-starter if the circuit clogged.
Connect battery to starter’s connectors and wait
for several minutes.
Pump compressed air into the fuel rich circuit.
Air should not flow into the circuit.
If air flow through the circuit, then, replace the
starter.
Check resistor to make sure that the auto
by-starter is in normal. Engine is running.
If the resistor is in open-circuit, then current will
not flow into the PTC. Thus, the auto by-starter
is not operated.
However, if the resistor is in short-circuit, current
higher than specification will flow into the PTC.
Then, it will cause the fuel rich circuit close
rapidly, and difficult to start the scooter.
Resistance value: 10.2
Ω
Automatci By-Starter
Removal/Installation
Remove the cover of the auto by-starter.
Remove screw and mounting plate.
Remove the auto by-starter from carburetor.
Install in the reverse order of removal
procedures.
Battery
Auto by-starter
Alternator
Resistor
Mounting plate
Screw
Summary of Contents for Euro 100
Page 1: ...SERVICE MANUAL Forward Contents How To Use This Manual Mechanism Illustrations 50 100 50 100...
Page 7: ......
Page 25: ...1 GENERAL INFORMATION 1 18 Note This chapter Contents...
Page 45: ...3 LUBRICATION SYSTEM 3 6 NOTES This chapter Contents...
Page 81: ...8 FINAL DRIVING MECHANISM 8 6 Notes This chapter Contents...
Page 97: ...10 FUEL SYSTEM 10 10 Notes This chapter Contents...
Page 109: ...11 BRAKE SYSTEM 11 12 Notes This chapter Contents...
Page 121: ...12 BODY COVER 12 12 Note This chapter Contents...
Page 157: ...15 ELECTRICAL EQUIPMENT 15 22 Notes This chapter Contents...
Page 158: ...16 ELECTRICAL DIAGRAM 16 1 JET 50 ELECTRICAL DIAGRAM 16 Home page Contents...
Page 159: ...16 ELECTRICAL DIAGRAM 16 2 JET 50 EURO ELECTRICAL DIAGRAM Home page Contents...
Page 160: ...16 ELECTRICAL DIAGRAM 16 3 JET 100 ELECTRICAL DIAGRAM Home page Contents...
Page 161: ...16 ELECTRICAL DIAGRAM 16 4 Notes Home page Contents...


