background image


23 

§

CHECKING FOR FUEL LEAKAGE

§


  Check fuel tank, fuel cup, fuel hose, and carburetor for leakage. 

§

CHECKING THE LUBRICATION OF BODY’S VARIOUS MECHANISMS

§


  Check the body’s pivot points if they have enough lubrication.                                                                                                       

(for example, the pivot points on the main stand, the side stand, and the brake lever

etc.). 

§

CHECKING THE SPARK PLUG

§


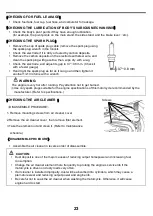
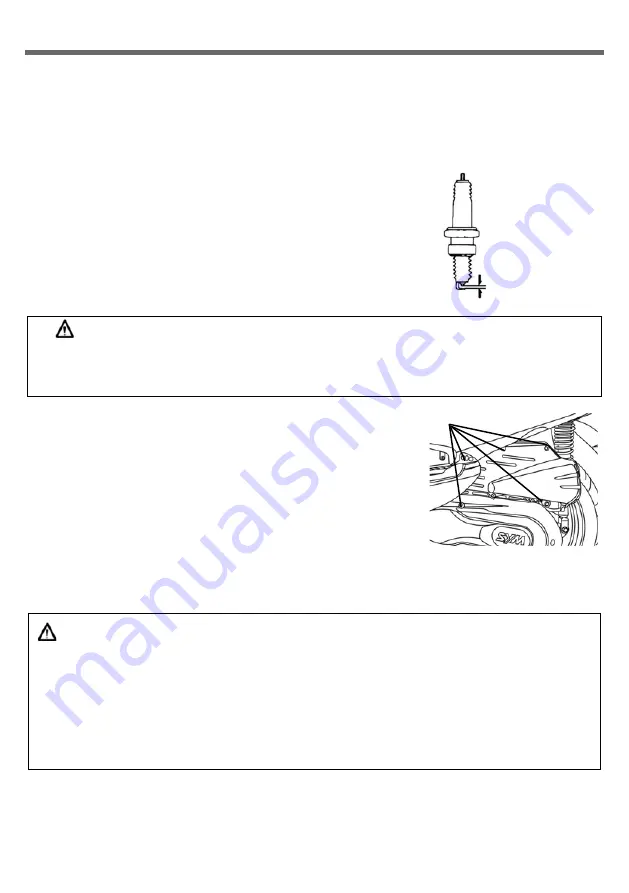
  Remove the cap of spark plug cable (remove the spark plug using 

the spark plug wrench in the tool kit. 

  Check the electrode if it is dirty or fouled by carbon deposits. 

  Remove the carbon deposits on the electrode with steel wire, and 

clean the spark plug with gasoline, then, wipe dry with a rag. 

  Check the electrode, and adjust its gap to 0.7~0.8 mm. (Check it 

with a feeler gauge) 

  Hand tight the spark plug as far as it can go and then tighten it 

another 1/2~3/4 turns with a wrench. 

  WARNING:     

The engine is very hot after running. Pay attention not to get burned. 

Use only spark plugs suitable for the engine specifications of this motorcycle recommended by the 
manufacturer. (Refer to specifications.) 


§

CHECKING THE AIR CLEANER 

§


DISASSEMBLE PRCEDURE


1. Remove mounting screws from air cleaner cover. 

2.Remove the air cleaner cover, then remove filter element.


3.Take the element out and clean it. (Refer to maintenance 

schedule.)


DISASSEMBLE PRCEDURE


  Assemble the air cleaner in reverse order of disassemble.


CAUTION:


  Dust deposit is one of the major causes of reducing output horsepower and increasing fuel 

consumption. 

  Change the air cleaner element more frequently to prolong the engine’s service life if the 

motorcycle is driven on dusty roads very often. 

  If air cleaner is installed improperly, dust will be absorbed into cylinders, which may cause a 

premature wear and reducing output power and engine life. 

  Be careful not to soak the air cleaner when washing the motorcycle. Otherwise, it will cause 

engine hard to start. 


0.7~0.8 mm 


Screws 

Summary of Contents for JOYRIDE 300 2022

Page 1: ...of throttle valve handle 15 Parking method 15 10 Inspection and maintenance before riding 16 Routine inspection 16 Engine oil inspection and change 16 Fuel inspection 17 Transmission oil inspection a...

Page 2: ...hecking the spark plug 23 Checking the air cleaner 23 11 When there is an abnormal condition or a trouble 24 Diagnosis when engine does not start 24 12 Suggestions on engine fuel 24 13 Transmission oi...

Page 3: ...p Storage Box Exhaust Muffler Front brake level Front turn signal light Ignition switch Rear brake level Frame number Air cleaner High low beam turn signal horn switch passing Wind mirror Side stand M...

Page 4: ...ught motorcycle very carefully but after they became familiar with their motorcycles they tended to become reckless which may result in an accident To remind you Please wear a safety helmet and proper...

Page 5: ...andle to swing and affects the riding safety Therefore do not overload your motorcycle CAUTION Do not place flammable materials such as rags between the body side cover and engine to avoid components...

Page 6: ...icator light goes on when the ignition switch is turned on and goes off shortly after the scooter starts moving If the ABS is normal it stays off If something is wrong with the ABS the indicator goes...

Page 7: ...Switching kilometers and miles In total display status Long press S and M button 2 0 5 seconds The mileage value can be reset to zero Trip reset In TRIP display status Press S button 2 0 5 seconds can...

Page 8: ...will not automatically return to the alert state 3 Automatic lock when turning from on to off In the released state stop and turn off the engine turn off the main switch After20 seconds it will autom...

Page 9: ...detect the vibration of the car body If the PKE does not exit the lock gear within 15 seconds after unlocking it will automatically return to the original anti theft alert state sound light alert or s...

Page 10: ...d touching the remote controller within the effective distance to unlock the vehicle 7 When the operating distance of the remote control is less than 10 meters pay attention to replace the built in ba...

Page 11: ...he main switch on press this button while holding the front or rear brake lever will start the engine CAUTION Release this button immediately after engine has been starter and never press the button a...

Page 12: ...gnal lights will flash To release simply return the turn signal light button to the original position Right side turn signal light flashing means you intend to make a right turn Left side turn signal...

Page 13: ...kes simultaneously when braking Avoid brake continuously for a long period of time because that may overheat the brakes and reduce its braking efficiency Slow down and brake early when riding in rainy...

Page 14: ...ait for 10 seconds before start it again It is harder to get the engine started after the motorcycle has been left idle for a long time or after refueling only after the fuel has been depleted Then it...

Page 15: ...icles behind When stop completely 3 Press the turn signal switch back to its original position and turn the ignition switch key to the OFF position to shut off the engine 4 Get off the motorcycle from...

Page 16: ...ed properly Do lights come on Can it be seen clearly from behind Tightness of Main Components Are screws nuts loosen Abnormal Points Do the previous troubles still exist CAUTION If any problem founded...

Page 17: ...ling the oil FUEL INSPECTION Turn main switch key to ON position and check fuel gauge s needle range to make sure there is enough amount of fuel in the fuel tank This motorcycle s engine is designed f...

Page 18: ...nut must be aligned with the pin see below figure Turn the adjustment nut on brake arm of front and rear wheels to adjust the free play of hand brake lever Hold the hand brake levers after adjusting...

Page 19: ...er cylinder cover 2 Wipe clean foreign materials dirt around the reservoir being careful not to let foreign materials fall into the reservoir 3 Remove the diaphragm plate and the diaphragm 4 Add brake...

Page 20: ...rush or a piece of sandpaper Install battery cable after cleaning and apply a thin coat of grease on the terminals Install battery in reverse order of removal The motorcycle is equipped with a mainten...

Page 21: ...results in the loss control of the steering handle and a punctured tire s STEERING HANDLE FRONT SHOCK ABSORBERS INSPECTION Perform this check with engine shut off and ignition switch key removed Visu...

Page 22: ...and left right signal lights flashes and also check if the warning buzzer sounds Check turn signal light covers if they are dirty crack or loosen Press horn button to check if it works CAUTION Specifi...

Page 23: ...ery hot after running Pay attention not to get burned Use only spark plugs suitable for the engine specifications of this motorcycle recommended by the manufacturer Refer to specifications CHECKING TH...

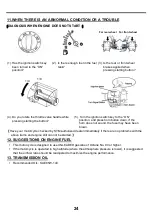
Page 24: ...ss horn button down if the horn does not sound the fuse may have been blown Have your motorcycle checked by SYM authorized dealer immediately if there are no problems with the above items and engine s...

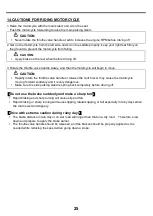
Page 25: ...e throttle valve handle or release the clutch lever may cause the motorcycle moving forward suddenly and it is very dangerous Make sure the side parking stand is spring back completely before driving...

Page 26: ...ssion oil R Replacement for every 5000KM 5 Months 18 Drive belt roller I R 19 Fuel tank switch and lines I I 20 Throttle valve operation and cable I I 21 Engine bolts and nuts I I 22 Cylinder head cyl...

Page 27: ...27 speed and after the motorcycle has accumulated a higher mileage Notes in the remarks are used to indicate the applicable models...

Page 28: ...fugal type Transmission CVT Front tire 120 70 15 Rear tire 140 70 14 Wheel Aluminum Tire pressure Front STD 2 00 kg cm2 Rear STD 2 00kg cm2 for 1 person 2 5kg cm2 for 2 persons Front brake Disk type 2...

Reviews: