background image

-3-

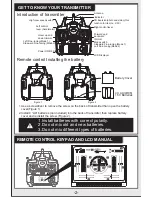
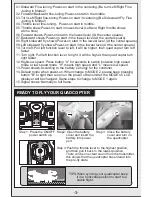
01.Sideward Fine-tuning :Power-on start in the centering.(Be turn Left/Right Fine

     -tuning in Mode2)

02.Forward/Backward fine-tuning:Power-on start in the middle.

03.Turn Left/Right fine-tuning:Power-on start in centering.(Be Sidewoard Fly Fine

     -tuning in Mode2)

04.Throttle lever fine-tuning

Power-on start in middle.

05.Throttle show:Power-on start in lowest level.(Left and Right throttle shows

     at one time)

06.Forward shows:Power-on start in the lowest level.(At the center spuare)

07.Backward shows:Power-on start in the lowest level.(At the center spuare)

08.Right sideward fly shows:Power-on start in the lowest level.(At the center spuare)

09.Left sideward fly shows:Power-on start in the lowest level.(At the center spuare)

10.Turn left: Pull left function lever to left, it will be higher, than quad copter turn left 

     faster.

11.Turn right: Pull left function lever to right, it will be higher, than quad copter turn 

     right faster.

12.High/Low speed: Press button “A” for seconds to switch between high speed 

     mode or low speed mode. “H” means high speed and “L” means low speed.

13.Power shows:According to the battery's energy for the controller.

14.Default mode when power-on.When change to MODE 2, please keep pressing 

     button "B" to right than return on the power of transmitter, the MODE on LCD 

     displayer will be changed. Same steps to change to MODE 1 again.

15.Signal shows:Normally to full frame.

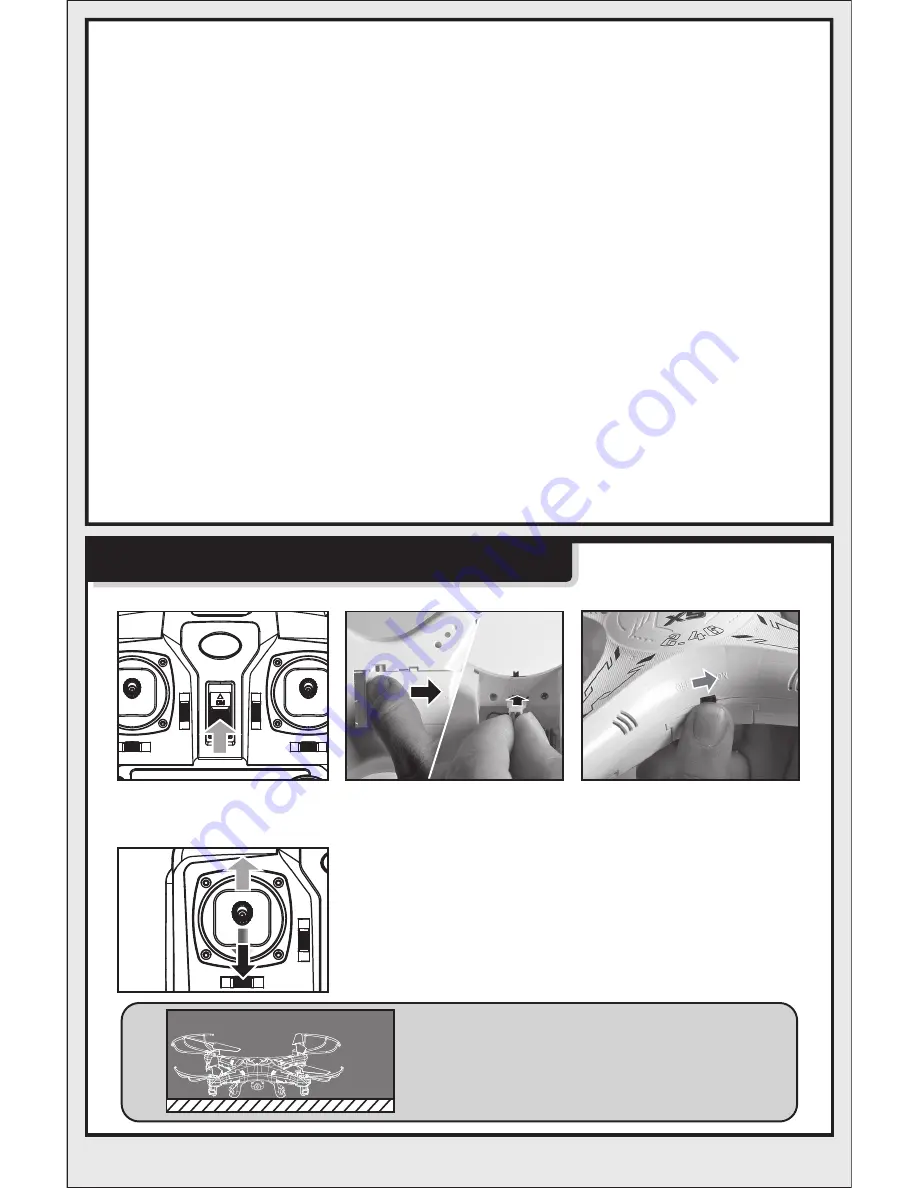
READY TO FLY YOUR QUADCOPTER

Step 1: Press the ON/OFF

            power switch up.

Step 3: Close the battery 

             cover and turn on 

             the quadcopter.

Step2: Open the battery 

           cover and insert the 

           battery into power

           port.

Step 4:Push the throttle lever to the highest position,

           and then pull it back to the lowest position.

           There will be one clear sound from the transmitter,

           this shows that the quadcopter has entered into 

           the pre-fly state.

TIPS:When syncing your quadcopter keep 

         it in a horizontal position to start to a 

         stable flight.

Horizontal

position

Summary of Contents for GB/T26701-2011

Page 1: ...º 3D eversion and throwing flight function The materials and specification mentioned in this instruction manual or the parts inside this package are for reference only Any updated or changed please refer to our website www symatoys com Four axis struture makes the quadcopter more flexible and rapid when flying It is wind resistant and can be flown indoor or outdoor 4CH 2 4G REMOTE CONTROL QUADCOPT...

Page 2: ...r USB Charging Cable Dear Customers Thank you for purchasing our flying model Please read this instruction manual carefully in order to master the skill more quickly and operate this product more safely In the mean time please well keep the original of this instruction manual for future reference ...

Page 3: ...deward Fine tuning Mode 1 Left Fine tuning Mode 2 Forward and backward trimmer Indicator Battery Cover 1 Use a screwdriver to remove the screw on the back of transmitter than open the battery cover Figure 1 2 Install 4 AA batteries not included into the back of transmitter than replace battery cover and reinstall the screw Figure 2 4 X AA LR06 1 5V Batteries REMOTE CONTROL KEYPAD AND LCD MANUAL Fi...

Page 4: ...lever to right it will be higher than quad copter turn right faster 12 High Low speed Press button A for seconds to switch between high speed mode or low speed mode H means high speed and L means low speed 13 Power shows According to the battery s energy for the controller 14 Default mode when power on When change to MODE 2 please keep pressing button B to right than return on the power of transmi...

Page 5: ...flashing slowly it means that the quadcopter has entered into the low battery state This time you need to charge the quadcopter with the USB cable provided CAUTIONS 3 5 4 3 Take out the USB charging cable and insert the battery power port to the small end of it Make sure the ports connect tight and correct 4 To charge battery please insert the USB port of provided USB charging cable to anyone USB ...

Reviews: