Chapter 1 Getting Started
Installing the Automated SatStat Program for Continual Status
Updates
1-18
Getting Started Guide
Installing the Automated SatStat Program
for Continual Status Updates
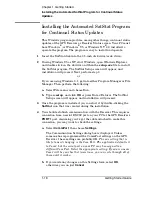
This Windows program provides, among other things, continual status
updates of the GPS Receiver or Receiver Status screen. Your PC must
have Windows
®
, or Windows
®
95, or Windows NT
®
4.0 installed to
operate the program. The program is easy to install and operate.
1
Insert the SatStat disk into the 3.5-inch disk drive (or
A:
drive).
2
If using Windows 95 or NT, start Windows, open Windows Explorer,
and double-click on the
A:
drive and then the
setup.exe
file
to install
the SatStat program. The SatStat Setup screen will appear, and
installation will proceed. Next, perform step 3.
or
If you are using Windows 3.1, get into either Program Manager or File
Manager. Then perform the following:
a.
Select File menu, and choose Run.
b.
Type
a:setup
, and click
OK
or press Enter (Return). The SatStat
Setup screen will appear, and installation will proceed.
3
Once the program is installed, you can start it by double-clicking the
SatStat
icon that was created during the installation.
4
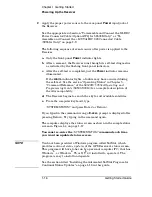
You should establish communication with the Receiver. This requires
connection from a serial RS-232 port on your PC to the GPS Receiver’s
PORT 1
port. Assuming you’ve got the cable attached to make this
connection, you may want to check the settings.
a.
Select
CommPort
, then choose
Settings
.
The Communication Settings dialog box is displayed. Unless
someone has reprogrammed the CommPort settings on the GPS
Receiver, these settings are probably OK.
The one setting that is
likely to need changing is the Com Port. The application defaults it
to Com1, but the serial port on your PC may be assigned to a
different Com Port. Select the appropriate setting. If you are unsure,
Com1 will be your best bet (worst case, you can cycle through all of
them until it works).
b.
If you made any changes on this Settings form, select
OK
,
otherwise you can just
Cancel
.
Summary of Contents for 58503B
Page 13: ...1 Getting Started ...
Page 37: ...2 Features and Functions ...
Page 62: ...Chapter 2 Features and Functions In Case of a Problem 2 26 Getting Started Guide ...
Page 63: ...3 Using Option 001 Front Panel Display Keypad 58503B Only ...
Page 75: ...4 58503B Specifications ...
Page 80: ...Chapter 4 58503B Specifications Specifications and Characteristics 4 6 Getting Started Guide ...
Page 81: ...5 59551A Specifications ...
Page 86: ...Chapter 5 59551A Specifications Specifications and Characteristics 5 6 Getting Started Guide ...

