S100 User Guide – Rev. D – June 2005
21
2
5
3
Setting Up the Hardware
On the S100 Front Panel
Complete the following steps before turning on the power:
1.
Connect
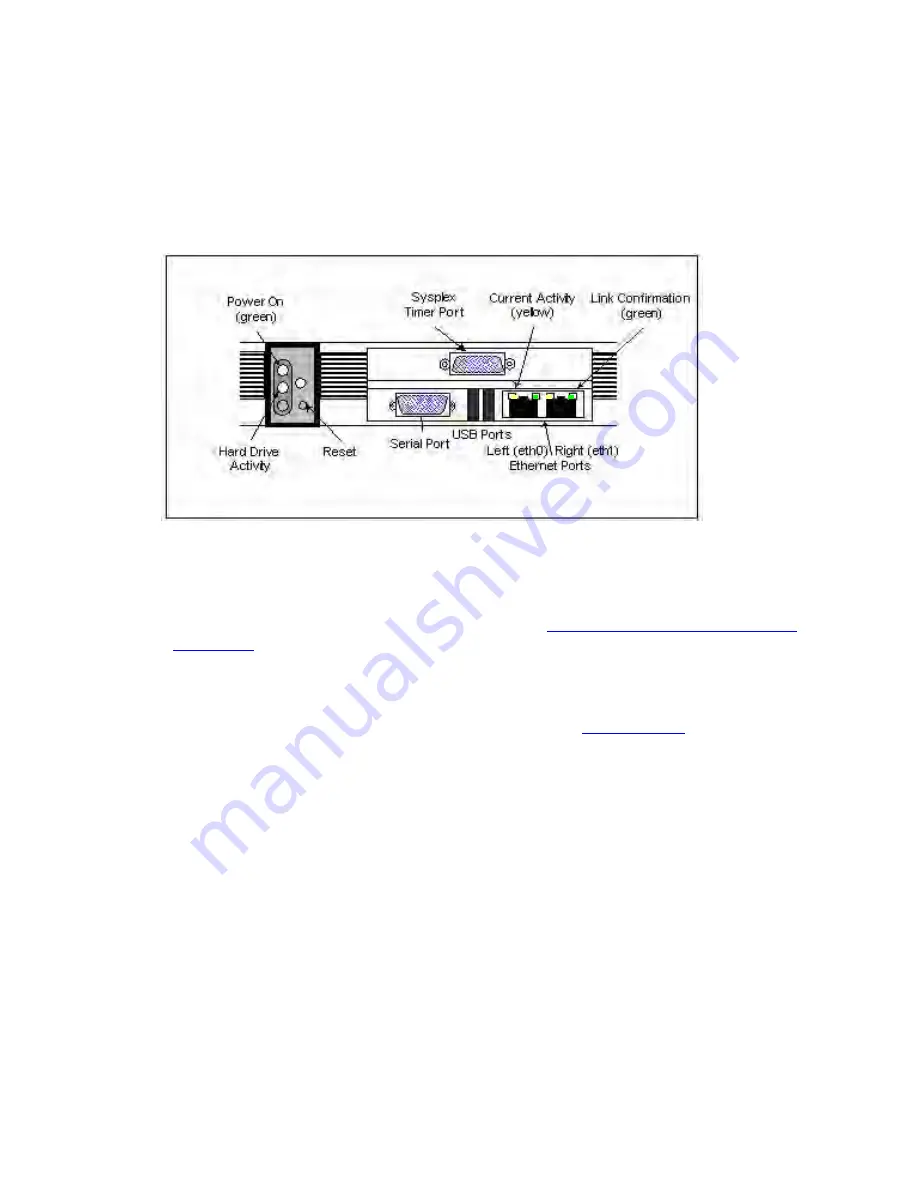
the 9-pin serial cable from the PC workstation to the S100 serial port. You are
doing this so to configure the S100 using a PC; see
“Establishing A Serial Connection”
on page 24
in the next section.
2.
Connect
the RJ45-terminated Ethernet cable to one or both network ports on the S100.
Note:
If only one network connection is required, use the
left
Ethernet port (
eth0
). The
two USB ports are not functionable on this S100 release.
Sysplex Timer
Port: This port
outputs UTC only.
Figure 3-2:
S100 Front Panel Close-up
Summary of Contents for SyncServer S100
Page 2: ...2 S100 User Guide Rev D June 2005 1 ...
Page 20: ...12 S100 User Guide Rev D June 2005 1 SyncServer S100 ...
Page 60: ...52 S100 User Guide Rev D June 2005 SyncServer S100 ...
Page 94: ...86 S100 User Guide Rev D June 2005 SyncServer S100 ...
Page 108: ...100 S100 User Guide Rev D June 2005 SyncServer S100 Figure 5 43 Large Net NTP Configuration ...
Page 109: ...S100 User Guide Rev D June 2005 101 2 5 3 Figure 5 44 Large Net NTP Configuration 2 ...
Page 116: ...108 S100 User Guide Rev D June 2005 SyncServer S100 ...
Page 126: ...118 S100 User Guide Rev D June 2005 SyncServer S100 ...
Page 150: ...142 S100 User Guide Rev D June 2005 1 SyncServer S100 ...
Page 166: ...158 S100 User Guide Rev D June 2005 1 SyncServer S100 ...


