40
TimeProvider 500 2.0 User’s Guide
098-00172-000 Revision A – December, 2009
Chapter 2 Installation & Configuration
Configuration Setup
Establish Serial Communication
Serial communication with TimeProvider 500 is established so that configuration
can be accomplished. To establish serial communication, follow these steps:
1. Connect a straight-through serial cable from the computer’s serial port with
theTimeProvider 500’s 9-pin serial port connector labeled RS232 MGMT.
2. Run your terminal emulation program, and configure the designated COM port
on the computer using
Logon to TimeProvider 500
Logon is required to configure or view TimeProvider 500 settings. To logon to the
TimeProvider 500, follow these steps:
1. Wait for the system to boot.
2. At the login prompt, type
admin
,
then press
Enter
.
3. At the password prompt, type
symmadmin**
, then press
Enter
.
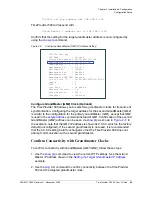
A successful logon responds with the
TP-500>
prompt. Below is an example
of what you will see.
Note
: The configuration steps throughout this section assumes that
the TimeProvider 500 initially has the factory default configuration. If
the TimeProvider 500 does not have the factory default configuration,
the baud rate may not be 57600. Other possible baud rates are 4800,
9600, 19200, and 38400.
Table 2-1. COM Port Settings
Settings
Value
Bits per second
57600
Data bits
8
Parity
None
Stop bits
1
Flow control
None
Note
: The baud rate can be changed using the CLI command,
set
eia-232 baud
, on page 88. Also, the
current serial port settings can be viewed using
show eia-232
.
Summary of Contents for TimeProvider 500
Page 10: ...Table of Contents 10 TimeProvider 500 2 0 User s Guide 098 00172 000 Revision A December 2009 ...
Page 12: ...List of Figures 12 TimeProvider 500 2 0 User s Guide 098 00172 000 Revision A December 2009 ...
Page 146: ...146 TimeProvider 500 2 0 User s Guide 098 00172 000 Revision A December 2009 T1 Format ...
Page 174: ...Index W W 174 TimeProvider 500 2 0 User s Guide 098 00172 000 Revision A December 2009 ...


