background image


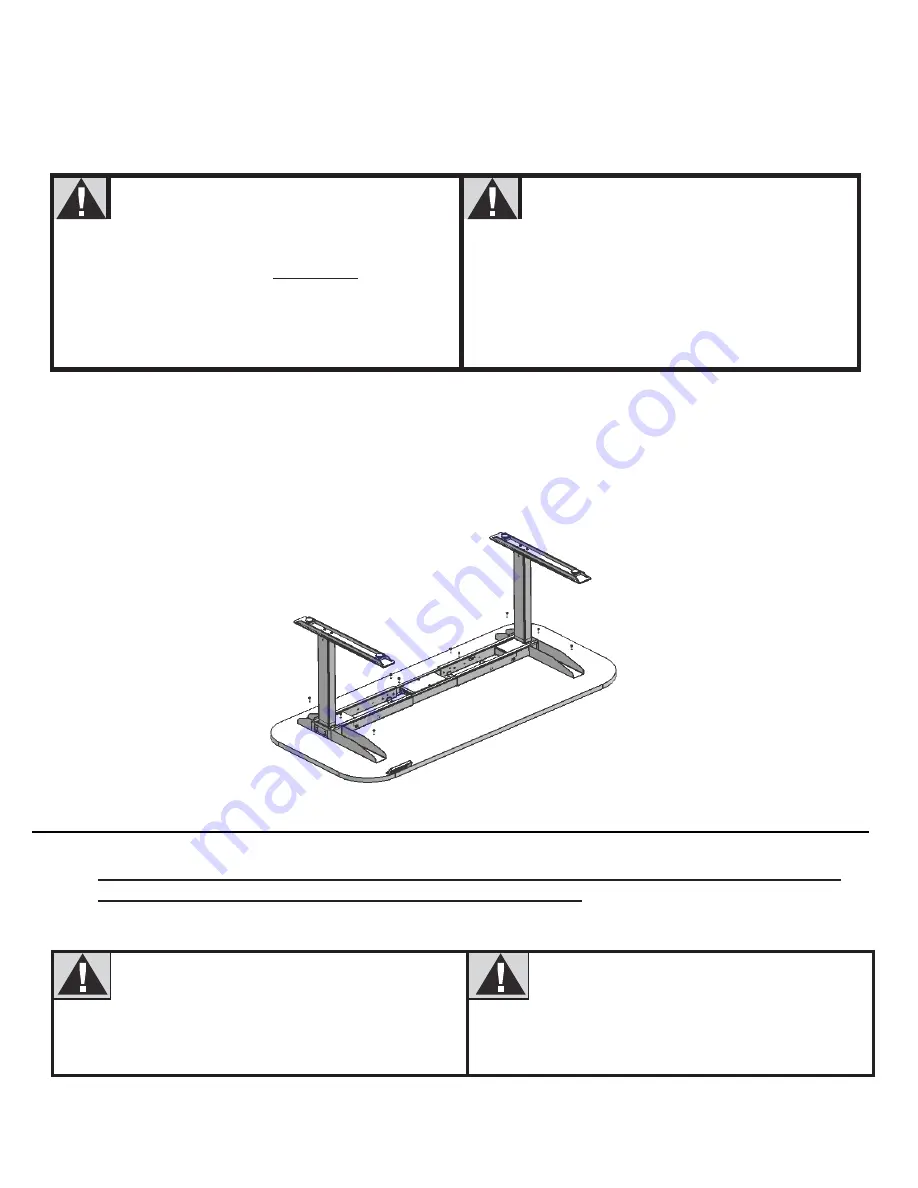
I.  Double-check that the base is centered on the underside of the desktop and is located where you 

want it. Also, double-check that the included wood screws are not too long for your desktop and won’t 

puncture the surface when screwed all the way in.


We recommend you pre-drill any holes 

needed for  fasteners connecting 


Never use countersunk screws to 
fasten into the  desktop.


                           the base to the top. 

NOTE: 

PLEASE ENSURE THAT YOUR 

DESKTOP DOES NOT 

ALREADY 

HAVE 

HOLES BY CHECKING BOTH SIDES.


This will make it easier to attach the screws 

and will greatly lessen the stress caused by 

driving a screw into the desktop material.


This will cause much greater stress  

on the desktop. Ensure any screw used


will not puncture through the desktop surface 

or otherwise damage the material. 


Now, proceed with securing the desk base to the desktop using qty 6 of the larger Pan Head 
Screws.(Part#13) 
Install as follows: 
3 per side bracket (left) 
3 per side bracket (Right) 


J. 

IN THIS FOLLOWING STEP, DO NOT OVERTIGHTEN SCREWS. OVER TIGHTENING MAY 
CAUSE THE PLASTIC ON THE COMPONENTS TO BREAK. 


We recommend you pre-drill any holes 

needed for fasteners connecting the


Never use countersunk screws to fasten 

into the desktop. This will cause much


Control box to the top. This will make   

it easier to attach the screws and will greatly 

lessen the stress caused by driving a screw 

into the desktop material.


greater stress on the desktop. Ensure 

any screw used will not puncture through 

the desktop surface or otherwise damage 

the material.


Use qty 2 of the smaller Pan Head Screws(Part#14)  

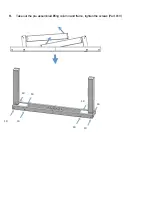
Summary of Contents for ENDEAVOUR

Page 1: ...SEMBLY AND USE UL Number E485560 IMPORTANT Any user or installer of desk base must study this manual carefully If this desk is sold please provide the manual to the buyer Questions Please contact Symmetry 888 552 5699 or email info symmetryoffice com ...

Page 2: ...circumstances does the manufactureraccept warrantyclaims or liability claims for damages caused from improper use or handling of the desk frame other than that which isdescribedinthisoperationmanual 3 SETUP ANDINSTALLATION Oncethe deskhas beenassembled adjustthe feetso thatthe deskis leveland doesnotshiftits position Afterthis connectthe desk to the 110v or 230v outletand the desk is ready for use...

Page 3: ... Brackets Qty 1 Keypad Qty 1 power cord Qty 1 Control box Qty 4 Leveling Studs Pleasecountallpiecesbeforedisposingofanycartonorpackingmaterial Usea paddedorcarpeted areafor Hardware 8 9 10 11 12 13 14 15 4mm 1PC 5mm 1PC M6 16 8PCS M6 45 8PCS M8 16 8PCS M5 20 6PCS M5 16 2PCS 8PCS ...

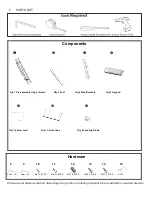
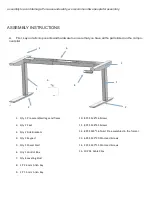
Page 4: ...po nents list 1 4 6 3 2 5 3 1 2 10 8 PCS M6 16 Screws 11 8 PCS M6 45 Screws 12 8 PCS M8 16 Nuts Pre assembled in the frame 13 6 PCS M5 20 Pan Head Screws 14 2 PCS M5 15 Pan Head Screws 15 10 PCS Cable Clips 1 Qty 1 Pre assembled legs and frame 2 Qty 2 Feet 3 Qty 2 Side Brackets 4 Qty 1 Keypad 5 Qty 1 Power Cord 6 Qty 1 Control Box 7 Qty 4 Leveling Stud 8 1 PC 4mm Allen Key 9 1 PC 5mm Allen Key ...

Page 5: ...5 B Take out the pre assembled lifting column and frame tighten the screws Part 10 10 10 10 10 10 10 10 10 ...

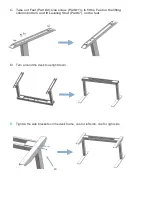
Page 6: ...se screw Part 11 to fit the Feet on the lifting column bottom and fit Leveling Stud Part 7 on the feet D Turn around the desk to upright down E Tighten the side brackets on the desk frame one for left side one for right side 10 ...

Page 7: ...idthofthebaseto fitthedesktopby sliding the two halvesoutward 43 3 to 78 7 max Place the base where you want it Some will want the frame to be all the wayto the edgeof the desk We recommendleavingatleast 1 2 ofdesktopwidth oneachside protruding beyond the frame width Depth The minimum depth top you can use is 23 We recommend that you center the base on the desktop front to back If your top is 25 5...

Page 8: ... Ensureanyscrewused will not puncture through the desktop surface orotherwisedamagethematerial Now proceed with securing the desk base to the desktop using qty 6 of the larger Pan Head Screws Part 13 Install as follows 3 per side bracket left 3 per side bracket Right J IN THIS FOLLOWING STEP DO NOT OVERTIGHTEN SCREWS OVER TIGHTENING MAY CAUSE THE PLASTIC ON THE COMPONENTS TO BREAK Werecommendyoupr...

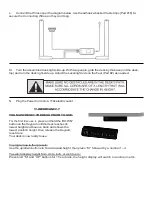
Page 9: ...IC ON THE COMPONENTS TO BREAK Place the Keypad Part 4 so the front of the keypad runs flush with the desktop edge or recessedup to 1 8 The Keypad can be placed anywhere along the front edge of the desk but we recommend placing it near the side so it doesn t interfere with yourchairorlegswhenseated Useqty 2 of the smallerPanHeadScrews Part 14 to attach the Keypad Part 4 to the desktop ...

Page 10: ... a 110v electric outlet IMPORTANT YOU MUST RESET THE DESK PRIOR TO USE For the first time use it press and hold the DOWN button on the Keypad untilthedeskreachesits lowestheight and bounce back and shows the lowest position height then release the Keypad reset done Yourdeskisnowreadytouse To program up to four presets Use the up down buttons to find a desired height then press M followed by a numb...

Page 11: ... 5 inches stop the reset procedure and contact your retailer or manufacturer If the handset displays E04 E05 or E06 check if any of the leg is over loaded and remove the weight operate again If the handset displays ER0 let the base cool down for 20 minutes If thedeskseemstobeuneven trytheresetinstructionsabove If that does not work youmay need toadjustthelevelersatthebottomofthefoot In the event o...

Reviews: