background image

INSTALLATION WARNINGS: 

•  Read the entire instruction manual before beginning any installation or assembly
•  The installer must verify that the attachment surface can safely support the  
  combined weight of all the attached equipment and hardware
•  Improper installation of this equipment may cause extensive property damage  
  or serious personal injury, either during or after installation

DISCLAIMER: 

•  The manufacturer and/or distributor will bear no responsibility for any damages of  
  any kind arising from any improper installation of this product 
•  In no way will the manufacturer and/or distributor be held liable for any damage to  
  the monitor, property or personal injury should any excessive force either intentionally  
  or unintentional be applied to the monitor or monitor support assembly

7752180 Rev_A

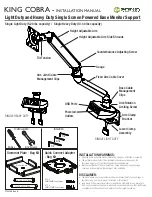
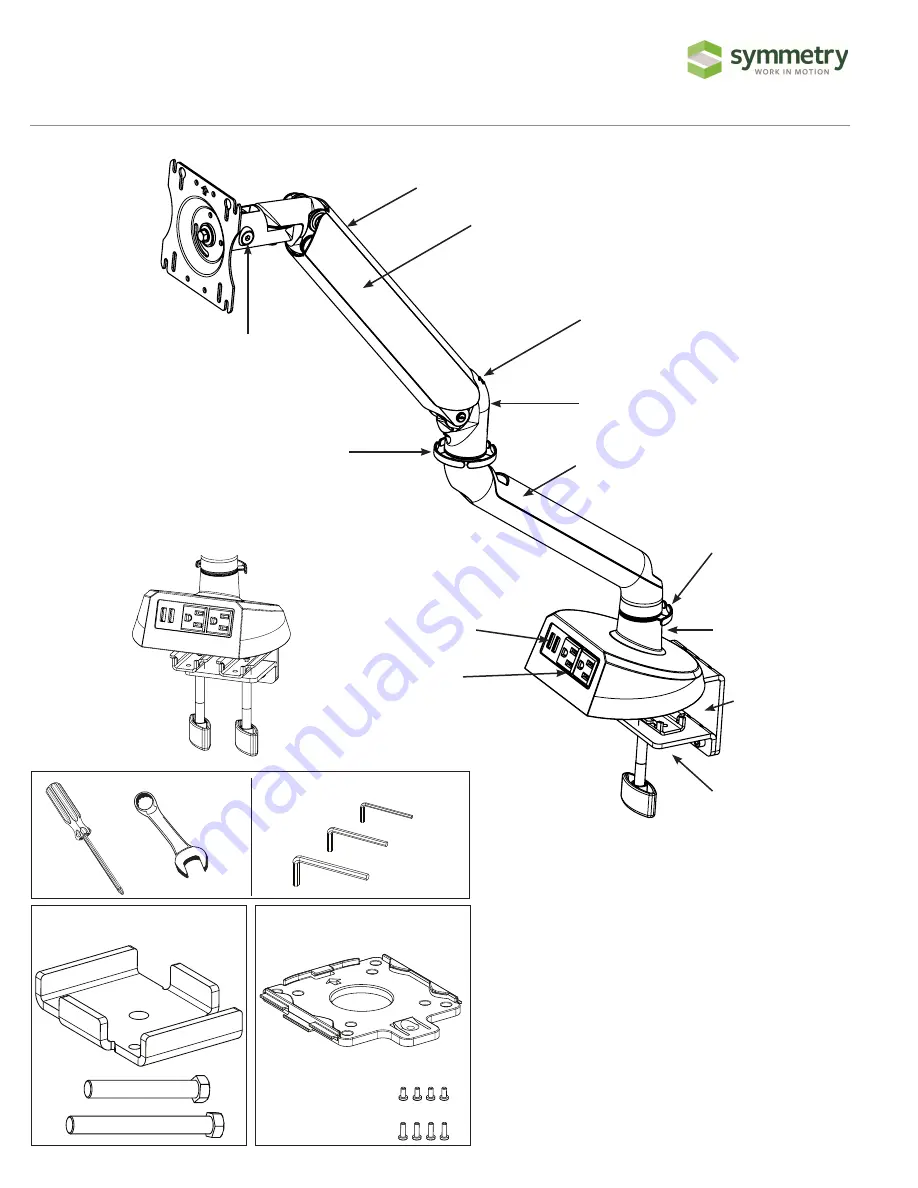
Grommet Plate - Bag Kit

Quick Connect Adapter 

- Bag Kit

Grommet Plate

3/8-16 x 2 1/2” Bolt

3/8-16 x 3 1/4” Bolt

QTY - 4 

4MM x 8MM Long Screws

QTY - 4 

4MM x 12MM Long Screws

Height Adjustable Arm Side Shrouds

Height Adjustable Arm

Counterbalance Adjusting Screw

Fixed Arm Cable Cover

Base Cable  

Management 

Clips

Arm Rotation  
Limiting Screw

Arm Joint Cable 
Management Clips

USB Ports

Powered 
Outlets

Arm Clamp  
Bracket

Lower Clamp  
Assembly

Gauge

Tilt Tension

KING COBRA - 

INSTALLATION MANUAL

Light Duty and Heavy Duty Single Screen Powered Base Monitor Support

Single Light Duty (5-20 lbs capacity)  /  Single Heavy Duty (10-30 lbs capacity)

1/8”

3/16”

1/4”

INCLUDED:

YOU WILL NEED:

9/16” Wrench

Phillips

SINGLE LIGHT DUTY

SINGLE HEAVY DUTY

Summary of Contents for KING COBRA Series

Page 1: ...l injury should any excessive force either intentionally or unintentional be applied to the monitor or monitor support assembly 7752180 Rev_A Grommet Plate Bag Kit Quick Connect Adapter Bag Kit Grommet Plate 3 8 16 x 2 1 2 Bolt 3 8 16 x 3 1 4 Bolt QTY 4 4MM x 8MM Long Screws QTY 4 4MM x 12MM Long Screws Height Adjustable Arm Side Shrouds Height Adjustable Arm Counterbalance Adjusting Screw Fixed A...

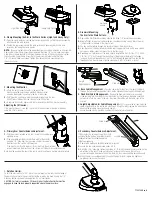
Page 2: ...ove the Lower Clamp Assembly by removing the three 1 4 socket head cap screws Slide the arm clamp bracket in the space between the rear of the desk and panel system then attach the Lower Clamp Assembly to the arm clamp bracket using the three 1 4 20 socket head cap screws Tighten the clamp knob s to securely clamp to the work surface Light Duty Clamp I Rotation Limiter To limit the arm rotation to...

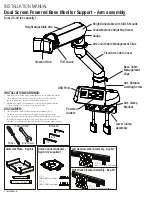
Page 3: ...ive force either intentionally or unintentional be applied to the monitor or monitor support assembly Grommet Plate Bag Kit Quick Connect Adapter Bag Kit 2 supplied Left Hand Crossbar Assembly Bag Kit Right Hand Crossbar Assembly Bag Kit Grommet Plate 3 8 16 x 2 1 2 Bolt 3 8 16 x 3 1 4 Bolt Height Adjustable Arm Side Shrouds Counterbalance Adjusting Screw Gauge Fixed Arm Cable Cover Base Cable Man...

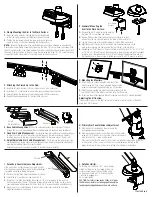
Page 4: ...ps at the arm joint G Height Adjustable Arm Cable Management Pull to remove the left and right side cable shrouds and lay the cables into side shroud trough Carefully replace the side shrouds ensuring the retaining clips are correctly seated Ensure enough slack is provided in cables to provide full arm articulation C Attaching the Crossbars to the Hub 1 Insert the left hand crossbar into the cross...

Page 5: ...ng arm 90 clockwise and lock out the rotation with the screw provided STEP 3 To slide the monitor left or right loosen the 2 thumb knobs located at the top of the slider STEP 2 Using the 4 thumb knobs install the slider to the monitor mount King Cobra Monitor Slider Installation ...

Reviews: