Rinnai Australia
17
Operation & Installation Manual
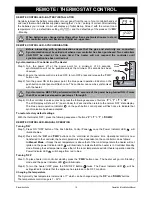
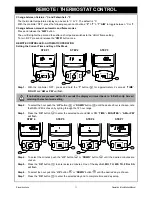
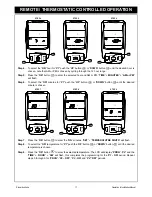
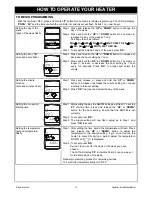
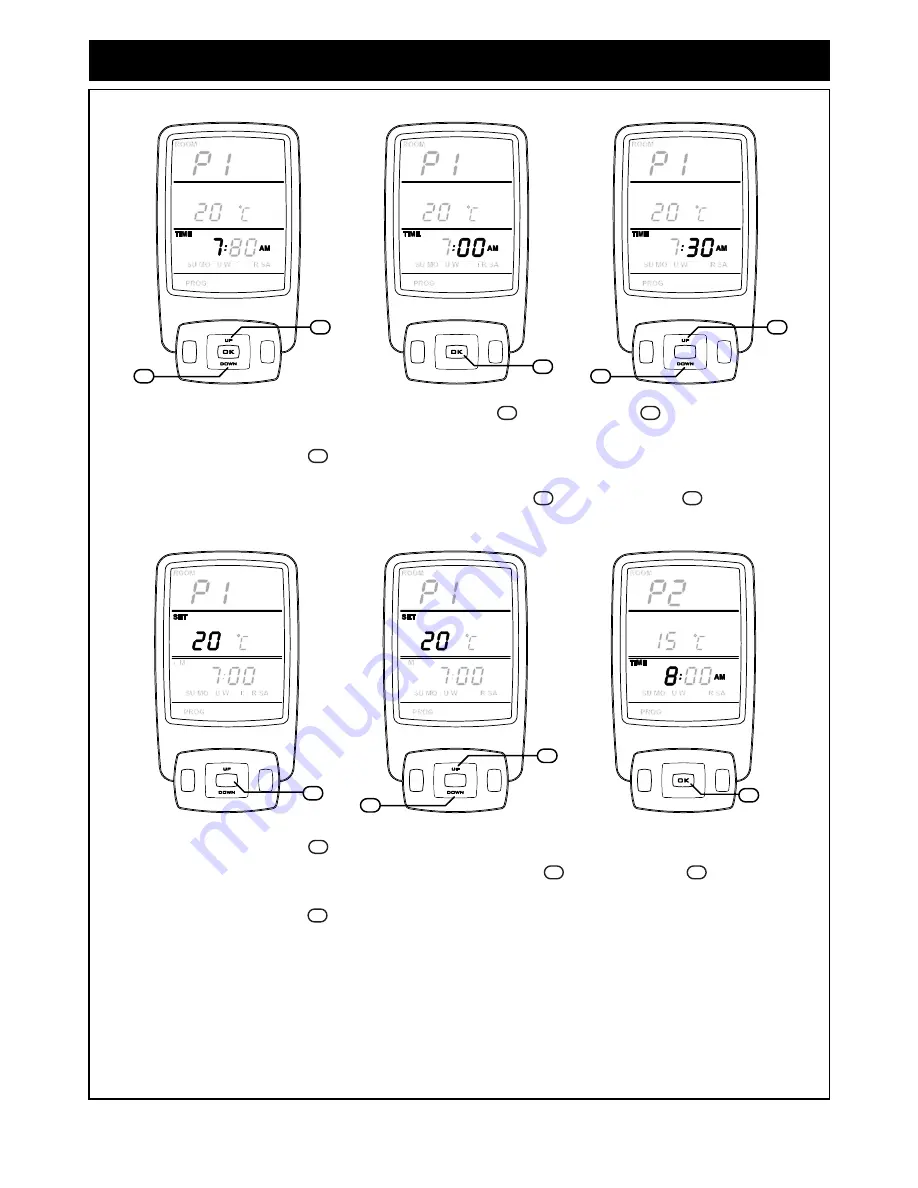
REMOTE / THERMOSTATIC CONTROLLED OPERATION
Step 4.
To select the
‘ON’
hour for
‘P1’
push the
‘UP
’ button
or
‘DOWN’
button
until the desired hour is
chosen, note that AM or PM is chosen by cycling through the 12 hour range.
Step 5.
Press the
‘OK’
button
to enter the selected hour and AM or PM.
‘TIME’
+ ‘
MINUTES’
+
‘AM or PM’
will flash.
Step 6.
To select the
‘ON’
minutes for
‘P1’
push the
‘UP
’ button
or
‘DOWN’
button
until the desired
minute is chosen.
Step 7.
Press the
‘OK’
button
to enter the
‘ON’
minutes.
‘SET’
+
‘TEMPERATUTRE DIGITS’
will flash.
Step 8.
To select the
‘ON’
temperature for
‘P1’
push the
‘UP
’ button
or
‘DOWN’
button
until the desired
temperature is chosen.
Step 9.
Press the
‘OK’
button
to enter the selected temperature. The LCD will display
‘PROG’. ‘P2’
and the
‘TIME’
+
‘HOUR’
+
‘AM’
will flash, this completes the programming for the
‘P1 - ON’
period. Repeat
steps 3 through 9 for
‘PROG’. ‘P2 - OFF’
,
‘P3 - ON’
and
‘P4’
‘OFF’
periods.
10
15
STEP 4
A/M
PWR
T
P
DOWN
UP
OK
A/M
PWR
T
P
10
STEP 5
A/M
PWR
T
P
DOWN
UP
OK
A/M
PWR
T
P
DOWN
UP
16
STEP 6
A/M
PWR
T
P
DOWN
UP
OK
A/M
PWR
OK
T
P
10
15
15
11
10
15
STEP 9
A/M
PWR
T
P
DOWN
UP
OK
A/M
PWR
T
P
DOWN
UP
16
STEP 7
A/M
PWR
T
P
DOWN
UP
OK
A/M
PWR
OK
T
P
STEP 8
A/M
PWR
T
P
DOWN
UP
OK
A/M
PWR
OK
T
P
10
16
15
11
10
15
11


