Rinnai Australia
39
Installation Manual
HEATER INSTALLATION
Step 11. REPLACE PANELS
When satisfied that the appliance is igniting and operating correctly, replace install horizontal cover panel and the
manual control switch panel in reverse order of ‘Step 3’ page 34.
NOTE: If using the Square Fasica and surround assembly ensure you connect the RJ45 extension lead
supplied with the Square assembly and allow it to dangle outside the heater.
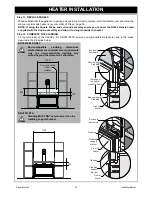
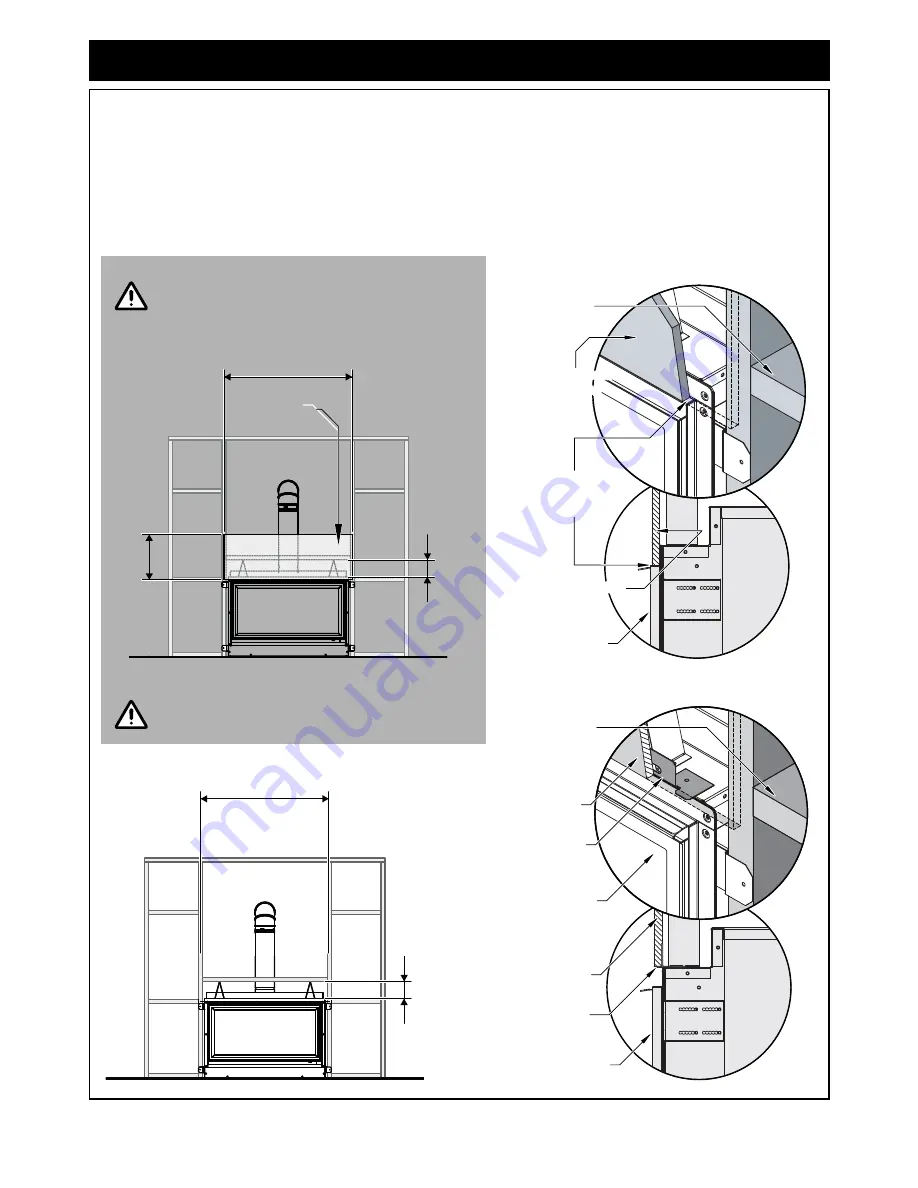
Step 12. COMPLETE THE CLADDING
Fit the remainder of the cladding. For RDV3610ETR ensure non-combustible material is used in the areas
depicted in the drawings below.
RDV3610ETR ONLY
Non-combustible cladding dimensions
marked below are minimum size requirements
only, the non-combustible cladding may
extend beyond the dimensions stipulated.
RDV3611ETR
Cladding MUST NOT extend lower than the
cladding support bracket.
WARNING
400
150
1120
N on-com bustible
C ladding
(shaded)
Top ledge of
the heater
cladding frame
Enclosure
framework
Non-combustible
Cladding
Non-combustible
Cladding
Non-combustible
Cladding
Non-combustible
Cladding
Front of
heater
WARNING
Front of
heater
Enclosure
framework
Cladding
Cladding
Cladding
support
bracket
Cladding
support
bracket
Front of
heater
150
1120

