
Align 300
Installation Instructions
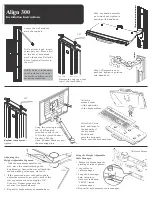
Slide keyboard assembly
on to track and tighten in
position with hand knob.
Locate the wall stud and
mark the top hole.
Drill a pilot hole and insert
screw part way. Place a level
on the side of mount and
mark other holes. Drill pilot
holes. Tighten all screws to
the wall.
1/8˝
NOTE:
Refer to instruction
sheet included with track
for deatils on different wall
mounting conditions.
Remove the end cap at one
top of the track slider.
Slide LCD assembly on to
track and tighten in position
with hand knob.
1/8˝
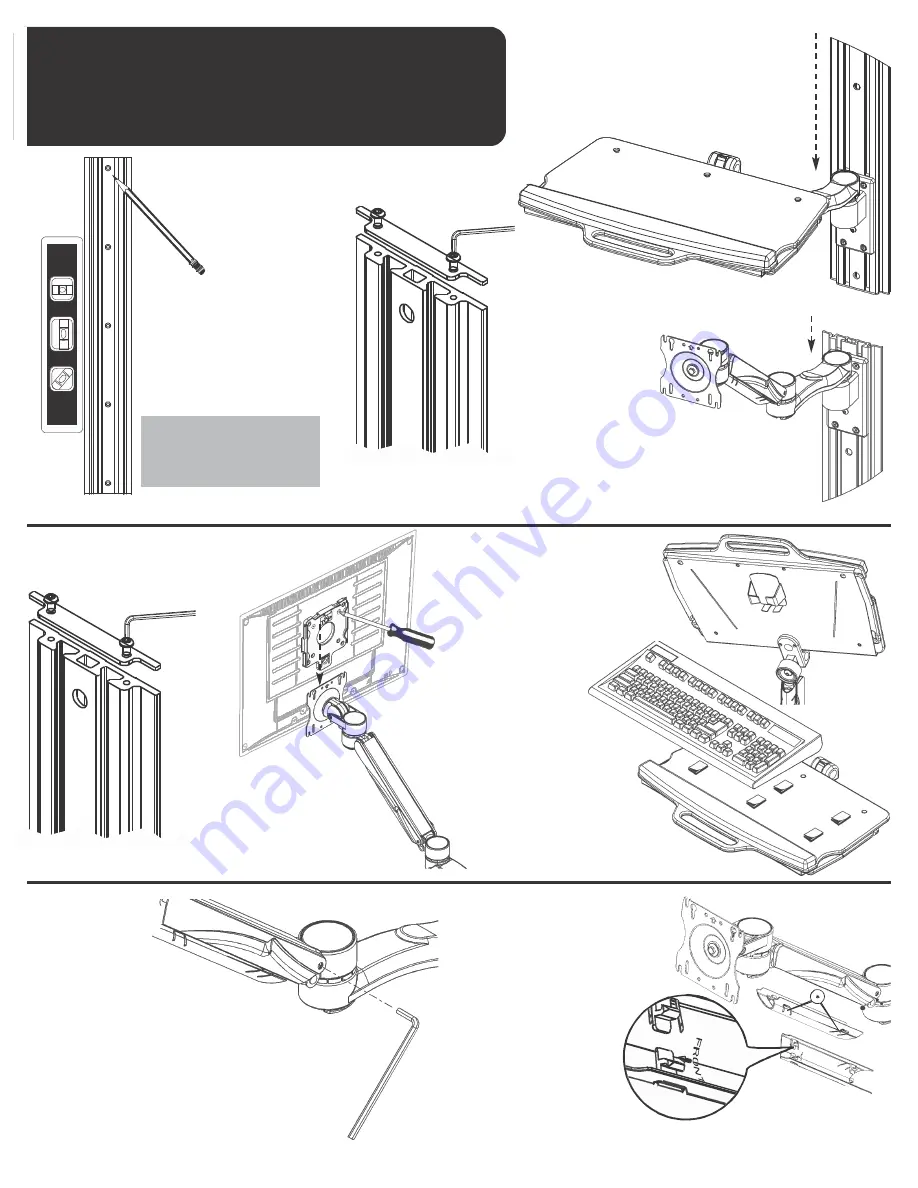
Affix the
mouse holder
to the underside
of the keyboard tray.
Replace end cap and
tighten.
Using the screws provided
and a Phillips head
screwdriver, attach the
LCD to the Quick Connect
Bracket. Slide the
Quick Connect Bracket on to
the mounting plate.
Affix the 6 Velcro
hook and loops to
the underside of
the keyboard.
Position and
press the keyboard
firmly onto the keyboard tray.
*Release Points
Adjusting the
Height Adjustable Segment:
1. With the monitor mounted to the
arm, move the monitor through the
height range; Ensure the arm will hold the
monitor in the position you placed it.
2. If the monitor drops or rebounds upward,
adjust the tension screw at the back of the
arm segment as shown using the 3/16”
Allen key. Repeat steps until the
monitor is counterbalanced.
3. Repeat for keyboard tray counterbalance.
3/16˝
Using the Height Adjustable
Cable Manager:
1. Remove cable manager by
pinching at release points.
2. Lay cables in
cable manager.
3. Snap cable manager
back into place.
Note text indication
“FRONT” inside
cable manager.
4. Repeat for keyboard tray cable manager.


