※
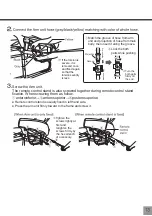
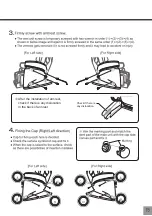
If the torsion is
severe, it is
removed once
and fixed again
so that the
torsion severity
is less
①
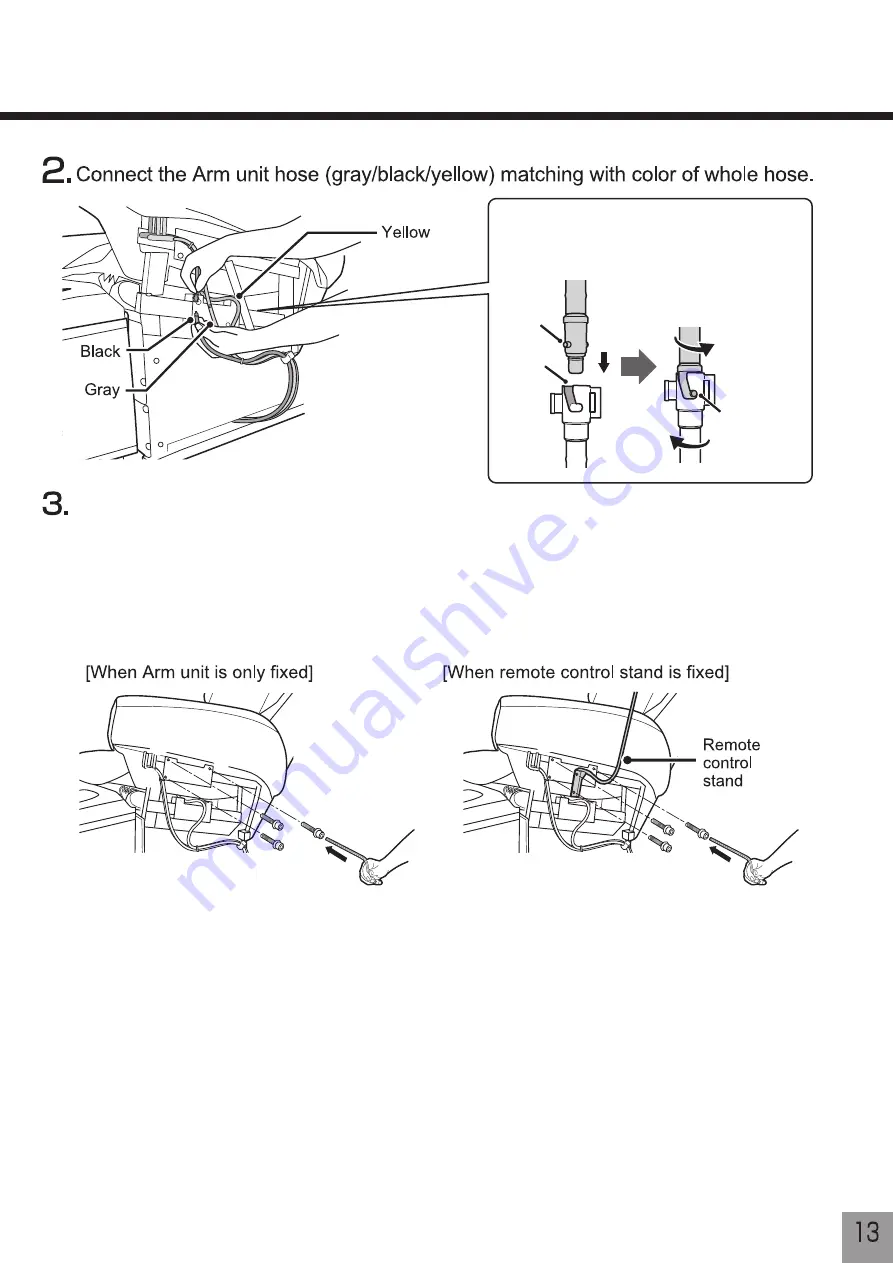
Match the groove of hose from arm
unit and projection of hose from main
body, then insert it along the groove.
②
Lock the both
parts while pushing.
Projection
Groove
Arm unit side
Main body side
※
Turn the
both parts
firmly till
the end.
①
②
③
①
②
③
①
②
③
①
②
③
※
Tighten the
screws lightly at
first and
retighten the
screws firmly by
the hex wrench
of accessory.
Screw the Arm unit.
The remote control stand is also screwed together during remote control stand
fixation. When screwing them as follow.
①
DQWHURLQIHULRUĺ
②
DQWHURVXSHULRUĺ
③
posterosuperioe
Ɣ
Remote control stand is usually fixed in left hand side.
Ɣ
Press the arm unit firmly toward to the frame and screw it.
Summary of Contents for JP-1000
Page 1: ...5009444 JP 1000 Massage Chair Product Name...
Page 2: ......
Page 3: ......
Page 4: ......
Page 5: ......
Page 6: ......
Page 7: ......
Page 8: ...Inlet power cord plug in port...
Page 9: ......
Page 10: ...Power cord...
Page 11: ......
Page 12: ...Lace the yellow hose as instructed in the left description...
Page 14: ......
Page 16: ......
Page 18: ......
Page 19: ......
Page 20: ......
Page 21: ......
Page 22: ......
Page 23: ......
Page 24: ......
Page 25: ......
Page 26: ......
Page 27: ......
Page 28: ......
Page 29: ......
Page 30: ......
Page 31: ......
Page 32: ......
Page 33: ......
Page 34: ......
Page 35: ......
Page 36: ......
Page 37: ......
Page 38: ......
Page 39: ......
Page 40: ......
Page 41: ......
Page 42: ......
Page 43: ......
Page 44: ......
Page 45: ......
Page 46: ......
Page 47: ......
Page 48: ......
Page 49: ......
Page 50: ......
Page 51: ......
Page 52: ......
Page 53: ......
Page 55: ......
Page 56: ...JP 1000...
Page 57: ......
Page 58: ......
Page 59: ......
Page 60: ...20210125 1 JP 1000...


