getting started
1
23
Synrad
Firestar i401
operator’s manual
Connecting
Important Note:
Connection to a local network is permitted as long as the laser’s fixed IP
address is unique to your network, otherwise a peer-to-peer connection
is required.
Note:
The procedure described below may require the assistance of your IT Department if
your facility’s Ethernet settings are determined automatically using Dynamic Host
Configuration Protocol (DHCP). The i401 peer-to-peer Ethernet connection must
be connected to a computer with a static IP address that is not connected to a local
network.
Set your computer’s static IP address
Note:
The exact steps may vary depending on your operating system.
1
Disconnect the computer from your local network by removing any networking cables.
2
From the
Start
menu, go to
Settings
and choose
Network Connections
.
3
Double-click on the appropriate Local Area Network (LAN).
4
Locate the LAN’s
Internet Protocol (TCP/IP)
properties.
5
Select “Use the following IP address:” and enter the following information:
IP
Address: 192.168.50.100
Subnet Mask:
255.255.255.0
6
Click
OK
to submit the changes.
Connect to the Firestar i401 laser
1
Remove DC power from the laser.
2
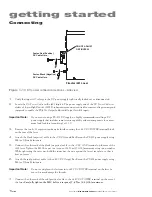
Locate the Ethernet crossover cable in the ship kit.
3
Connect the crossover cable between your computer and the i401’s
Ethernet
port.
Important Note:
The Ethernet cable included in the laser’s ship kit is a shielded crossover
cable. If your network application requires a straight-thru (patch) cable
or you supply your own crossover cable, be sure the Ethernet cable is an
industrially-shielded CAT 5e or CAT 6 cable.
Note:
When connecting to a local network, use a straight-thru Ethernet cable between the
i401 laser and your Ethernet router or hub.
4
Follow the initial start-up procedure in the Operation chapter and proceed with Step 5
below when DC power is applied to the laser.
5
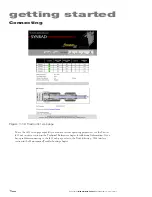
Launch your web browser, type “http://192.168.50.50” (without the quotes,) and then
press
Enter
. The i401 web page should appear as shown in Figure 1-12.


