technical reference
3
11
Synrad
Firestar i401
operator’s manual
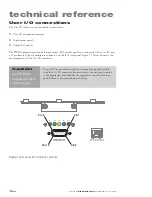
User I/O connections
User I/O connection summary
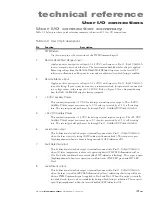
Table 3-3 below provides a quick reference summary to Firestar i401
User I/O
connections.
Table 3-3
User I/O pin descriptions
Pin Function
Description
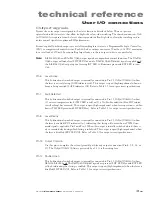
1
PWM Return
Use this input pin as the return side of the PWM Command signal.
2
Remote Reset/Start Request input
Apply a positive or negative voltage (±5–24 VDC) with respect to Pin 11,
Input Common
,
to reset or remote keyswitch the laser. The laser remains disabled while voltage is applied.
Removing voltage from the
Remote Reset/Start Request
input causes the laser’s
RDY
indicator to illuminate and begins a five-second countdown after which lasing is enabled.
3
Remote Interlock input
Apply a positive or negative voltage (±5–24 VDC) with respect to Pin 11,
Input Common
,
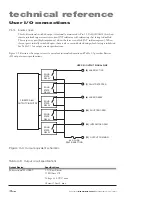
to enable lasing. If your system does not use a remote interlock, this pin must be connected
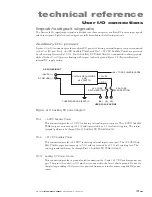
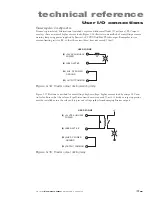
to a voltage source in the range of ±5–24 VDC. Refer to Figure 3-7 for a diagram showing
how the
Remote Interlock
input is factory-jumpered.
4
+ 5 VDC Auxiliary Power
This connection pr5 VDC for driving external inputs or outputs. The
+5 VDC
Auxiliary Power
output can source up to 0.5 A and is protected by a 0.5 A self-resetting
fuse. The return (ground) path must be through Pin 12,
Auxiliary DC Power Ground
.
5
+ 24 VDC Auxiliary Power
This connection pr24 VDC for driving external inputs or outputs. The
+24 VDC
Auxiliary Power
output can source up to 0.5 A and is protected by a 0.5 A self-resetting
fuse. The return (ground) path must be through Pin 12,
Auxiliary DC Power Ground
.
6
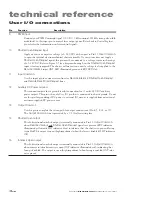
Laser Active output
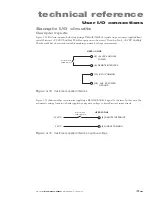
This bi-directional switched output is internally connected to Pin 13,
Output Common
,
when the laser is actively lasing (
LASE
indicator illuminated red). This output is open
(high impedance) when no beam is being emitted (
LASE
indicator Off).
7
Fault Detected output
This bi-directional switched output is internally connected to Pin 13,
Output Common
,
when (1) laser temperature is above safe operating limits (
TMP
LED illuminated red) or
(2) a No-Strike condition has occurred (blue
SHT
indicator is flashing). The output is open
(high impedance) when laser operation is within limits (
TMP
LED green and
SHT
LED
blue).
8
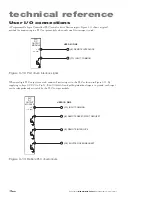
Laser Ready output
This bi-directional switched output is internally connected to Pin 13,
Output Common
,
when the laser is enabled (
RDY
LED illuminated yellow), indicating that lasing will occur
when a PWM Command signal is applied to Pin 9 and Pin 1. When this output is initially
switched closed, there is a five-second delay during which lasing is inhibited. This output is
open (high impedance) when the laser is disabled (
RDY
indicator Off).


