20/64 |
F-B90
Product Handling
Warning
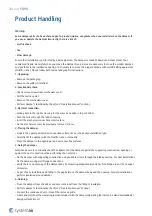
Some damper parts can have sharp edges. To prevent injuries, use gloves when you install or move the damper. If
you use or operate the damper incorrectly, there is a risk of:
- electric shock.
- fire.
- other damage.
Ensure that installation is performed by a trained person. The damper is made of boards and sheet metal. Thus
considered fragile. Be careful when you move the damper. Two persons are necessary to move the smaller dampers
and put them in the installation opening. It is necessary to move the bigger dampers with suitable lifting equipment
(forklift, crane). Please follow both textual and graphic instructions.
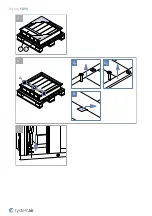
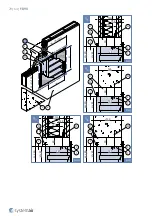
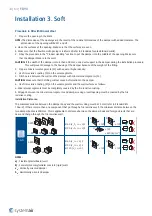
1. Unpacking:
• Remove the packaging
• Remove the grille (if installed).
2. Functionality check:
• Unscrew two screws from mechanism cover.
• Pull the textile eyelet.
• Remove the mechanism cover.
• Perform damper's functionality check (see "Operation Manual" section).
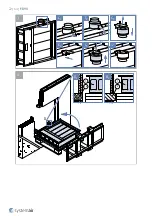
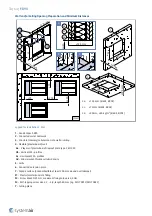
3. Electrical connection:
• Make a hole in the rubber crossing for the wires as needed in top or bottom.
• Push the wires through the rubber crossing.
• Insert the mechanism cover back into its place.
• Fix the mechanism cover by previously removed screws.
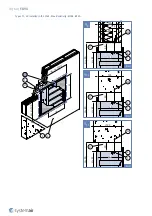
4. Placing the damper:
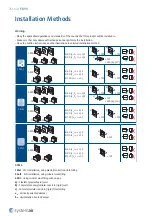
• Prepare the opening and/or duct connection surfaces as per the desired installation type.
• Carefully lift the damper with the forklift, crane or manually.
• Place the damper in the opening or on duct connection surfaces.
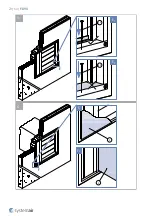
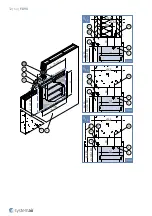
5. Fixing the damper:
Note: Make sure to continually check the alignment of the damper against the supporting construction, opening or
against the duct connection when performing the next steps.
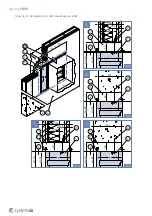
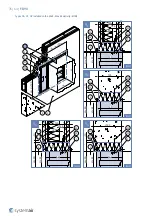
• Fix the damper with supporting construction using suitable screws through the blade end-stop. For duct installations
fix the damper using duct flange connections.
• Verify there is no skewing of the damper body by measuring diagonal dimensions of the blade area or the nominal
dimension.
• As per chosen installation add filling to the gap between the damper body and the opening. For duct installations
perform insulation around damper.
6. Finishing:
• Clean the damper from the debris and excess material from the filling or insulation.
• Perform damper's functionality check (see "Operation Manual" section).
• Connect the continuous duct or mount the removed grille.
• Create and/or fill out the Operating Journal included with the damper (Operating Journal can be also downloaded at
design.systemair.com)
Summary of Contents for 178818
Page 1: ...F B90 Multiblade Fire Damper Handbook...
Page 21: ...21 64 F B90 5 1 1 2 B A1 A2 3 A1 B A2...
Page 22: ...22 64 F B90 C1 C2 C3 C4 C5 i D 4 1 8 1 Fx D1 D2...
Page 23: ...23 64 F B90 F3 5 2 E F F3 E1 E2 5 F1 F2 6...
Page 48: ...48 64 F B90 Wire preparation C1 A1 A2 B C2 C2 H B G A1 A2 B 2 1 C2 C1...
Page 61: ...61 64 F B90 D1 D2 D3 P13 P13 E E H B G 1 2 H...
Page 64: ...Systemair DESIGN 2021 08 25 Handbook_F_B90_en GB...

