Wet
14/48 | User Manual S-BM2 | 202010
Wet Installation
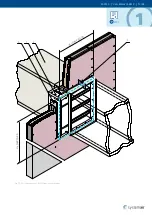
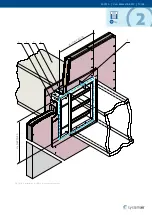
Wall Installation Using Plaster/Mortar/Concrete Filling
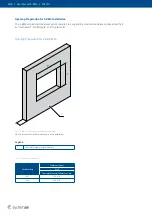
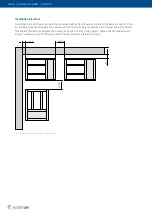
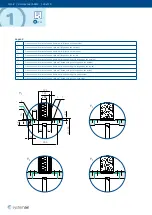
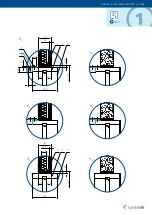
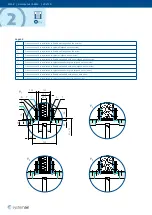
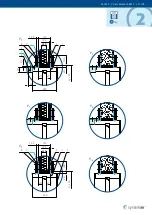
1. The supporting construction opening must be prepared in a way depicted in the “Opening Preparation for
S-BM2 Installation” section (as per Fig. 1 and Fig. 2). Opening surfaces must be even and cleaned off.
The flexible wall opening must be reinforced as per the standards for plasterboard walls.
The opening dimensions are driven by the nominal dimensions of the damper with added clearance.
The opening will be with the dimensions of
W
1
and
H
1
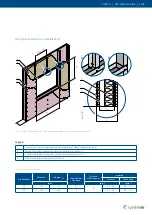
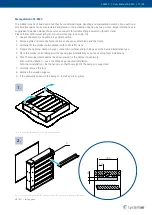
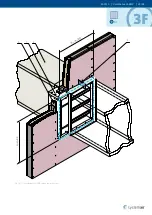
2. Insert the closed damper as per the “Manipulation of S-BM2” section into the middle of the opening so that
the damper blade is in the wall. For damper widths greater than 600 mm, it is recommended to use a duct support
inside the damper during installation to avoid any damage caused to the damper housing by the weight of the filling.
3.
Fill in the area between the wall and the damper with gypsum plaster or mortar or concrete filling (3)
while paying attention to prevent the fouling of the damper’s functional parts, which could limit its correct
functionality. The best way is to cover the functional parts during installation.
To prevent seepage of the filling material, use of boards is recommended.
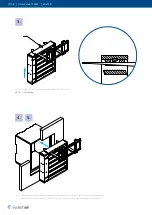
First, let the plaster or mortar or concrete filling harden and then perform the next steps.
4.
After the filling hardens, remove the duct support from inside of the damper.
5. If needed, uncover and clean the damper after installation.
6. Check the functionality of the damper.
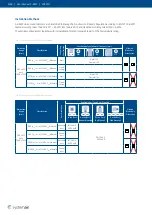
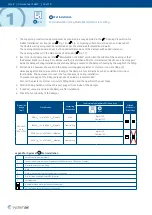
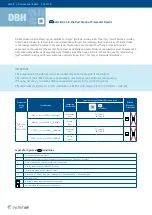
Dimension
Range
(mm)
Classification
Supporting
Construction
Construction Type/Minimal Thickness (mm)
Allowed
Blade Axis
Orientation
Wet
200 × 425
up to
1000 × 1225
EI90 (v
ew
i ↔ o) S1000 C
mod
MAmulti
Wall
Rigid/125
Flexible/125
EI90 (h
ow
i ↔ o) S1000 C
mod
MAmulti
Floor/ceiling
-
EI120 (v
ew
i ↔ o) S1000 C
mod
MAmulti
Wall
Rigid/125
Flexible/125
EI120 (h
ow
i ↔ o) S1000 C
mod
MAmulti
Floor/ceiling
-
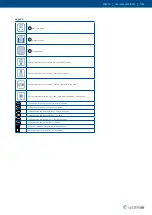
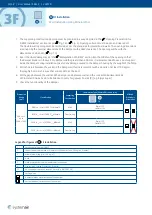
Legend for figures of
Wet installation
1
Smoke control damper S-BM2
2
Connected ductwork made of Promatect-L500 boards (min. 500 kg/m
3
, Promat)
3
Plaster/mortar/concrete filling
4
Grille
5
Nails or pins per ductwork manufacturer instructions
6
Fire resistive coating Promat K84 (Promat)
Y
Cutting plane
Horizontal blade axis orientation of the damper
Vertical blade axis orientation of the damper


