7
6
6. Pull the rotor (4) out of the pump (8).
7. The complete rotor (4) can be rotated on the shaft (4.3).
8. The fl ywheel (4.2) and the magnet (4.1) can also be rotated against one another at a certain angle.
9. Thoroughly pull the axle (4.3) out of the pump (8).
10. Push the rear bearing support (4.5) including the axial bearing washer (4.4) out of the pump; you may fi nd a
pen to be helpful to accomplish this.
11. Insert this pen in the small bore at the pump‘s rear side (8) and use it in order to push the rear bearing
support (4.5) including the axial bearing washer (4.4) out of the pump.
12. Clean all components - please use clear water only - so that they allow to be easily moved.
Do not use sharp-edged objects.
13. Proceed as follows in order to reassemble the pump:
13.1. Put the rear bearing support (4.5) including the axial bearing washer (4.4) onto the axle (4.3) and insert it
in the pump (8).
13.2. Put the rotor (4) onto the axle (4.3).
13.3. Put the front bearing support (4.5) including the axial bearing washer (4.4) onto the axle (4.3).
13.4. Twist the intake lid (6), insert it into the pump (8) and turn it counter-clockwise up to its stop.
13.5. Place the pump (8) into the bottom shell (2).
13.6 Rest the top shell (1) against the two rear hooks on the bottom shell (2) and snap it into the front brackets.
To ensure proper functioning, repeat the above procedure frequently, depending on clogging and working time.
Dismantling / Assembly PSP 3500, PSP 4500 ( see fi g. 2, 3, 4 + 6)
1. Follow the safety measures.
Disconnect the pump!
2. Push in the two brackets on the front of the pump, push the top shell (1) up and remove it.
3. Lift the entire pump (8) out of the bottom shell (2).
4. Twist the intake lid (6) clockwise by approx. 90° and pull it out of the pump (8).
5. The front bearing support (5.4) and an axial bearing washer (5.3) are situated in the inlet lid (6) or on the
axle (5.2) respectively.
6. Pull the rotor (5) out of the pump (8). Attention: The rotor (5) has a very strong magnetic fi eld!
7. Thoroughly pull the axle (5.2) out of the pump (8).
8. Push the rear bearing support (5.5) including the axial bearing washer (5.3) out of the pump; you may fi nd a
pen to be helpful to accomplish this.
9. Insert this pen in the small bore at the pump’s rear side (8) and use it in order to push the rear bearing
support (5.5) including the axial bearing washer (5.3) out of the pump.
10. Clean all components - please use clear water only - so that they allow to be easily moved.
Do not use sharp-edged objects.
11. Proceed as follows in order to reassemble the pump:
11.1. Put the rear bearing support (5.5) including the axial bearing washer (5.3) onto the axle (5.2) and insert it
in the pump (8).
11.2. Put the rotor (5) onto the axle (5.2).
Caution!
The rotor (5) has a very strong magnetic fi eld, which will pull
the rotor into the pump (8)!
11.3. Put the front bearing support (5.4) including the axial bearing washer (5.3) onto the axle (5.2).
11.4. Twist the intake lid (6), insert it into the pump (8) and turn it counter-clockwise up to its stop.
11.5. Place the pump (8) into the bottom shell (2).
11.6. Rest the top shell (1) against the two rear hooks on the bottom shell (2) and snap it into the front brackets.
To ensure proper functioning, repeat the above procedure frequently, depending on clogging and working time.
Maintenance
In order to prolong the service life of your pump and to keep it in good operating condition, it is recommended
to carry out maintenance and cleanup regularly. This can be done by everyone, quickly and easily.
See “Dismantling / Assembly”
Servicing intervals:
- Initially, clean your pump daily and make sure it functions properly. Clean the fi lter housing if necessary.
- Since servicing intervals (complete cleanup) will vary depending on pond pollution, repeat the periodic
service to your pump in accordance with the requirements given.
Should you determine that there are damaged or worn parts, do replace them.
See “Spare parts”
Winter / Pump care
Protect your pump from freezing!
Take the pump out of your pond in autumn.
Clean the pump completely following the outlined instructions.
Store the tank in a frost-resistant room.
Spare parts
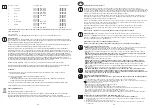
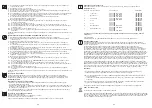
For ordering spare parts, please indicate the pump type, the designation and the Art.-No. as per table below
(see also fi g. 4 - 6)
.
Item Designation
Pump
Type
Art-No.
1
Upper shell
PSP 1500, PSP 2500
104/003644
PSP 3500, PSP 4500
104/003665
Item Designation
Pump
Type
Art-No.
2
Lower shell
PSP 1500, PSP 2500
104/003645
PSP 3500, PSP 4500
104/003666
3
Handle
PSP 1500, PSP 2500
104/003646
PSP 3500, PSP 4500
104/003667
4
Rotor
PSP 1500
168/009145
PSP
2500
168/009117
5
Rotor
PSP 3500
168/009112
PSP
4500
168/009113
6
Inlet cover
PSP 1500, PSP 2500
168/009146
PSP 3500, PSP 4500
168/009110
7
Accessories
PSP 1500
104/003701
PSP
2500
104/003702
PSP 3500, PSP 4500
104/002118
PLEASE PLACE YOUR ORDER IN WRITING AND SEND IT TO THE FOLLOWING ADDRESS OR CONTACT YOUR
DEALER DIRECT!
T.I.P. - SERVICE
Siemensstraße 17 · D - 74915 Waibstadt · FAX +49 72 63 / 91 25 85 · service@tip-pumpen.de
Conditions of Warranty
This device was produced and tested with the most up-to-date methods. In accordance with the legal
conditions of each country in which the device is sold, the seller ensures a faultless manufacturing guarantee
and the irreproachability of the materials. The warranty period begins on the day that the product is bought,
under the following conditions:
Defects which may be attributed to failures of production or materials will be corrected free- of- charge within
the warranty period. Complaints must be reported directly upon the discovery of a defect.
The warranty claims expire if the buyer or a third party attempts to manipulate the device. Damages due to
improper handling or use, incorrect placement or storage, improper connection or installation, abuse, or other
external forces do not fall under the provisions of guarantee. The parts subject to wear, for example the rotor,
fi lter materials, and light fi xtures are not under warranty. All parts are produced with great care and the
employment of high-quality materials: They are designed for a long life span. However, the wear is dependent
upon the way and intensity with which the product is used, and the maintenance intervals. For this reason,
adherence to the instillation and maintenance instructions ist essential to the long life span of all parts subject
to wear.
In the case of a complaint, we reserve the right to repair or replace any faulty parts or to exchange the device.
Parts which have been exchanged become our property.
Damage claims are not possible, as far as they do not stem from intent or gross negligence of the manufacturer.
Further claims do not exist in connection with the warranty. Claims must be proven with the presentation of the
receipt. The warranty is valid in the country in which you originally purchase the product.
Instructions:
1. If your device does not function properly, please ensure that there are no other reasons to which the
problem may be attributed, for example, a cut in the energy supply oder incorrect handling.
2. In addition to the faulty device, please ensure that you have spent the following items: Receipt of purchase
and Description of the defects (an exact specifi cation of the defect will facilitate a speedy repair).
3. In the case that the device needs to be repaired, please disconnect all attachments which do not belong to
the original accessories before you ship the device.
In the case of warranty claims or malfunction, please contact your point of sale.
For EU countries only
Do not throw electric appliances in your dustbin!
According to EU guideline 2002/96/EG concerning old electric and electronic appliances and its implementati-
on in national law, such appliances must be collected separately and fed into an environment-friendly recycling
system. Please consult your local waste management system for advice on recycling.


