background image

A. Breaking in New Wheels

 – Calibrase wheels 

are diamond trued before leaving the factory, 
however their resilient composition makes them 
subject to slight changes of form.  Before a new 
pair of Calibrase wheels is put into service, the 
wheels must be given two refacings of 50 cycles 
each.  This will break in the wheels, and ensure 
perfect contact of the abrading faces with the 
specimen surface. 

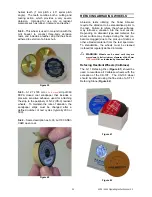
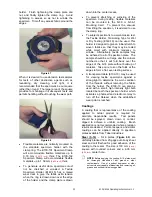
Figure 63 


NOTE:

 The S-11 Refacing Disc is used only once 

(maximum of 50 cycles), therefore this initial refacing 
of new wheels will require two (2) Refacing Discs. 


NOTE:

 The useful life of the ST-11 Refacing Disc is 

10,000 cycles (approximately 400 refacings). 

U


WARNING:


Never reface wheels with a used S-11 

refacing disc.  Unless new S-11 refacing discs are 
used for each refacing, the wear coefficient of the 
wheel faces may change and inject an error in the 
test results. 

B. Testing with Previously Used Wheels

 – 

Before each test, reface previously used wheels 
25 or 50 cycles.  Twenty-five cycles is sufficient 
when the previous test was a short one on 
similar test material.  Fifty cycles is 
recommended when the previous specimen was 
of an unlike material or the test was of 1000 
cycles or more. 


NOTE:

 Wheels that have not been used for a long 

period of time may require two break-in refacings like 
a new set of wheels. 

C. Refacing Wheels During a Test

 – Calibrase 

wheels are designed to operate continuously 
throughout the test without additional refacing.  
However, there may be times when the wheel 
faces tend to become clogged due to the 
adhesive character of particles worn off the 
specimen.  Should this happen, re-standardize 
the abrading surfaces by running them 25 
cycles, then proceed with the test.  Do not 
confuse coloring of the wheels with “clogging” as 
this is simply due to the wheel faces becoming 

coated with fine abradings, a condition that must 
be expected. 


NOTE:

 For most materials, it is usually not necessary 

to reface wheels prior to 1,000 cycles of testing.  In an 
extreme case it may be necessary to reface the 
wheels every 500 cycles. 

D. Truing Out-of-Round Wheels

 – It is 

important that abrading wheels run true to obtain 
accurate test results.  Out-of-round wheels may 
be detected by an up and down movement of 
the abrading arm during testing.  To reface 
resilient Calibrase wheels when they become 
worn out of round, follow the procedure for 
refacing vitrified Calibrade wheels. 

U


WARNING:


Truing Calibrase wheels on the 

diamond refacer removes most of the abrasive 
grain from the wheel faces.  In order to re-
establish their normal abrasion coefficient, they 
must be given two refacings of 50 cycles each 
(follow the procedure for breaking in new wheels). 

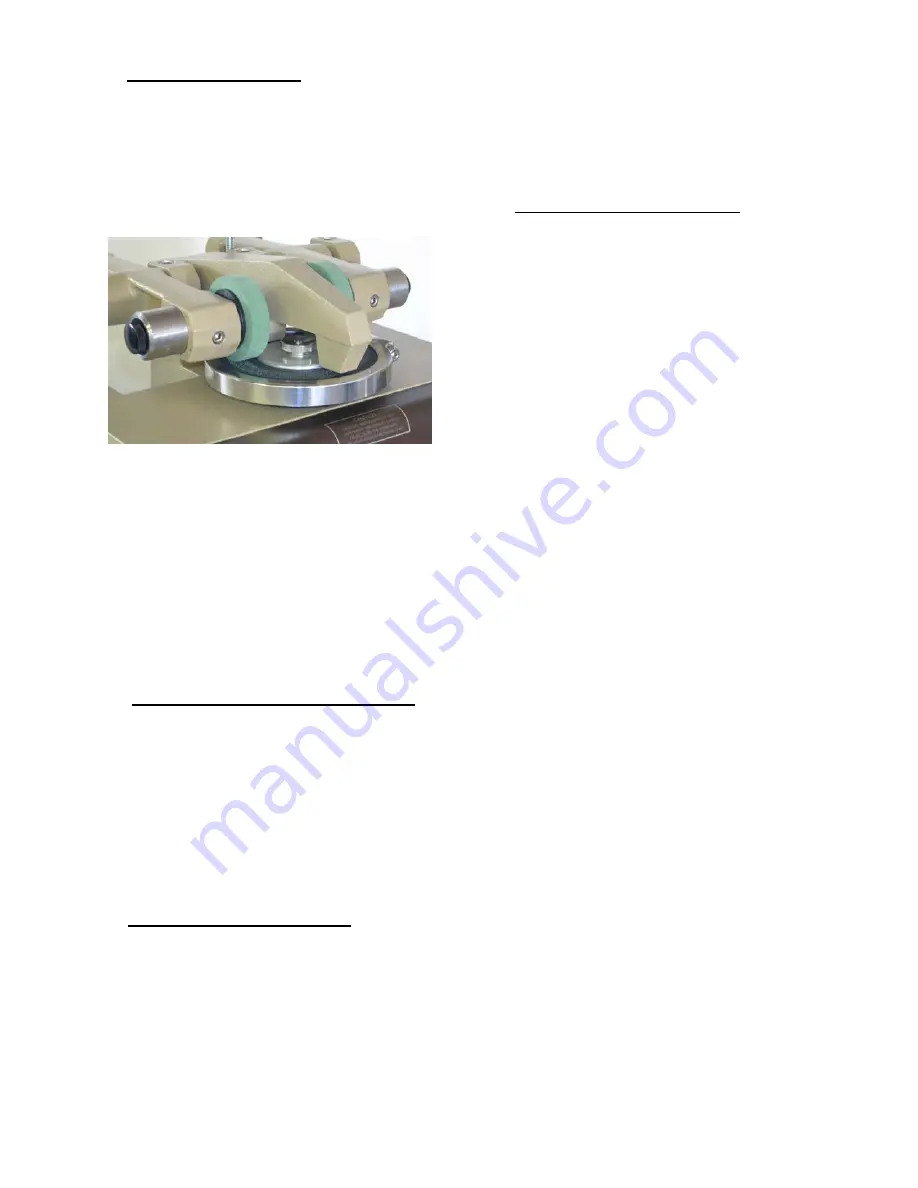
Procedure for Refacing Calibrase Wheels 

• 

Apply the wheels to the Abraser on the 
corresponding quick-release mounting hub.  
When facing the abraser, the right (left) 
wheel will be mounted on the right (left) 
abraser arm such that the wheel label is 
facing inward towards the center of the 
specimen table. 

• 

Mount an S-11 Refacing Disc (ST-11 
Refacing Stone) on the E100-125 specimen 
holder.  To secure the S-11, use the clamp 
plate and nut, and clamp ring.  The clamp 
plate and clamp ring are not required for the 
ST-11 refacing stone. 

• 

Weight the abrading arm with the same load 
weight that is to be used for testing. 

• 

Lower the abrading wheels onto the refacing 
medium. 

• 

Lower the vacuum pick-up nozzle and adjust 
its height to within 3.175 – 6.35 mm 

(0.125 – 

0.25 inch)

 of the refacing disc.  (See note 

below for CS-10F wheels.) 

• 

If you are using a vacuum suction level less 
than 100, program the appropriate value.  It 
is recommended that the vacuum level not 
be less than 70 for wheel refacing. 

• 

Program the appropriate number of cycles 
according to Table 1. 

• 

Using the S-12 Brush, frequently remove the 
abradings by brushing the refacing medium 
during the refacing operation.  DO NOT 
brush the wheels. 


25 

5135 / 5155 Operating Instructions ver 1.1 

Summary of Contents for 5135

Page 1: ...Taber Rotary Platform Abrasion Tester Model 5135 5155 Operating Instructions...

Page 2: ...zle 21 CHARACTERISTICS OF ABRADING WHEELS 22 Calibrase Wheels 22 Calibrade Wheels 23 Specialty Wheels Abradants 23 REFACING ABRADING WHEELS 24 Refacing Resilient Wheels Calibrase 24 Refacing Vitrified...

Page 3: ...when the shipment was unpacked 2 Notify the company you purchased the product from and immediately report the shortage The materials are packed at the factory and should be complete if the box has not...

Page 4: ...zontal axis displaced tangentially from the axis of the sample Figure 3 diagrams the relative positions of the sample and abrading wheels and the direction of their rotation One abrading wheel rubs th...

Page 5: ...The forward end of the arm has a quick release wheel mounting hub to which the abrading wheel is mounted The arms are precision balanced to ensure exacting results Each arm applies 250 grams force aga...

Page 6: ...end of the test cycles A flexible rubber suction hose connects it to the Abraser A vacuum pick up nozzle is hinged to an adjustable mount at the rear of the housing The height above the specimen is s...

Page 7: ...els CS 10 and H 18 For additional details on other available wheels that may be used with this instrument see Characteristics of Abrading Wheels page 21 Auxiliary Port 1 This feature is not currently...

Page 8: ...the instrument 2 Attach the male connector of the vacuum power cord into the receptacle marked VACUUM at the rear of the Abraser When operating at 115V a patch cord is used to connect the vacuum unit...

Page 9: ...l display must display Stopped 1 Press the MENU button to display menu options see below for screen displays 2 From the menu options press 1 to select the option to change speed 3 Using the numeric ke...

Page 10: ...reset to any number of test cycles below the maximum value of 50 000 The total cycle count shown on the display screen defaults to the test duration value that was last entered To reset the test cycle...

Page 11: ...ariable vacuum control For test control and standardization of vacuum suction the vacuum level is calibrated to values of 50 100 Changing the vacuum level adjusts the speed of the vacuum unit motor an...

Page 12: ...t may influence the test results Accessory Receptacle Incorporated into the Model 5135 and 5155 Abraser is an accessory receptacle to supply power to either the Wheel Refacer or Grit Feeder Attachment...

Page 13: ...available to evaluate materials not easily tested with the standard configuration All tables are engineered with a ball plunger and drive pin spring clutch that locks the table onto the motor shaft T...

Page 14: ...amp ring A 108 mm 4 25 inch diameter rubber pad S 19 is provided to ensure a non slip surface Figure 19 Specimen Holder with Ring Clamp E140 14 Rigid specimens that are slightly warped and less than 6...

Page 15: ...ng E140 18 The E140 18 holder is designed to give an initial stretch to woven fabrics so that they may be tested while moist with minimum tendency to wrinkle A raised wear track provides additional te...

Page 16: ...An example where this holder may be useful is for glass or ceramic tile which may be difficult to drill a center hole Figure 30 Figure 31 Threaded Ring Specimen Holder E140 21 The E140 21 Threaded Rin...

Page 17: ...ecimen Holder with Transparent Base E100 10 This Transparent Base Holder E100 10 is manufactured with a transparent base and recommended to be used with the E100 102 clamp ring When evaluating textile...

Page 18: ...mplate is provided as a guide to cut specimens to the proper size NOTE To mount samples place each over its mounting area with the narrow end toward the center Using the insertion tool tuck the edges...

Page 19: ...r the wear path Specimen Clamp Ring Two specimen clamp rings are available for the Taber Rotary Platform Abraser The standard clamp ring provided with the instrument is Model E100 101 This has a 108 m...

Page 20: ...gressive or the load is too great Genuine Taber abrasive wheels are available in a variety of standardized formulations Each offers unique features and provides a means to precisely and effectively ev...

Page 21: ...t marked 500 grams onto both the left and right auxiliary weight mounts found opposite of the wheel mounting assembly To operate at 1000 grams slide the auxiliary weights marked 1000 grams onto the au...

Page 22: ...n not to damage the specimen surface Setting the Vacuum Level The vacuum suction level should be set high enough to remove debris from the specimen surface but not lift flexible samples A visual inspe...

Page 23: ...of refacing NOTE The abrasive coefficient of the wheels can be altered by oil or other contaminants Handle only the sides of the wheels U WARNING Shelf life is dependent on proper storage conditions...

Page 24: ...Calibrade wheels do not have an expiration period U WARNING Calibrade wheels are diamond trued at the factory and can be used continuously without further refacing until the abrading surfaces show in...

Page 25: ...33 but 180 ANSI CAMI open coat Figure 60 REFACING ABRADING WHEELS Abrasion tests utilizing the Taber Abraser require the abradant to be standardized prior to the test Failure to reface the wheel surfa...

Page 26: ...at must be expected NOTE For most materials it is usually not necessary to reface wheels prior to 1 000 cycles of testing In an extreme case it may be necessary to reface the wheels every 500 cycles D...

Page 27: ...WARNING The abrasive coefficient of the working faces of the wheels can be altered by oil or moisture from the fingers Touch only the sides of wheels in handling Refacing Vitrified Wheels Calibrade Al...

Page 28: ...e edges should be removed A radius of 0 4 mm 0 016 inch is sufficient Figure 65 U WARNING The abrasive coefficient of the working faces of the wheels can be altered by oil or moisture from the fingers...

Page 29: ...nd mounting of specimens and the setup and operation of the Abraser is presumed That phase of testing has been treated in detail in other sections of this manual Where it is appropriate reference will...

Page 30: ...methods for calculating this index are by measuring a visual or physical change It should be noted that the wear factor arrived at by any one of the following four methods is not directly comparable M...

Page 31: ...terial with the wear resistance of a similar zinc material In this case three specimens 100 mm 4 inch square by 6 35 mm 0 25 inch thick of each type of material are prepared so that an average result...

Page 32: ...aterial A 100 mm 4 inch square sample is recommended with a 6 35 mm 0 25 inch center hole Rigid materials are generally mounted to the standard specimen holder without the Clamp Ring E100 102 and requ...

Page 33: ...so that they may be tested while moist with minimum tendency to wrinkle Alternatively textile samples may be adhered to a S 16 specimen plate The sample should be cut large and the corners notched so...

Page 34: ...no gap Use a file to remove any burrs from the center hole and edges To generate useful data specimens must be flat and have a uniform coating thickness To subject specimens to a wet abrasion test the...

Page 35: ...plate Wheels and Load CS 10 Calibrase with 500 gram or 1000 gram load Alternatively the CS 17 with 1000 gram load or CS 10F with 125 to 500 gram load may be used Evaluation Visual end point at the fir...

Page 36: ...be used Electroplate Nickel Plated Steel Specimen S 16 specimen plates plated in the usual fashion Wheels and Load CS 10 Calibrase with 500 or 1000 gram load Evaluation Visual method by comparison of...

Page 37: ...e with 500 gram or 1000 gram load Evaluation Weight loss method or depth of wear method maximum depth of penetration recommended is 0 8 mm 0 0312 inch Linoleum Specimen 100 mm 4 inch diameter or squar...

Page 38: ...mel makes them highly resistant to abrasion and scratching Because of the similarity of porcelain glaze with glass the abrading action of the Calibrase wheels is barely noticeable in the early stages...

Page 39: ...acing stone Remark 2 For transparent specimens care must be taken to mount the test specimen such that the bottom surface is not scratched nor subjected to abrasion Remark 3 The use of an oversized no...

Page 40: ...000 gram load may be used Evaluation Visual method by comparison of the number of wear cycles necessary to produce an equal degree of abrasion with that of an unwaxed standard of like material tested...

Page 41: ...be considered The effect of age may impact the abrasion resistance of organic materials and coatings Many coatings show low abrasion the first few days but progressively improve during the following...

Page 42: ...en holder can be removed from the instrument This will allow for optional holders to be used or to clean the motor cavity Each specimen table is designed with a drive pin and ball plunger to provide a...

Page 43: ...ss 0 key for more selections then 1 to select Clock 3 The display screen will prompt you to type the required time and date information For time enter hour and minutes HH MM for date enter month day a...

Page 44: ...The software includes a calibration reminder which is triggered one year after the initial date of calibration Alternating Display Screens Should your Rotary Platform Abrasion Tester require calibrati...

Page 45: ...a flanged extension of the motor shaft and are enclosed by a hinged cover for safety during the refacing operation By moving the diamond point tool across the wheel faces the wheel surfaces can be ref...

Page 46: ...Abraser Multi Media Abraser 5500 The Model 5500 Multi Media Attachment is an accessory attachment for the Rotary Platform Abraser used to evaluate particle abrasivity Applications include fluids powd...

Page 47: ...mbination of turntable shims the proper arm position relative to the specimen Kits are available for Single and Dual abrasers and include the arm height extenders turntable adaptor and a set of 6 shim...

Page 48: ...wear resistance Part 2 Frick Taber Test EN 13329 Laminate floor Coverings Specifications Requirements and Test Methods EN 13696 Wood and Parquet Flooring Determination of Elasticity and Resistance to...

Page 49: ...l Set non resilient gray fine abrasive 125324 H 18 Calibrade Wheel Set non resilient gray med abrasive 125325 H 22 Calibrade Wheel Set non resilient gray coarse abrasive 125326 H 38 Calibrade Wheel Se...

Page 50: ...Holder 4 O D complete with spring clutch rubber pad nut and clamp plate 125795 E100 101 Specimen Hold down Ring 4 17 64 I D 125796 E100 102 Specimen Hold down Ring 4 21 64 I D 121205 E100 10 Specimen...

Page 51: ...uffing Head Attachment Set for Ford Motor Company FLTM BN 108 04 includes heads A B and 2 lb weight 980503 13 1 304 GM Scuffing Head Attachment Set for General Motors GM9911P includes C head and 1 lb...

Page 52: ...mple number be recorded here Test No It is recommended that all tests on a particular specimen be issued a sequential test number and that test number be recorded here Test Medium Indicate the test me...

Page 53: ...52 5135 5155 Operating Instructions ver 1 1...

Reviews: