10
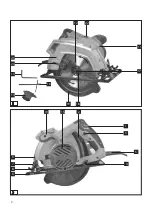
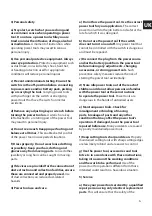
6. Layout
1. Handle
2. ON/OFF switch
3. Locking button for ON/OFF switch
4. Locking lever for cutting depth setting
5. Power cable
6. Soleplate
7. Locking lever for miter setting
8. Locking screw for parallel stop
9. Scale for miter angle
10. Additional handle
11. Laser
12. Saw blade
13. Saw blade wrench
14. Connection for sawdust extractor
15. Motor casing
16. Parallel stop
17. Screw for securing the saw blade
18. Flange
19. Swing guard hood
20. Lever for swing guard hood
21. Guard hood
22. ON/OFF switch for laser
7. Before starting the equipment
Before you connect the equipment to the mains
supply make sure that the data on the rating plate
are identical to the mains data.
Always pull the power plug before making
adjustments to the equipment.
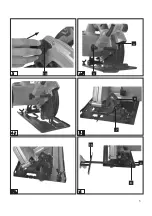
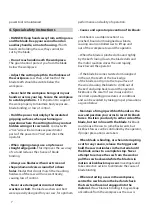
7.1 Assembly of the connection for clamping
extraction
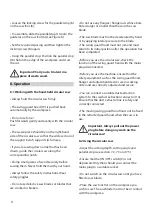
Slide the connector in the device as shown in
Figure 3.
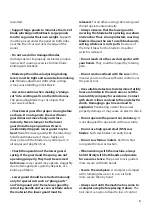
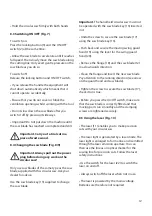
7.2 Setting the cutting depth (Figure 4)
•
Release the handle on the rear of the guard
hood for adjusting the cutting depth (4).
•
Place the saw foot (6) flat on the surface of the
workpiece you wish to saw. Raise the saw until
the saw blade (12) is at the required cutting depth
(a).
•
Refasten the handle for adjusting the cutting
depth (4). Check the handle is securely fastened.
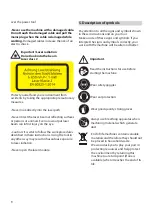
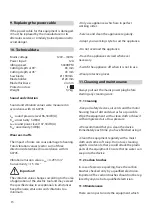
7.3 Miter stop (Figure 5)
•
The preset standard angle between the saw foot
(6) and saw blade (12) is 90°. You can adjust this
angle to carry out angled cuts.
•
Release the locking lever for miter setting (7) on
the front of the saw foot.
•
You can now adjust the cutting angle to around
45°. Keep an eye on the cutting angle scale (9) as
you do so.
•
Refasten the locking lever for miter setting (7).
Check the handle is securely fastened.
7.4 Extraction of dust and chips
•
Connect a suitable vacuum cleaner to the
provided chip extractor connector (14) of your
circular saw (vacuum cleaner not included). This
will provide excellent dust extraction on the
workpiece. The benefits are that you will protect
both the equipment and your own health. Your
work area will also be cleaner and safer.
•
Dust created when working may be dangerous.
Refer to the section entitled “Safety instructions”.
•
Important! The vacuum cleaner you use for the
extraction work must be suitable for the
workpiece material.
•
Check that all the parts are properly connected.
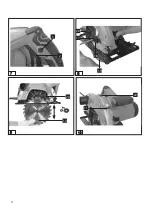
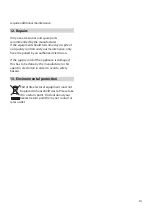
7.5 Parallel stop (Figure 6)
•
The parallel stop (16) enables you to saw parallel
lines.


