1) Install the port mounts.
Remember the legs rake toward the stern, the
mounts are machined to allow the leg to fit in at the correct angle.
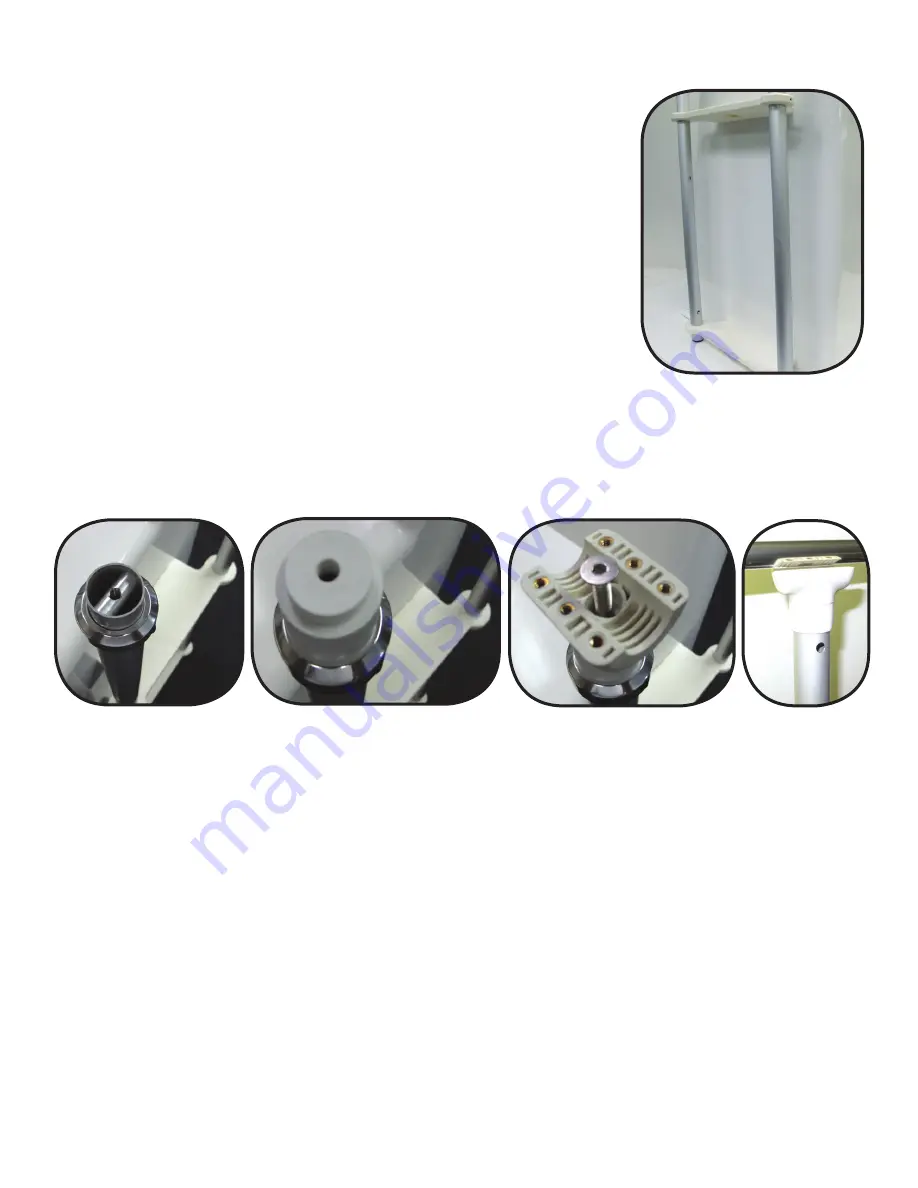
It is imperative that the legs are vertical left to right (Figure 3).
Tip:
To achieve a tighter fit to the console, the console mounts can be cut down
using a table saw with a standard wood blade.
2) Using the 1/4" lag bolts and washers, attach the mounts through the inside of the
console. If the console is less than 1/2" thick you will need a backing plate to
prevent the console from cracking. The console spacers allow for adjustment on
the mount to keep the legs vertical.
3) Slide the legs through the mounts. The front leg has a pull pin lock and rear legs
has a spring loaded locking pin. Once the legs are installed and vertical
(port to starboard) tighten the mounting bolts.
4) There are set screws in the front and back of the mounts. Tighten these
gently against the tube. Do not over tighten as you will deform the tube and
the legs will bind.
Assembling the Legs
1) Insert the 1/2" joiner pins completely through the tube at the top of the upper leg. The threaded hole in the pin must be
parallel with the leg. Make sure the pin is flush with the side of the tube (Figure 4).
2) Place the 4 tubing caps over the 1-1/4" tube. These caps hold the joiner pins in place (Figure 5).
3) Make sure the legs are in the locked position
(the pull pin is in place and the spring pins are snapped into the locking holes).
4) Remove the Allen bolts that hold the clamp together, and remove the rubber inert to allow access to the 5/16"
bolt in the clamp.
5) The clamp fits over the tubing cap and the bolt threads into the joiner pin. Gently tighten the screw so that the clamp
can still turn on the tube (Figure 6).
6) Take one of the cross braces and lay it in the saddle of the clamp, this will align the clamps. When the clamps are
aligned, tighten the 5/16" screw securely to prevent the clamps from turning (Figure 7).
Intalling the Console Mounts (Continued)
Figure 3
Figure 4
Figure 5
Figure 6
Figure 7


