Some small electric flight models use only elevator, throttle, and rudder channels (not aileron). Here, it's often
preferred that the rudder be controlled with the opposite stick (right stick for Mode 2 configurations). Such
channel re-assignment can be done in this screen.
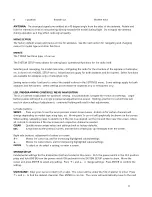
Determine which Tx channel on the left should be mapped to the desired output channel on the right. With the
cursor on the "OUTPUT" channel number on the right, move the cursor up or down to change the channel
number as shown on the left. Press ENTER then
↑
+ or
↓ ‐
to find the output channel as desired. Press ENTER
when finished.
WARNINGS:
Two warnings can show to alert of certain conditions in the radio, which can be inhibited if desired
in this screen. Select the warning to be activated or inhibited as desired and adjust. When set to active "ACT", the
warnings are as follows:
THRO POS: Throttle stick is over 50% full throttle. Move the stick below 50% full throttle to clear the warning.
THRO CUT: This alert rises when the throttle cut function is set, and the throttle cut switch is turned on. Turn the
throttle cut switch to off to clear the warning.
TRAINER:
The process of binding transmitters for training purposes is explained on page xx. When in training
mode with the TTX650 being used by the teacher, this radio can allow the teacher to transfer control of all
or only
certain
channels to the student if desired.
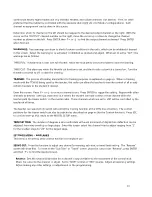
Enter this screen. Press
↑
+ or
↓ ‐
to select a channel to set. Press ENTER to toggle the setting. Repeat with other
channels as desired. Setting a channel to SLV means the student will have control of that channel when the
teacher pulls the trainer switch on the master radio. Those channels which are set to MST will be controlled by the
teacher at all times.
The teacher can select which switch will control the training function at the CTRL line at bottom. The control
positions for the trainer switch can also be selected as described on page xx (for the Control function). Press ESC
to confirm settings and return to the MODEL SETUP menu.
TRIM SETTING:
The number of degrees a servo will rotate with each increment of digital trim deflection can be
adjusted, from very small up to large steps. Enter this screen, select the channel trim to adjust ranging from "1"
for the smallest steps to "20" for the largest steps.
SETTINGS MENU – AIRPLANES
This menu is for setting servo control functions for airplane use.
SERVO SET:
Enter this function to adjust any channel's reversing, sub-trim, or travel limit setting. The "Reverse"
screen will show first. To move to the "Sub Trim" or "Travel" screen, place the cursor over "Reverse", press ENTER
and then
↑
+ to find the desired screen.
Reverse:
Sets the rotational direction for a channel's output relative to the movement of the control stick.
Move the cursor to the channel to adjust. Set to "NOR" normal or "REV" reverse. Adjust all reversing settings
before
making any other settings or adjustments in the programming.
11

