background image

Backup and Restore

1

1

1

4

4

4

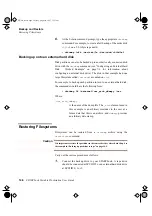
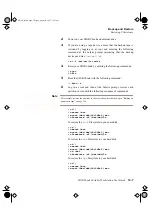
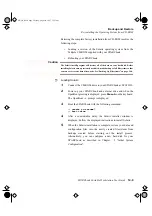
This chapter describes the backup and restore facilities provided as part of the

SPARCbook implementation of Solaris. In particular it provides an example of

how to use 

ufsdump

 and 

ufsrestore

 to backup and restore filesystems. 

The following topics are covered:

Overview   . . . . . . . . . . . . . . . . . . . . . . . . . . . . . . . . . . . . . . . 14 - 2

File Backup Facilities  . . . . . . . . . . . . . . . . . . . . . . . . . . . . . . 14 - 3

Backing Up Filesystems  . . . . . . . . . . . . . . . . . . . . . . . . . . . . 14 - 4

Restoring Filesystems . . . . . . . . . . . . . . . . . . . . . . . . . . . . . . 14 - 6

Re-installing the Operating System from CD-ROM   . . . . . . 14 - 8

S3UG4_Book  Page 1  Friday, August 8, 1997  11:37 am

Summary of Contents for SPARCbook 3 series

Page 1: ...SPARCbook Portable Workstation User Guide SPARCbook 3000 and SPARCbook 3 Families S3UG4_Book Page i Friday August 8 1997 11 37 am ...

Page 2: ... logo OpenWindows SunView and SunOS are trademarks or registered trademarks of Sun Microsystems Inc UNIX and OPEN LOOK are registered trademarks of UNIX Systems Laboratories Inc All other product names mentioned herein are the trademarks of their respective owners All SPARC trademarks including the SCD Compliant logo are trademarks or registered trademarks of SPARC International Inc SPARCbook is a...

Page 3: ...is not responsible for any radio or television interference caused by using other than recommended cables and connectors or by unauthorized changes or modifications to this equipment Unauthorized changes or modifications to the equipment could void the authority granted by the FCC to operate the equipment This device complies with Part 15 of the FCC rules Operation is subject to the following two ...

Page 4: ...plaint with the FCC if you believe it is necessary The telephone company may make changes in its facilities equipment operations or procedures that could affect the operation of the equipment If this happens the telephone company will provide advance notice in order for you to make the necessary modifications in order to maintain uninterrupted service If trouble is experienced with this equipment ...

Page 5: ...NNECT CABLES AS DESCRIBED BELOW WHEN INSTALLING MOVING OR OPENING THE COVERS OF THIS PRODUCT OR ATTACHED DEVICES To connect your computer 1 Turn your computer and peripherals OFF 2 Connect all cables between your computer and any peripherals 3 Connect all signal cables for example modem cable to a telephone receptacle 4 Connect the power cord to the outlet 5 Turn the peripherals ON and then turn y...

Page 6: ...TTERY REQUIRES REPLACEMENT THE UNIT MUST BE RETURNED TO THE FACTORY OF MANUFACTUREASTHEREISADANGEROFEXPLOSIONIFTHEBATTERYIS INCORRECTLY REPLACED Environmental Notice Note The fluorescent lamp located in the liquid crystal display LCD contains a small amount of mercury Dispose of it in accordance with your company s safety procedures local procedures or return it to your supplier for safe disposal ...

Page 7: ...ook 1 2 Installing the Battery 1 3 Connecting the AC Adapter 1 5 Powering On for the First Time 1 6 Powering Off 1 7 Powering off using a system shutdown 1 7 Powering off using Save 1 7 Using Full System Startup 1 8 Using Different Screen Environments 1 9 Starting NCE 1 9 Using an External Keyboard and Mouse 1 10 Chapter 2 Initial System Configuration What System Configuration Entails 2 2 Initial ...

Page 8: ...ower Management Power Management System Operation 4 2 Battery charging 4 2 Battery status 4 2 Battery warning LED 4 3 Maximizing battery life 4 4 The Internal Battery 4 4 Operating on internal battery power 4 4 Replacing the internal battery 4 5 Battery behavior 4 5 Battery conditioning 4 5 The Internal Battery Pack Charger Unit IBPC 4 6 Connecting the charger 4 6 Using the charger 4 7 Storing the...

Page 9: ...e and Resume and Security 5 6 Enabling and Disabling Save and Resume 5 7 Chapter 6 Using the Removable Hard Disk Overview 6 2 Fitting and Removing the Hard Disk 6 3 Caring for Removable Hard Disks 6 4 Boot Disk Partitions 6 5 Model differences 6 5 Using Additional Removable Hard Disks 6 7 Configuring a boot disk 6 8 Configuring a hard disk for additional storage 6 9 Using a Removable Hard Disk Dri...

Page 10: ...tems 8 13 Exporting local filesystems 8 14 Mounting filesystems 8 15 Automatic file mounting 8 16 Unmounting a remote filesystem 8 17 Executing Remote Commands 8 18 Copying files 8 18 Remote program execution 8 19 SLIP and PPP 8 19 Chapter 9 Remote Computing Getting Connected 9 2 Configuring the modem 9 2 Checking the modem is alive 9 3 Simple Terminal Login Connection 9 3 Remote Network Access 9 ...

Page 11: ... 11 4 Display panning 11 4 Display zoom 11 4 Color Mapping 11 6 Setting the color mode 11 6 Resolution limitations 11 7 Simultaneous Display Operation 11 7 Connecting an External Display 11 8 Configuring the Display Interface Using NCE 11 9 Using the NCE Display Panel 11 9 Configuring the Display Interface at the Command Prompt 11 11 Setting the Xserver resolution 11 11 Setting up the display inte...

Page 12: ...13 10 Adding swap space 13 10 Chapter 14 Backup and Restore Overview 14 2 Backup strategies 14 2 Further information 14 3 File Backup Facilities 14 3 Backing Up Filesystems 14 4 Backing up partitions to tape 14 5 Making a complete tape backup worked example 14 5 Backing up onto an external hard disk 14 6 Restoring Filesystems 14 6 Re installing the Operating System from CD ROM 14 8 Chapter 15 Syst...

Page 13: ... program 16 12 Operating system panic 16 12 Failing program 16 12 Warning messages 16 13 Resetting Your SPARCbook 16 14 Appendix A Technical Specifications Appendix B Connector Reference DC In B 2 Parallel Port Connector B 2 Ethernet B 3 Video B 3 SCSI B 4 Keyboard Mouse B 5 Serial Ports B 5 ISDN B 5 Modem SPARCbook 3 Models Only B 6 Appendix C Customer Support Information What to do if You Suspec...

Page 14: ...xiv SPARCbook Portable Workstation User Guide S3UG4_Book Page xiv Friday August 8 1997 11 37 am ...

Page 15: ...To get the most from your SPARCbook as quickly as possible please take the time to read the first five chapters of this guide These provide the most essential information to get your system up and running quickly This section provides the following information Document Summary xvi Models Covered by this Guide xix Associated Documents xix Typographical Conventions xx S3UG4_Book Page xv Friday Augus...

Page 16: ...Components This chapter identifies the main components of your SPARCbook and briefly describes the function of each Read this chapter to familiarize yourself with the main components Chapter 4 Power Management This chapter describes your SPARCbook s power management system It discusses how to use internal and external batteries and a 12V car adapter Chapter 5 Save and Resume This chapter discusses...

Page 17: ...es how to set up the internal modem on the SPARCbook 3 Series models how to set up PCMCIA modems on SPARCbook 3000 models and how to use remote communications Chapter 10 PCMCIA Interface This chapter discusses how to use the PCMCIA interface to add memory or I O facilities to your SPARCbook using industry standard credit card sized PCMCIA cards Chapter 11 Using Displays This chapter describes how ...

Page 18: ...th your SPARCbook It describes how to obtain technical assistance provides a problem solving checklist describes how to use the OpenBoot diagnostics software and how to solve some common software problems Appendix A Technical Specifications This appendix provides detailed technical specifications for the SPARCbook 3 GX and TX S3GX and S3TX and SPARCbook 3000 ST and XT models S3000ST and S3000XT Ap...

Page 19: ...pplied to any SPARCbook 3 model using the same operating system although specific details such as built in display resolution may differ Associated Documents Publication Topics Read Me First Release notes for the version of Solaris currently offered for SPARCbook 3 and 3000 SPARCbook NCE User Guide Describes how to use the Notebook Computing Environment refered to in this manual as the NCE User Gu...

Page 20: ...names the device file dev rdiskette Monospace Bold Used to indicate commands you type in more etc hotsts Sans serif Bold Used to indicate particular keys or key sequences that you press on the keyboard and buttons displayed in windows To power off press the Pause O keys Italics Used to emphasize important terms when they are first used and for titles of other publications The term domain is often ...

Page 21: ...supply and how to start up and shut down It provides the following sections Caring for your SPARCbook 1 2 Installing the Battery 1 3 Connecting the AC Adapter 1 5 Powering On for the First Time 1 6 Powering Off 1 7 Using Full System Startup 1 8 Using Different Screen Environments 1 9 Starting NCE 1 9 Using an External Keyboard and Mouse 1 10 S3UG4_Book Page 1 Friday August 8 1997 11 37 am ...

Page 22: ...st 13 cm 5 in away from electrical appliances that generate strong magnetic fields such as motors televisions refrigerators or powerful audio speakers Do not disassemble your SPARCbook Do not move your SPARCbook while it is operating Cleaning the exterior surface of your SPARCbook and the liquid crystal display LCD require different methods It is recommended that you clean your SPARCbook as follow...

Page 23: ...attery Installing the Battery When a battery is supplied with your SPARCbook it is packed separately to protect the battery and SPARCbook contacts while the system is in transit Figure 1 1 Installing the Battery SPARCbook 3000 Shown S3UG4_Book Page 3 Friday August 8 1997 11 37 am ...

Page 24: ... The AC adapter or car adapter supplies power to your SPARCbook whether your SPARCbook is operating or not ò The internal battery takes between 1 5 and 4 hours to charge the first time depending on SPARCbook model and whether it is operating or not ò The internal battery uses nickel metal hydride NiMH cells One characteristic of this type of cell is that it takes several full charge and discharge ...

Page 25: ...that you can use the supplied AC adapter anywhere in the world where there is a suitable supply You may need to use different AC cords however Connect the AC adapter to your SPARCbook as follows 1 Connect the DC cord from the AC adapter to the DC In connector on your SPARCbook 2 Connect the AC cord from the AC adapter into a wall socket or distribution panel Figure 1 2 Connecting the AC Adapter S3...

Page 26: ...e system configuration screen is displayed Configuring your system is described in Chapter 2 Initial System Configuration Note On a new system the Power On button is only configured to power your SPARCbook on It has no effect while the SPARCbook is running However it can be configured as a Save button using the NCE Save and Resume panel See Chapter 5 Save and Resume in this guide and Save and Resu...

Page 27: ... off It takes between 30 and 90 seconds for the Save to complete Save and Resume ò The Save and Resume feature makes it easy to start and stop your SPARCbook without having to perform the lengthy Solaris shutdown and startup procedures of a conventional UNIX system The system s complete operational state is saved onto specially assigned partition on the hard disk and is completely restored when yo...

Page 28: ...me facility In cases where you have previously used Save to power off or if Resume fails a full system startup can be carried out as follows 1 If your system is powered on press Pause O to power off 2 Press the power on button or if your system already has power but is failing to Resume press Pause R 3 When the OpenBoot start up screen is displayed press Pause A Tadpole S3 SPARCbook keyboard prese...

Page 29: ...lay operates as a simple ASCII terminal and displays the Solaris command line Note If your SPARCbook starts at the command prompt you can enter OpenWindows by typing the command openwin The factory installed Solaris 2 5 1 may not have CDE installed If you wish to use CDE it must be installed from the supplied SunSoft CD ROM Starting NCE The Notebook Computing Environment NCE provides a suite of gr...

Page 30: ... should not be connected The pinout of the combined keyboard and mouse interface is standard allowing you to connect any Sun compatible external mouse and keyboard with their standard cables The combined keyboard and mouse interface allows you to connect an external mouse and keyboard The mouse can be connected directly to the SPARCbook or indirectly via a connector provided on the external keyboa...

Page 31: ...g environment ready installed for you on the removable hard disk However before using your SPARCbook for the first time configure the operating system following the instructions in this chapter You may require the assistance of a system administrator to carry out the configuration or to provide you with essential information This chapter contains the following sections What System Configuration En...

Page 32: ...onfiguration process may differ slightly between Solaris versions so that the order in which steps are carried out may differ from the worked example below As a general rule you should carry out any steps following any instructions displayed on the screen For full details of how to configure Solaris refer the SunSoft Solaris documentation Initial Configuration Worked Example Collecting the require...

Page 33: ...ated by periods For example Internet IP Address 195 5 2 15 The IP address must be unique to your SPARCbook system as duplicated addresses will disrupt the network ò Name Service After you have entered your SPARCbook s host name and IP address you are prompted to select the name service you require Using NIS and NIS can cause start up problems if you later try to use your SPARCbook without a networ...

Page 34: ...tor for the correct choice for this screen Time zone When prompted enter your time zone information following the on screen instructions If your time zone does not correspond with any of those listed you can set a time zone relative to Greenwich Mean Time GMT also known as Coordinated Universal Time CUT or specify a timezone file to be used Setting a superuser password Enter a password for the sup...

Page 35: ...enwin The OpenWindows desktop is displayed Moving Between User and the Root Accounts ò Many of the operations described in this guide require you to be logged in as root The root account gives you the privileges required to carry out system administration tasks such as disk maintenance However using the root account for day to day purposes is very risky as you can easily cause damage to the operat...

Page 36: ... OpenWindows desktop menu is displayed 3 From the menu select Programs and then Command Tool A cmdtool window is displayed 4 In the command tool window enter the command admintool The Admintool window is displayed If necessary select the User from the Browse menu to display a list of users 5 From the Edit menu select Add The Add User window is displayed Figure 2 1 Admintool S3UG4_Book Page 6 Frida...

Page 37: ... the account is to be administered Use this section to specify such the required change frequency expiration date and number of days warnings are issued advising that the password should be changed ò Home Directory This section creates a home directory for your new user account You must enter a directory path in the text field User accounts are normally located in opt In this example Betty Small w...

Page 38: ...Initial System Configuration Restarting the System 2 8 SPARCbook Portable Workstation User Guide S3UG4_Book Page 8 Friday August 8 1997 11 37 am ...

Page 39: ...ach Read this chapter to familiarize yourself with the main components This chapter contains the following information Front Detail 3 2 Rear Detail 3 4 Underside Detail 3 6 I O Panel 3 7 The Built In Display 3 10 The Built In Keyboard 3 11 The Pointing Stick 3 15 Status Display 3 16 S3UG4_Book Page 1 Friday August 8 1997 11 37 am ...

Page 40: ...il 3 2 SPARCbook Portable Workstation User Guide Front Detail The front detail of your SPARCbook 3000 is illustrated in Figure 3 1 Figure 3 1 Front View of SPARCbook 3000 1 2 3 4 5 6 7 8 S3UG4_Book Page 2 Friday August 8 1997 11 37 am ...

Page 41: ...esume work when the battery has been replaced or your system has been connected to an AC supply 5 Power On Button The Power On button is used to power your SPARCbook on On a new system it is only configured as a power on button the unit is powered off by pressing Pause O on the keyboard See Powering off using Save on page 1 7 However the button can be configured to function as a power off button i...

Page 42: ...il 3 4 SPARCbook Portable Workstation User Guide Rear Detail The rear detail of your SPARCbook is illustrated in Figure 3 2 Figure 3 2 Your SPARCbook 3000 Viewed from the Rear 1 2 3 4 5 S3UG4_Book Page 4 Friday August 8 1997 11 37 am ...

Page 43: ...hicle adapter to your SPARCbook 3 I O Panel The I O panel provides interface connections used for connecting peripherals and for communications See I O Panel on page 3 7 4 ExternalBattery Release The external battery release is used to release a clip on external battery pack when one is attached to your SPARCbook 3 Slide the release towards the front of your SPARCbook 3to release the battery 5 Rem...

Page 44: ...system by allowing air to circulate beneath the base casting 2 Machine Identification Label The machine identification label contains the serial number of your SPARCbook and information about the machine type This information is required to obtain repair service 3 Battery Cover Catch This is used to release the battery cover 4 Battery Cover This covers the battery compartment Before you can use yo...

Page 45: ...ook provides connectors for all of the expansion and communications interfaces except for the PCMCIA Model differences The following figures illustrate the I O panels of the SPARCbook models Figure 3 4 I O Panel SPARCbook 3000 Models Figure 3 5 I O Panel SPARCbook 3 Models A B A B S3UG4_Book Page 7 Friday August 8 1997 11 37 am ...

Page 46: ...riven directly from this port Using the display interface is discussed in Chapter 11 Using Displays SCSI Port The SCSI port allows you to connect external hard disks tape drives and CD ROM drives to your SPARCbook See Chapter 7 Using SCSI Devices Keyboard Mouse Port The combined keyboard and mouse port allows you to connect a Sun compatible keyboard and mouse The external keyboard operates simulta...

Page 47: ... line in and line out connections It allows stereo sound input from an external sound source such as a microphone or CD player to be recorded and stored by your SPARCbook and then played out to external audio equipment See Using Audio Equipment on page 12 4 Audio Out ISDN Interface The ISDN interface allows connection to the Integrated Services Digital Network services provided by telephone compan...

Page 48: ...The built in display is used by your SPARCbook to display information when an external high resolution display is not being used To use the internal display open the lid and adjust the viewing angle to suit your needs Figure 3 6 Adjusting the Display Viewing Angle S3UG4_Book Page 10 Friday August 8 1997 11 37 am ...

Page 49: ... Built In Keyboard The built in keyboard provides full size keys laid out in a conventional manner However the number of keys provided is limited by the compact size of the SPARCbook which means that some of keys normally found on a full sized keyboard must be simulated using key combinations Function keys The functions of the twelve function keys F1 F12 are controlled by the operating environment...

Page 50: ...ler and several key combinations are predefined to operate them as shown below Operation Key Combination Start Openboot after power on or reset Pause A System reset Pause R System shutdown using Save Pause O Cancel Save Pause P Increase TFT display brightness Pause Decrease TFT display brightness Pause Move cursor to center of display Pause Home Calibrate Mouse Pause Home hold down for 3 seconds Z...

Page 51: ... enabled and disabled by pressing Shift NumLk Pressing Shift NumLk enables numeric keypad mode Pressing Shift NumLk again disables numeric keypad mode The character for each key while in numeric keypad mode is screen printed on the top surface next to the larger typewriter character as shown in Figure 3 7 Figure 3 7 Numeric Keypad Alt Ctrl 5 6 7 8 9 0 _ C V B N M Shift F G H J K L T Y U I O P Ente...

Page 52: ...igure 3 3 on page 3 6 Note Releasing the legs aids system cooling by allowing air to circulate beneath the base casting This ensures more reliabl operation in warmer climates Release the legs by pressing them towards the outside of the case They pop out of their recesses into position To return the legs to their storage position press them back into the recesses where they click into place Figure ...

Page 53: ...ition The Pointing Stick is pressure sensitive and the cursor moves in the direction in which it is pressed at a speed corresponding to the pressure applied Note Under some operating conditions the cursor may drift down or across the display without the pointing stick being pressed or may move in one direction more effectively than it does in the other If this happens press Pause Home and hold the...

Page 54: ... Note The battery status line on some earlier S3 models does not show a percentage number until the battery has been fully charged Battery status On a SPARCbook 3 the battery status line indicates whether you are running on the internal battery Int or an external battery pack Ext It also indicates the level of charge of the battery being monitored as a percentage of a full charge The plus sign ind...

Page 55: ...ook is receiving DC power from the external AC adapter or from a car adapter WAN Active Indicates that a wide area network connection has been established either via the internal modem or ISDN interface LAN Active Indicates that the Ethernet interface is active and connected to a viable network PCMCIA Active Indicates the active presence of a PCMCIA card in the PCMCIA port sequence Disk Activity S...

Page 56: ...Main System Components Status Display 3 18 SPARCbook Portable Workstation User Guide S3UG4_Book Page 18 Friday August 8 1997 11 37 am ...

Page 57: ... internal and external batteries and a 12V car adapter It contains the following sections Power Management System Operation 4 2 The Internal Battery 4 4 The Internal Battery Pack Charger Unit IBPC 4 6 Using an External Battery Pack 4 8 Using A 12V Car Adapter 4 12 S3UG4_Book Page 1 Friday August 8 1997 11 37 am ...

Page 58: ...he system automatically switches to a trickle charge to maintain the battery in good condition You can use your SPARCbook as normal while the battery is being charged Battery status Battery status information is shown on the upper line of the status display This provides an indication of the battery s level of charge expressed as a percentage with a plus sign to indicate that it receiving a charge...

Page 59: ... warning LED provides two warning levels First the LED flashes to indicate that there are 3 to 5 minutes of battery power remaining The LED flashes faster as this time runs down Second the LED illuminates continuously to indicate that the battery is almost completely discharged At the second warning you can take one of the following actions Connect the AC adapter or car adapter to charge the batte...

Page 60: ...ng a slower CPU clock speed For information about how to use these facilities see the NCE User Guide The Internal Battery The internal battery is specially designed for use with your SPARCbook It incorporates a number of safety features It is shaped to aid correct insertion It contains electrical protection against damage by short circuit It is physically protected against chemical leakage or rupt...

Page 61: ...y supplied with your computer is self discharge This causes the battery to become exhausted after several weeks of storage even if it is not fitted into your computer Also when it is installed in your system the internal battery will discharge while your computer is not in use This may take up to 3 weeks depending on the level of charge when the system was last used ò System behavior with an Exhau...

Page 62: ...Internal Battery Charger Storage unit T2IBPCHRG Connecting the charger Connect your battery IBPC as follows see Figure 4 3 1 Connect the AC adapter to either DC connector on the IPBC 2 Connect the supplied DC connector cable between the remaining DC connector on your IPBC and the DC In socket on your SPARCbook Figure 4 3 Using the Battery Charger and Storage Unit S3UG4_Book Page 6 Friday August 8 ...

Page 63: ...our charger illuminates when the AC adapter is connected and switched on The amber LED on the charger illuminates constantly when the battery is being fast charged and flashes rapidly when the battery becomes fully charged If the battery is too hot or too cold to charge the amber LED flashes slowly The charger keeps the battery in a fully charged state until it is removed The battery can be remove...

Page 64: ...he optional external battery pack available from your SPARCbook dealer which will power your SPARCbook for up to 6 hours of use from a single charge The external battery pack allows you to use all of the interfaces an external RHDD or floppy disk drive while away from an AC supply although this drains the battery faster Identifying the main components Figure 4 4 External Battery Pack 2 1 3 4 5 6 7...

Page 65: ...l battery pack The external battery pack can be operated with your computer in one of two ways By direct attachment to the rear of your computer By connection with the extension cord ò Direct Attachment Attach the external battery pack to your computer as follows 1 Separate the cord holder 4 from the external battery pack by pressing the release lever 5 and sliding the cord holder off the external...

Page 66: ...y time and also which battery internal or external is discharged first This is described in the NCE Guide User Guide Charging your external battery pack To charge your external battery pack connect the AC adapter to the DC in connector on the external battery pack Note It is possible to plug the DC in connector into the computer when your external battery pack is operating on the extension cord Ho...

Page 67: ...al battery pack charges automatically Detaching your external battery pack Removal of the external battery pack is a reversal of the attachment procedure 1 Power your computer off 2 Slide the release catch on your computer 9 then slide the external battery pack off your computer 3 Replace the two blanking plugs in your computer to protect the battery in contacts from damage 4 If required attach th...

Page 68: ... DRIVING A VEHICLE WARNING DISCONNECT YOUR CAR ADAPTER FROM THE VEHICLE POWER SUPPLY BEFORE CHANGING THE INTERNAL 5A FUSE Connecting your car adapter Connect your car adapter as follows see Figure 4 5 Caution The car adapter is suitable for 12 volt negative earth vehicles only Operation under any other conditions may cause damage to your car adapter or to your computer 1 Insert the large plug of y...

Page 69: ...om your car adapter It charges the internal battery in the same way as the AC adapter Your car adapter is of a high efficiency design However to conserve your vehicle s battery life you should disconnect the adapter from the cigarette lighter socket when your SPARCbook is not in use Figure 4 5 Conecting the Car Adapter S3UG4_Book Page 13 Friday August 8 1997 11 37 am ...

Page 70: ...t the DC in connector before disconnecting from the cigarette lighter socket Ensure that your computer has an internal battery installed Operation during engine starts Voltage variations and spikes from your vehicle s power supply during engine starts can disrupt the operation of your SPARCbook As a precaution disconnect your car adapter from your SPARCbook before starting the engine following the...

Page 71: ...ur SPARCbook without having to perform lengthy shutdown and startup procedures This chapter the following sections How Save and Resume Functions 5 2 Powering Off Using Save 5 3 Automatic Save Features 5 5 Sleep mode 5 5 Save and Resume and Security 5 6 Enabling and Disabling Save and Resume 5 7 S3UG4_Book Page 1 Friday August 8 1997 11 37 am ...

Page 72: ...save data available your SPARCbook carries out a conventional Solaris system startup The Save Partition ò A partition is reserved on your SPARCbook s boot disk to support the Save and Resume feature The Save partition s size is equivalent to the main memory capacity of your SPARCbook For example if you have a SPARCbook with 64MB of main memory DRAM your SPARCbook reserves a Save partition of 64MB ...

Page 73: ...fected by Save and Resume allowing you to take up work exactly where you left off How to ensure Save and Resume operates successfully Your SPARCbook Resumes most reliably if the hardware facilities are the same before and after the Save is performed To ensure the Save and Resume facility operates correctly it is important that you avoid making hardware configuration changes while your system is po...

Page 74: ... instances your SPARCbook will recover from these situations but this cannot always be guaranteed What to do if Resume Fails If your system fails to Resume carry out a full system reboot with the following procedure 1 Power off again if necessary by pressing Pause O 2 Press the power on button 3 When the OpenBoot greeting is displayed press Pause A The OpenBoot ok prompt is displayed 4 Enter the f...

Page 75: ...hat is there is no mouse keyboard or interface activity it is able to perform an automatic Save See Power Manager Panel in your NCE User Guide Sleep mode In addition to the Save and Resume feature your SPARCbook provides a Sleep mode The Sleep mode can be enabled via the Notebook Computing Environment See Save and Resume Panel in your NCE User Guide Sleep saves the current state of your SPARCbook ...

Page 76: ...tively bypassing the normal login prompts One way to protect your SPARCbook against unauthorized use is to remove the hard disk while it is without power Refit it again when you next wish to use your SPARCbook before you power on If this level of protection is not sufficient you have the following options Power off using a conventional Solaris system shutdown To do this log in as root and enter th...

Page 77: ...isabled with a reversible command as described below or can be disabled permanently by assigning the save partition for general data storage ò Disabling Save and Resume To disable Save and Resume enter the following command saveresume n SAVE Partition was dev rdsk c0t0d0s4 Note This example shows the save partition for a SPARCbook 3000 model For a SPARCbook 3 the save partition is dev rdsk c0t3d0s...

Page 78: ...owing command saveresume y dev rdsk c0t0d0s4 saveresume SAVE Partition is dev rdsk c0t0d0s4 Note This example shows the save partition for a SPARCbook 3000 model For a SPARCbook 3 the save partition is dev rdsk c0t3d0s4 The save partition is created when the Operating System is installed from the Tadpole distribution CD S3UG4_Book Page 8 Friday August 8 1997 11 37 am ...

Page 79: ...itional hard disks and how to ensure a basic level of security for your RHDD It contains the following sections Overview 6 2 Fitting and Removing the Hard Disk 6 3 Caring for Removable Hard Disks 6 4 Boot Disk Partitions 6 5 Using Additional Removable Hard Disks 6 7 Using a Removable Hard Disk Drive Adapter 6 9 RHDD Security 6 12 S3UG4_Book Page 1 Friday August 8 1997 11 37 am ...

Page 80: ...in your office and another disk for use at home Each could be stored securely when not in use and each could contain the appropriate operating system configuration for its designated location with networking setup on your office disk and dial up client services set up on your home disk Using the Save and Resume feature each disk can store a different machine state that your SPARCbook Resumes when ...

Page 81: ...n Ensure that your SPARCbook is powered OFF before removing the hard disk Removing the hard disk while your SPARCbook is running may damage the disk and destroy important data 1 Place your SPARCbook on a firm surface such as a desk with its left side tilted upwards slightly 2 Slide the hard disk s catch downwards as shown in Figure 6 1 3 Pull on the catch to remove the disk from your SPARCbook Fig...

Page 82: ... while your SPARCbook is running always power off first Condensation If your hard disk is carried separately from your SPARCbook and is subjected to much lower temperatures bringing it into a warm room may cause condensation This will not cause damage but you should allow your hard disk time to acclimatize before using it Static electricity In common with most electronic components the removable h...

Page 83: ...e and must be the same size as the memory capacity of your SPARCbook The swap partition is used by the operating system to store applications that are running in the background Its size therefore is affected by the size of the main memory of your SPARCbook Model differences The SPARCbook 3 and SPARCbook 3000 models use different types of removable hard disks which is why different device files are...

Page 84: ...oned as shown in the table then the device files would be at dev c0t0d0sn ò SPARCbook 3000 The SPARCbook 3000 Series use a removable IDE hard disk drive which has a fixed ID The factory installed operating system assigns this drive as target 0 with the result that the device files for the disk slices appear at dev rdsk c0t0d0sn as shown in Table 6 1 Main Memory Upgrades and Disk Partitions é The s...

Page 85: ...is first used This involves Setting the SCSI ID for the RHDD Carrying out disk configuration Note You can only use SCSI removable hard disk drives with SPARCbook 3000 models if they are installed in a removable hard disk drive adapter See Using a Removable Hard Disk Drive Adapter on page 6 9 ò Setting the SCSI ID for the RHDD Before you use the RHDD you should check and if necessary set its SCSI I...

Page 86: ...d in Table 6 1 optimized for your SPARCbook s memory capacity Configure a boot disk as follows 1 Ensure that your SPARCbook is powered off and fit your new RHDD 2 Press the power on button 3 When the OpenBoot greeting is displayed press Pause A Your SPARCbook displays the OpenBoot monitor prompt 4 At the OpenBoot prompt type the following command ok boot disk h 5 Your SPARCbook boots to single use...

Page 87: ...e SPARCbook s SCSI port It does not require a separate power supply Note Only Series 2 removable hard disk drives can be used with the RHDDA The removable hard disk drive supplied with SPARCbook 3000 models is a different type and can only be used internally ò Connecting the RHDDA Connect the RHDDA to your SPARCbook as follows 1 Ensure your SPARCbook is powered off 2 Connect the RHDDA to the SCSI ...

Page 88: ...D of its own but takes its ID from the RHDD installed in it 2 Slide the drive s integral catch cover downwards see Figure 6 4 3 Tilt the front of the RHDDA upwards slightly and slide the drive into place until you feel the connectors engage 4 Slide the drive s catch cover upwards to lock the drive in place 5 Configure the drive as described in Using Additional Removable Hard Disks on page 6 7 Figu...

Page 89: ... in progress and unmount any file systems on the drive Remove the drive by sliding the catch cover downwards and sliding the drive out of the adapter ò Setting the SCSI Terminator The RHDDA contains a switchable terminator The terminator must be active if the RHDDA is the only SCSI device connected to the SPARCbook Figure 6 4 Removing an RHDD From an Adapter Catch Cover S3UG4_Book Page 11 Friday A...

Page 90: ...your SPARCbook when it is not in use and storing it separately However it is equally possible for the RHDD to be removed by an unauthorized person The RHDD can be removed and installed into a similar SPARCbook allowing your files and applications to be accessed Unauthorized access can be prevented by using the Security panel provided by NCE This allows you to specify the serial numbers of up to si...

Page 91: ...nation correctly and provides an example of how to configure an external hard disk It provides the following information Overview 7 2 Connecting SCSI Devices 7 3 SCSI Terminators 7 4 SCSI IDs 7 4 Configuring an External Hard Disk Worked Example 7 6 Using a Tadpole SCSI Floppy Disk Drive 7 11 S3UG4_Book Page 1 Friday August 8 1997 11 37 am ...

Page 92: ...vices to SPARCbook 3 models or seven to SPARCbook 3000 models 7 Do not exceed the maximum recommended SCSI cable lengths See the documentation for your SCSI devices 4 Select a different SCSI ID or target ID for each device on the chain The default SCSI ID of the removable hard disk supplied in SPARCbook 3 models is ID3 4 Ensure that the SCSI chain is correctly terminated The chain must be terminat...

Page 93: ...isk of SPARCbook 3 models counts as another This means that up to six external SCSI devices can be connected to SPARCbook 3 models and up to seven external devices can be connected to SPARCbook 3000 models which have an IDE internal hard disk SPARCbook positioning Some SCSI devices provide two connectors so that they can be located in any position along the chain The SPARCbook has only one connect...

Page 94: ...ted in Figure 7 1 Note A SCSI terminator is a type of resistor network which prevents interference occurring between conductors within the interconnecting cables and so improve reliability However terminators must not be fitted to other devices in the chain as this will cause unreliable operation SCSI IDs To allow data on individual drives to be accessed each device connected to the chain must hav...

Page 95: ...ciated with those IDs SCSI ID Special Files Function SPARCbook 3 SPARCbook 3000 0 dev c0t0d0s 0 7 dev c4t0d0s 0 7 External Hard Disk Drive 1 dev c0t1d0s 0 7 dev c4t1d0s 0 7 External Hard Disk Drive 2 dev c0t2d0s 0 7 dev c4t2d0s 0 7 External Hard Disk Drive 3 dev c0t3d0s 0 7 dev c4t3d0s 0 7 SPARCbook 3 Removable Hard Disk Drive with root partition SPARCbook 3000 External Hard Disk Drive 4 dev c0t4d...

Page 96: ...matted drive with a SCSI ID of 2 which is connected to the SCSI port of the SPARCbook The disk has one partition ò Connecting the drive The SCSI ID for a hard disk can be set to 0 zero 1 or 2 see Table 7 1 The removable hard disk on SPARCbook 3 models has its ID set to 3 by default so this ID should not normally be used for an external drive If the external drive is the only external device or if ...

Page 97: ...and dev rdsk directories respectively for each of eight possible slices partitions Thus in the case of the example drive with a SCSI ID of 2 the following special files are created dev dsk c0t2d0sn dev rdsk c0t2d0sn Where c0 defines the SPARCbook system s internal SCSI controller in this case 0 zero In the case of a SPARCbook 3000 this would be 1 t2 defines the SCSI target address in this case 2 d...

Page 98: ...In this example one partition is created on slice 2 which occupies the entire disk The disk is partitioned as follows 1 Become superuser 2 Enter the following command format Searching for disks done AVAILABLE DISK SELECTIONS 0 c0t2d0 IBM DVAS 2810 cyl 6183 alt 2 hd 8 sec 32 iommu 0 10000000 sbsus 10001000 espdma 8400000 esp 4 88000000 sd 2 0 1 c0t3d0 TOSHIBA MK2428FB cyl 4000 alt 2 hd 8 sec 32 iom...

Page 99: ...d revision volname set 8 character volume name quit format partition PARTITION MENU 0 change 0 partition 1 change 1 partition 2 change 2 partition 3 change 3 partition 4 change 4 partition 5 change 5 partition 6 change 6 partition 7 change 7 partition select select a predefined table modify modify a predefined partition table name name the current table display display the current table label writ...

Page 100: ... partition quit format quit ò Create and then check a filesystem on the new disk 1 Become superuser 2 At the Solaris prompt enter the following commands newfs dev rdsk c0t2d0s6 fsck dev rdsk c0t2d0s6 ò Create a mount point and mount the filesystem In this example a new directory is created in the root directory to provide the mount point and then the new filesystem is mounted This is carried out a...

Page 101: ...arately Caution The floppy drive is powered from the SCSI port of your computer Powering more than one floppy drive or a floppy drive and a removable hard disk drive adapter at the same time may cause damage to your SPARCbook The procedure for installing and using the SFDD is as follows Connect the drive Set the SCSI ID and terminator switches Power up the system and enter a command to create the ...

Page 102: ...e a unique SCSI ID You set the SCSI ID for your floppy drive using the three SCSI ID switches shown in Figure 7 3 In order to avoid conflicts with other devices it is recommended that you set the SCSI ID to 5 Note The switches on the floppy drive are wired internally for active low operation This results in the position labeled on the switch as ON corresponding to binary 0 zero Figure 7 2 Connecti...

Page 103: ...All other devices should have their terminators removed or switched off ò Creating the Special Files at Boot Time Before filesystems can be created or accessed on a floppy disk special files must exist To create the special files during the boot process the following procedure is used 1 Press the power on button 2 When the OpenBoot start up screen is displayed press Pause A The OpenBoot ok prompt ...

Page 104: ...ta that is no longer wanted Inserting and Ejecting a Floppy Disk ò To insert a floppy disk hold it label side up and slide it into the aperture until it clicks into place ò You can remove the disk from the drive at any time provided the system is not currently accessing the disk You should use theunmount or eject commands before removing the floppy See below ò To remove a floppy disk press the eje...

Page 105: ...py makes the data on the disk appear as part of the standard filesystem of your SPARCbook although this is at the expense of some storage capacity of the disk which is used to store filesystem information Under UNIX you can directly mount a floppy disk with either an MS DOS or a UNIX filesystem Formatted disks that you want to use as mounted filesystems must have a filesystem on them To make a UNI...

Page 106: ...tion for information about making MS DOS filesystems or for further information about the mount umount and eject commands ò Using a Disk as a Raw Storage Medium Using the disk as a raw storage medium gains the maximum amount of storage space available on the disk You can use standard UNIX commands to read the contents of a disk by giving the device name as the input stream For example the followin...

Page 107: ...ARCbook to a network and configure the network interface This chapter contains the following sections Network Terminology 8 2 Connecting Your SPARCbook to a Network 8 3 An Overview of TCP IP Networking and the Internet 8 4 Configuring Your SPARCbook for a TCP IP Network 8 9 Sharing Filesystems 8 13 Executing Remote Commands 8 18 S3UG4_Book Page 1 Friday August 8 1997 11 37 am ...

Page 108: ... a network from a server Hostname The name given to a computer so that it can be referred to easily by other users on the network Internet The name given to a wide area network that spans the world Many computers connected to an Ethernet local area network LAN are part of or have access to the Internet IP Address A unique number assigned to each machine on the network Each system address has a cor...

Page 109: ... adapter card See Chapter 10 PCMCIA Interface There are several different types of physical media to which the SPARCbook s Ethernet interface can be connected These include Thick wire Ethernet or 10Base5 Thin wire Ethernet or 10Base2 Twisted pair or 10BaseT To connect your SPARCbook to any of these media types a transceiver is required A wide range of transceivers are available from third party ve...

Page 110: ...es can be sent and received anywhere in the world Although an in depth study of networking is beyond the scope of this manual this section provide a useful overview of how the Internet uses a system of network domains and internet protocol IP addresses to make data communications possible over the Internet Internet addresses Every device connected to a network must have a unique address and must k...

Page 111: ...to identify an individual computer normally called a host attached to that network The proportion of the address used for each function depends upon the class of the network There are three network classes as summarized in Table 8 1 Class Range Network Portion Host Portion Likely Usage A 1 126 a b c d Only the largest networks are assigned Class A addresses Each Class A network has over 16 million...

Page 112: ...rnet address for your site See Registering Internet addresses on page 8 8 Network names Although IP addresses provide computers with an efficient means of identifying the source and destination of data and messages transmitted across the Internet it is much more intuitive for humans to use names TCP IP provides a flexible naming system which allows this The global Internet is organized into a hier...

Page 113: ... medoc anyco com Simpler email addresses may be recognized by a mail server which uses database files to recognize the intended destination from Betty Small s email address of betty_small anyco com Accessing the Internet To allow access to computers attached to other networks or to the Internet a router or gateway is normally required The router or gateway functions are are performed by computers ...

Page 114: ...s data movement between this segment and any others within the same organization and provides access to the Internet Registering Internet addresses Internet addresses are allocated and administered globally by the DDN ARPANET Network Information Center NIC An Internet address and domain name can be obtained directly from the NIC or from a network access provider who will register one on your behal...

Page 115: ...twork In particular the network administrator will be able to advise you about the correct hostname and IP address to use for your SPARCbook Configuring your SPARCbook to use DNS optional This may not be necessary for a small network which rarely changes However as a network grows the administrative burden of keeping each host up to date can be considerable This burden is reduced on many larger ne...

Page 116: ...etworks you wish to connect to ò Simple Configuration Using ifconfig The ifconfig command can be used to set the basic characteristics of the network interface the most important of which is to associate an IP address with the interface For example ifconfig le0 192 3 4 56 netmask 255 255 255 0 broadcast 192 3 4 255 ò Configuring Your SPARCbook by Editing the Hosts Files The etc hosts file traditio...

Page 117: ... 4 56 medoc loghost my new SPARCbook 192 3 4 10 champagne internet router 192 3 4 54 burgundy 192 3 4 55 bordeaux 192 3 4 57 frascati 192 3 4 58 merlot 192 3 4 59 chianti Configuring your SPARCbook to use a name server Note You are strongly advised not to use NIS or NIS with your SPARCbook if you intend to use your SPARCbook as a mobile computer Using NIS or NIS may prevent your SPARCbook from sta...

Page 118: ...tc defaultrouter containing the IP address of the router For example the etc defaultrouter file for a machine attached to the network in Figure 8 4 where champagne is the router would be similar to the following defaultrouter 192 3 4 10 Testing Your network connection When all the necessary configuration files have been created and correctly edited your SPARCbook should be rebooted in order for th...

Page 119: ...s associated with Save and Resume arise when file sharing is being used This is particularly true if you are running applications located on a server machine The scenario is frequently as follows you power off with a Save remove your SPARCbook from the network and then attempt a Resume with no network connection The server machine cannot be reached and the Resume cannot complete because your SPARC...

Page 120: ...editor such as vi Each line has the following syntax pathname option option Where pathname is the file or directory to be exported option specifies the type of access to be given such as ro for read only or rw for read write access For example the etc exports file on merlot attached to the network shown in Figure 8 4 might have the following lines usr anywork rw medoc access chianti burgundy anon ...

Page 121: ...your own filesystem You may need to create a directory as a mount point and then mount the remote filesystem For example Betty Small on the machine medoc wishes to mount the directory anywork which resides on the machine merlot and access it within her home directory export home bs in a subdirectory called mywork The steps required would be as follows ò Create the new directory mkdir export home b...

Page 122: ...k on a machine called medoc as in the previous example the following line would be added to the etc vfstab file on medoc merlot usr anywork export home bs myworknfs yes rw hard intr Where the fields are assigned as follows device to mount This is the device name for a local file system or host pathname for a remote directory device to fsck This specifies raw device to fsck In the case of an NFS fi...

Page 123: ...s whether or not the filesystem is mounted automatically at boot time mount options This field specifies mount options such as read only ro read write rw and no super user privileges nosuid Other useful options for remotely mounted filesystems are hard and intr which together enable the local user to interrupt with Ctrl C or to kill hung processes which may occur if the network link is disrupted U...

Page 124: ... one rsh Lets you execute a single command on a remote UNIX host ftp For file transfer protocol allows you to copy files over the network between hosts telnet Allows you to log in to any reachable remote system on which you have an account finger Allows to find out information about users on remote systems Copying files The syntax for copying files with rcp is as follows rcp r fromsys filename tos...

Page 125: ...ou would type the following rsh burgundy ls home SLIP and PPP When your SPARCbook is connected to a remote network via a SLIP or PPP connection most of the commands that can be used when directly attached to the local network can still be used This means that the network printer can be used and mail may be sent from your SPARCbook Care should be taken when disconnecting a SLIP or PPP connection th...

Page 126: ...Using the Network Interface Executing Remote Commands 8 20 SPARCbook Portable Workstation User Guide S3UG4_Book Page 20 Friday August 8 1997 11 37 am ...

Page 127: ...ls how to set up PCMCIA modems on SPARCbook 3000 models and how to use remote communications This chapter contains the following sections Getting Connected 9 2 Simple Terminal Login Connection 9 3 Remote Network Access 9 5 Setting up PPP 9 6 Using a SLIP Connection 9 13 Electronic Mail 9 14 AT Command Set 9 15 Class 2 Fax Command Set 9 21 S3UG4_Book Page 1 Friday August 8 1997 11 37 am ...

Page 128: ...available from your SPARCbook supplier To use the internal modem connect your SPARCbook 3 modem connector into the wall phone socket To use a PCMCIA modem insert the card into one of the PCMCIA slots See Installing a PCMCIA Card on page 10 5 Configuring the modem There are no system configuration procedures necessary to use modems with the SPARCbook as the necessary device file already exist The S...

Page 129: ... tilde period that is EOT Simple Terminal Login Connection To open a simple terminal login connection to a remote system you can use the tip command The tip command allows you to open an AT command interface to the modem as described in the previous section or to dial up remote UNIX or non UNIX systems and to login to an interactive login session although you may require a login account on the rem...

Page 130: ...e local system The connection remains in place and typing Ctrl D returns you to the remote system t from to Copy a file from the specified file on the remote system to a file on the local machine If to is ommitted the same file name is used p from to Copy a file from the specified file on the local system to a file on the remote machine If to is ommitted the same file name is used Get a summary of...

Page 131: ...ications can be used although the limited bandwidth of the link may make transferring large files a lengthy process Note PPP is only available on Solaris 2 3 or later it is similar to SLIP but includes sophisticated negotiation which improves data transfer rates and minimizes configuration overhead In order to gain access to a network using the SLIP or PPP you must connect via a telephone line and...

Page 132: ...ur SPARCbook if necessary 2 Edit the etc hosts file on all machines to be connected 3 Edit the uucp database files for all dial out systems 4 Edit the etc passwd and etc shadow files for a dial in machine You will need to consult the system administrator if this is an organization s dial in server 5 Edit the etc asppp cf file on each machine on the link 6 Test the link These steps are described on...

Page 133: ...Install the PPP packages with the following command pkgadd d cdrom Solaris_2 5 SUNWpppk SUNWapppu SUNWapppr Note If you use pkgadd it is important to load the packages in the order shown in the above command The packages can also be installed using admintool 4 Follow the displayed instructions to complete the installation Editing the system files ò Editing the etc hosts File It is necessary to do ...

Page 134: ...ry network interface For example to allow ketch to communicate with systems connected to the primary network the hosts file for ketch might contain the following Internet host table 127 0 0 1 localhost 192 3 5 21 ketch loghost my mobile SPARCbook 192 3 5 10 champagne p ppp router 192 3 4 54 burgundy 192 3 4 55 bordeaux 192 3 4 57 frascati 192 3 4 58 merlot Figure 9 1 PPP Connection via a Dial In S...

Page 135: ...cp Systems slip Systems ò Devices The etc uucp Devices file contains an entry for every modem or serial port your SPARCbook might use for uucp or PPP operations The copy supplied as part of the SPARCbook load of Solaris 2 5 provides the following entries for the internal or supported PCMCIA modem Sparcbook 3 internal modem ACUEC cua c 38400sparcbk3 ACUEC cua d 38400sparcbk3 ACUEC cua e 38400sparcb...

Page 136: ...y is as follows Name This is the host name of the remote system which must be the same as the value for the peer_system_name keyword entry in the file etc asppp cf Time Defines the time at which calls can be made The value any specifies any time You can also specify when to call by using Su Mo Tu etc for the days of the week and by specifying the time Type This specifies the interface type in this...

Page 137: ...SPARCbook then verifies the user information in the etc passwd file For information about configuring these file please refer to the System Administration Guide See Associated Documents on page xix Editing the asppp cf file The etc asppp cf file provides PPP with information about the system at the other end of the PPP link When you boot your SPARCbook the link manager uses this information to est...

Page 138: ...chine To allow dial in the etc asppp cf would have similar structure to that of the dial out machine except that in this case the destination is not included in the ifconfig section but is included in the path For section example the etc asppp cf file for the SPARCbook frigate see Figure 9 2 might be as follows ifconfig ipd0 plumb frigate up path interface ipd0 peer_system_name ridge peer_ip_addre...

Page 139: ...pagne p is alive Your SPARCbook should dial the remote system and then after some delay while the connection is being established return output similar to that shown The 180 argument in this example sets a timeout of 3 minutes to allow time for the connection process to complete before reporting a failure Using a SLIP Connection You can use the Connect panel and Location panel of the Notebook Comp...

Page 140: ...nd and receive mail directly to and from any other Internet user To do this you need to register with an Internet mail feed organization as a new Internet node See Registering Internet addresses on page 8 8 Setting up email Your SPARCbook is shipped ready to use existing Ethernet based mail facilities If you attach to a network that already provides email facilities you need to contact your networ...

Page 141: ...IA slot 1 When in Command Mode the modem accepts instructions in the form of command lines returns status information in response to some of them The modem can be instructed to perform functions such as originating or answering calls or can be configured to change its mode of operation Modems can store two configuration profiles and four telephone numbers while powered off With the exception of A ...

Page 142: ...t V Enable Short form Result Code Wn Error Correction Message Control X Enable Extended Result Code Set Y Long Space Disconnect Fn Restore Factory Configuration V Display Current Configuration and Stored Profiles W Store Current Configuration Yn Designate a Default Profile Zn x Store Telephone Number Cn Enable Disable Data Compression En Enable Disable Auto Retrain B Display Blacklisted Number C R...

Page 143: ...al up a remote modem The following modifiers may be added L Redial last number P Pulse Dialing T Touch tone Dialing R Originate Call in Answer Mode W Wait for dial tone for a time defined by S6 Delay dial sequence for a time defined by S8 Wait for Quiet for a time defined by S7 Go On hook for a time defined by S29 Return to Command Mode S n Dial a Stored Number En Echo Command Characters This cont...

Page 144: ...ond with identification codes n 0 Request Product Code n 1 ROM Checksum n 2 Return OK Response n 3 Manufacturers ID n 4 Configuration Mode n 33 Sierra ID O Return to Online This command returns to the modem to the Data Mode Qn Command Response Control This controls whether the modem provides responses to commands n 0 Return Response n 1 Do Not Send Response Sr n Change Register Value This selects ...

Page 145: ...ephone numbers Wn Store Current Configuration Store the currently active configuration including S registers as a profile n 0 or 1 Yn Designate a Default Profile Selects the profile used after a hardware reset Zn x Store Telephone Number The modem can store up to 20 numbers n Number memory 0 19 x Dial string of up to 40 characters Cn Enable Disable Data Compression n 0 Disable data compression n 1...

Page 146: ...it remote configuration mode and transmit OK onto the telephone line L Display Callback Directory This causes the modem to supply a list of all callback directory entries P Store Callback Password This causes the modem to store a password and to store or delete a corresponding telephone number The password is used to match that supplied by a remote modem when secure access is used The number is us...

Page 147: ...ile Connection Response FDCS Report Current Session FDIS Report Remote Identification FCFR Indicate Confirmation to Receive FTSI Report the Transmit Station ID FCSI Report the Called Station ID FPTS Page Transfer Status FET Post Page Message Response FHNG Call Termination with Status Class 2 Session Parameters FMFR Identify Manufacturer FMDL Identify Model FREV Identify Revision FDCC DCE Capabilit...

Page 148: ...ether they are queued to be sent have been sent or have been received It also provides status and error information during fax transactions Sending a fax To send a fax with the main FAXtool window open select the Transmit button and the Send Fax window opens The Send Fax window shows a list of the currently available fax numbers When you first start up the FAXtool this box is blank Send a fax as f...

Page 149: ...der page or on the message pages Please refer to FCC Part 68 Modem Information on page iv If the fax is only partly transmitted or if the remote number is busy FAXtool will retry for a preset number of attempts and then if still unsuccessful cancel the operation For further infromation about FAXtool refer to the SunSoft Solaris documentation S3UG4_Book Page 23 Friday August 8 1997 11 37 am ...

Page 150: ...Remote Computing FAXtool 9 24 SPARCbook Portable Workstation User Guide S3UG4_Book Page 24 Friday August 8 1997 11 37 am ...

Page 151: ...r SPARCbook using industry standard credit card sized PCMCIA cards This chapter discusses how to use PCMCIA cards with the SPARCbook and contains the following sections Introduction to PCMCIA 10 2 The PCMCIA Port 10 4 Installing a PCMCIA Card 10 5 Removing a PCMCIA Card 10 6 S3UG4_Book Page 1 Friday August 8 1997 11 37 am ...

Page 152: ...e or peripheral expansion The PCMCIA standard defines cards of three thicknesses each is about the same size as a credit card uses a similar 68 pin connector and has a 3 3 mm thickness around its edge The three types differ in the thickness of the center section as illustrated in Figure 10 1 The center section of a Type I card is 3 3 mm thick Type II cards are 5 mm thick and Type III cards are 10 ...

Page 153: ...ARCbook 3 if you are traveling in territories where the built in modem cannot be connected to the public telephone network Interface cards These include network interface scanner interface and frame grabber cards Hard disk drives These include a range of different capacity products suitable for filesystem use which can be formatted and mounted like a conventional drive These are particularly usefu...

Page 154: ...ou wish to install an interface card such as a modem which uses a connecting cable The door is retained by clips at its hinges See Figure 10 3 To remove the PCMCIA port flap 1 Open the door to an angle of about 60 degrees 2 Pull firmly to release the hinge pins from the hinge clips To replace the PCMCIA port flap 1 Locate the hinge pins so that they both touch the hinge clips with the door at an a...

Page 155: ...ther your SPARCbook is powered down or that there are no operations in progress with the card that is already installed To install a PCMCIA card proceed as follows 1 Open the PCMCIA port door You can remove the door if you wish as previously described 2 Insert your PCMCIA card into the slot with the 68 pin connector end in first taking care to align it correctly in the card guides 3 Push on the PC...

Page 156: ...Modem Panel in your NCE Guide Removing a PCMCIA Card Before removing a PCMCIA card from your SPARCbook you should disable it using the PCMCIA panel of the Notebook Computing Environment See PCMCIA Panel in your NCE User Guide Caution You do not need to power your SPARCbook off before inserting or removing a single PCMCIA card However before inserting or removing a second card you must ensure that ...

Page 157: ...SPARCbook is going to be used as a router you must assign a separate IP address and hostname for each interface There must be an entry for each interface to be used in the etc hosts file See Assigning a hostname and IP address on page 8 10 See also Remote Network Access on page 9 5 for information about using remote network access via a modem In addition each network interface has associated with ...

Page 158: ... the NCE PCMCIA Eject Script PC Flash cards are used in a similar way but use different device files These are as follows dev dsk c3d0s0 slot 0 dev dsk c3d1s0 slot 1 Note SRAM and PC Flash cards can only be formatted as 1 4MB devices by Solaris To achieve their full capacity you can format them with a PC and mount them with the commands shown above Hard disks Note Because of its physical thickness...

Page 159: ...o set a SCSI ID and that the disk slices for the PCMCIA disk appear at dev dsk c1d0s n For example to mount partition 6 of a formatted PCMCIA hard disk onto a UNIX filesystem the following command would be used mount F ufs dev dsk c1d0s6 mnt Note It is not possible make a PC file system on the hard disk with Solaris The disk must be formatted on a PC and then it can be mounted with the following c...

Page 160: ...PCMCIA Interface Using PCMCIA Cards 10 10 SPARCbook Portable Workstation User Guide S3UG4_Book Page 10 Friday August 8 1997 11 37 am ...

Page 161: ...ions SPARCbook Display Interface Overview 11 2 Display Interface Operating Modes 11 3 Pan and Zoom 11 4 Color Mapping 11 6 Simultaneous Display Operation 11 7 Connecting an External Display 11 8 Configuring the Display Interface Using NCE 11 9 Configuring the Display Interface at the Command Prompt 11 11 Adding to the Display Types List 11 14 Display Timing Parameters 11 16 S3UG4_Book Page 1 Frida...

Page 162: ...erface s operating parameters One feature that makes the SPARCbook unique is that the Xserver resolution can be set independently of the display resolution as illustrated in Figure 11 1 providing applications with an emulated frame buffer For example you could set the Xserver to drive a 1024 x 768 pixel display and configure the SPARCbook to drive a 800 x 600 display The application would only be ...

Page 163: ...ive mode can be considered to provide accelerated graphics the two terms can be used interchangeably for the SPARCbook For example if you enable an external display of 1024 x 768 pixels and have the Xserver resolution set to 1024 x 768 pixels then your system operates in native mode with accelerated graphics Emulated mode Emulated mode is selected when the Xserver resolution and display resolution...

Page 164: ...n the display move the cursor to the edge of the display toward the part of the image that you wish to see For example if the part of the image that you want to see is to the left of the display move the cursor to the left edge and continue trying to move the cursor to the left Display zoom Depending on the selected emulated frame buffer resolution and physical display resolution your SPARCbook pr...

Page 165: ...iew may leave large blank borders around the image if for example you display a 1024 x 768 image on a 800 x 600 display In this case the quarter size image would only occupy the center 256 x 192 pixels on the display Note When you start OpenWindows or CDE with an emulated frame buffer image larger than the display the internal display is automatically zoomed to fit so that you can view the whole i...

Page 166: ...s used to select an entry in a 24 bit color palette to obtain an 8 bit intensity value for each of the red green and blue color channels Thus you get 256 colors displayed simultaneously from a palette of 16 777 216 When 16 and 32 bits per pixel are used the pixel data controls directly the intensity of the red green and blue video channels These modes are refered to as true color modes for this re...

Page 167: ...32 bits per pixel video Simultaneous Display Operation The internal display can be used simultaneously with an external display if they both have the same resolution For example a SPARCbook system fitted with a 1024 x 768 XGA display can drive an external 1024 x 768 display at the same time This is possible because the hardware timing is similar for both displays Because the Xserver resolution is ...

Page 168: ...igure 11 3 The Sun monitor cable adapter allows you to connect Sun monitors to your SPARCbook The monitor adapter cable is illustrated in Figure 11 4 Connect an external monitor as follows 1 Connect the monitor cable to the monitor 2 Connect the monitor video cable to your SPARCbook using the adapter illustrated above if required 3 Connect the monitor to a grounded power outlet and apply power 4 C...

Page 169: ...nd re enter the desktop environment from the Solaris command prompt Using the NCE Display Panel The NCE Display panel provides an easy to use method of reconfiguring the display interface It provides a list of predefined display types When a display is chosen from the list the Xserver is automatically set to the same resolution enabling native mode by default see Native mode on page 11 3 However t...

Page 170: ...68 The Xserver Resolution changes to correspond enabling accelerated graphics 6 If required to support your particular applications select a different Xserver resolution from the Xserver Resolution pull down menu Note Selecting a lower Xserver resolution than the physical display resolution will result in blank borders around the image on the display 7 Click the Test button This causes the SPARCbo...

Page 171: ...n command and the physical display resolution using the fbconfig command Setting the Xserver resolution The Xserver resolution can be set at the Solaris command prompt using the openwin command with SPARCbook specific options Different command syntax are required under Solaris 2 4 and 2 5 as outlined below ò Under Solaris 2 4 Using the following command syntax openwin noport native width 1024 heig...

Page 172: ...ns described for Solaris 2 4 are still available but must be passed into the Xserver using the TADXOPTIONS environmental variable For example you could use the command TADXOPTIONS maxfb openwin This starts the OpenWindows desktop environment with the Xserver resolution set to 1600 x 1200 pixels Setting up the display interface hardware The display interface hardware can be configured from the Sola...

Page 173: ...evice name instead of the default dev fb v Verbose report detailing all timing parameters and flag settings N Print the number of the current mode l List all modes currently set up m mode Change to mode The new mode will not take effect until the next time the Xserver is started I Change to the default setting immediately This change will only take place the next time the Xserver is started n mode...

Page 174: ...mode is marked as read only or if the mode is in operation c mode Define new mode as a copy of existing mode D mode Set the pixel depth of the mode e state Set external display drive to state where 0 is off and 1 is on This only works if the current mode is driving the built in display such as mode 0 or new modes with the i flag set S Save the current mode in etc fbconfigurations This option can b...

Page 175: ...one by changing the name and modifing any of the characteristics as necessary For example you may need only to change the sync signals from being separate horizontal and vertical signals to being combined onto the green video channel Display Manufacturer s NCE Equivalent Field Unit Parameter Specification Pixel Rate 100000 Pixel Clock Frequency KHz Horizontal frequency 68 68 KHz Vertical frequency...

Page 176: ...eo channel sync on green Typical characteristics for horizontal and vertical synchronization and blanking signals are illustrated in Figure 11 6 The waveforms for the horizontal and vertical sync signals are similar in shape but differ in that the horizontal parameters are measured in pixels or dots while the vertical parameters are measured in lines So for example a 1024 x 768 display would have ...

Page 177: ...hes The porches are used to adjust the position of the video image on the display The way that the timing signals affect the image on the display is shown in Figure 11 7 Figure 11 7 Video Timing Parameters on the Displayed Image Horizontal Back Porch Horizontal Resolution Horizontal Front Porch Vertical Back Porch Vertical Resolution Vertical Front Porch S3UG4_Book Page 17 Friday August 8 1997 11 ...

Page 178: ...Using Displays Display Timing Parameters 11 18 SPARCbook Portable Workstation User Guide S3UG4_Book Page 18 Friday August 8 1997 11 37 am ...

Page 179: ... 2 This chapter describes how to use the serial parallel and audio interfaces It contains the following sections Using Serial Devices 12 2 Using Parallel Devices 12 3 Using Audio Equipment 12 4 S3UG4_Book Page 1 Friday August 8 1997 11 37 am ...

Page 180: ... configure a serial port for a terminal or modem from within the OpenWindows or CDE desktops login as root and use admintool as follows 1 Launch admintool from within a cmdtool window with the following command admintool 2 From the Browse menu select Serial Ports The Serial Ports menu is displayed Ports a and b are the serial ports on the I O panel of your SPARCbook that are configured by default ...

Page 181: ...tation See Associated Documents on page xix Using Parallel Devices You can connect a range of devices to the parallel port on the rear of your SPARCbook including printers and scanners The parallel port provides a 26 pin mini D type connector Pinout information is provided in Parallel Port Connector on page B 2 A cable adapter as illustrated in Figure 12 2 is available which allows connection to c...

Page 182: ... input and outputs The OpenWindows Audiotool allows you to record and play back audio files and provides controls to adjust the input level of the microphone line input and the volume of the speaker and line output For more information about Audiotool please refer to your Solaris documentation Using the built in microphone and speaker The built in microphone and speaker provide an audio input and ...

Page 183: ...ectly to your SPARCbook Devices which require a more sensitive input such as a stereo microphone or a mixing desk may require a suitable preamplifier The line output provides a suitable input for a PA amplifier or for active or multimedia speakers speakers that contain their own amplifier The audio output can be adjusted to provide CD quality sound reproduction S3UG4_Book Page 5 Friday August 8 19...

Page 184: ...Serial Parallel and Audio I O Using Audio Equipment 12 6 SPARCbook Portable Workstation User Guide S3UG4_Book Page 6 Friday August 8 1997 11 37 am ...

Page 185: ...pplications and outlines any limitations that may apply This chapter contains the following sections Third party Application Support 13 2 Methods of Installing Applications 13 3 Legibility of Text on a Small Screen 13 4 Customizing the Operating System 13 5 S3UG4_Book Page 1 Friday August 8 1997 11 37 am ...

Page 186: ...d 20 20 Access In general all third party X or OpenWindows applications written for SPARCstation and compatible workstations will run on the SPARCbook with very few limitaitions as follows Applications use either Xwindows as their graphics system or must be written for OpenWindows The operating system uses Xwindows Release 4 and OpenWindows Version 3 3 but you can run earlier Xwindows or OpenWindo...

Page 187: ...an be installed using one of the following methods From a locally connected CD ROM tape or floppy drive From a network server From a remote website For specific information about installing SPARC applications onto SPARCbook refer to the documentation supplied with the application and to the SunSoft documentation see Associated Documents on page xix Applications and Graphics Interfaces The SPARCboo...

Page 188: ...on a Small Screen When using some display resolutions you may find that text elements within windows and menus become very small Both OpenWindows and CDE allow you to increase the size of text used in windows menus and alert messages ò Changing Text Size in OpenWindows To change the font size used in OpenWindows select Workspace Properties from the Workspace menu and then select Fonts from the Cat...

Page 189: ...nstructions should be read in conjunction with your SunSoft Solaris documentation Installing Packages The basic procedure for adding packages is as follows Connect a CD ROM drive either directly to your SPARCbook or to a server containing the Tadpole or SunSoft distribution CD Consult the system administrator if required for advice on using the CD ROM with a server Create the necessary device file...

Page 190: ... ID 6 and creates the necessary special file dev dsk c0t6d0s0 to allow the CD ROM s filesystem s to be accessed ò Creating Device Files On a Live System It may be necessary to add an external CD ROM drive to a SPARCbook without powering the system down in order to allow uninterrupted access to available SPARCbook filesystems In this case the device file described above can be created as follows 1 ...

Page 191: ...of the CD ROM That is ls cdrom Displaying Package Information To display information about all packages that are already installed on your SPARCbook type pkginfo Information about the installed packages is displayed on your screen Alternatively to display information about specific packages you can pipe the output of pkginfo into a grep command For example the following command could be used to di...

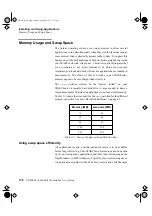
Page 192: ... to be much larger than it really is The swap partition created by the factory install on your SPARCbook s removable hard disk drive is large enough to allow a reasonable number of tools and applications to be used simultaneously Table 13 1 shows the sizes used for the swap partition for the different memory capacities See also Boot Disk Partitions on page 6 5 Using swap space efficiently All appl...

Page 193: ...ock the clock program must run every second Keep your mail in mailfiles if you have more than a few messages Each message that appears when you open your mail file takes memory Keep tools iconified if you are not using them but do not want to quit them For example the performance meter and the File Manager tools are suspended when they are iconified freeing up memory but not swap space for other p...

Page 194: ...e amount of swap space available and in use Adding swap space You can create and add additional swap space without reformatting the disk For example the following steps create a 16Mbyte file for use as extra swap space you will need to be superuser or logged in as root to do this as follows 1 Create a swap file using the following commands mkdir swap cd swap mkfile 16m SWAPFILE Make a 16Mbyte file...

Page 195: ...laris In particular it provides an example of how to use ufsdump and ufsrestore to backup and restore filesystems The following topics are covered Overview 14 2 File Backup Facilities 14 3 Backing Up Filesystems 14 4 Restoring Filesystems 14 6 Re installing the Operating System from CD ROM 14 8 S3UG4_Book Page 1 Friday August 8 1997 11 37 am ...

Page 196: ... appropriate for your individual needs You should consult the system administrator for your organization who will be able to advise you on the best strategy for you and the facilities available The following observations may help in devising your strategy Your SPARCbook runs the standard Solaris operating system with backup capabilities identical to those of a conventional desktop system including...

Page 197: ...d have the advantage of allowing you to back up both local and remote filesystems mounted via NFS For example the tar command could be used to make a backup of your export home directory to tape as follows tar cvf dev rmt 0 export home As another example to save the file mywork to a floppy disk using the Tadpole SCSI floppy disk drive the command would be as follows the disk must be formatted see ...

Page 198: ... arguments filesystems Failing to observe the correct order could completely destroy the filesystem being backed up For example to create backup of a disk partition on a 5 0 Gbyte tape unit 0 the following command would be used ufsdump 0fu dev rmt 0 dev rdsk c0t0d0sn 0fu is a list of options 0 specifies the backup level in this case a full backup u specifies that the etc dumpdates file should be u...

Page 199: ...ump from overwriting the last In this case the argument dev rmt 0n corresponds with the f option and the 64 argument corresponds with the b block size option Caution It is important to restore the partitions in the same order they where backed up Making a complete tape backup worked example This example creates a tape backup of the backup partition of your removable hard disk drive This is special...

Page 200: ...ple to backup each partition in turn to an external hard disk the commands would have the following form ufsdump 0f external usr_arch_ddmmyy usr Where usr_arch_ddmmyy is the name of the dump file The _arch element used in this example is an arbitrary reminder to the user at a future date that this is an archive and ddmmyy provides an arbitrary date stamp Restoring Filesystems Filesystems can be re...

Page 201: ...t r 6 Log in as root and then at the Solaris prompt restore each partition in turn with the following sequence of commands Note This example restores the partitons in the order they where backed up in Backing up partitions to tape on page 14 5 cd umount mnt mount dev dsk c0t3d0s0 mnt ufsrestore rf dev rmt 0n To restore the root filesystem to your hard disk cd umount mnt mount dev dsk c0t3d0s3 mnt ...

Page 202: ... s partition map to suit your own preference or you can follow the default option Table 14 1 shows a partition map for a hard disk installed from the CD using the defualt options except for the var partition which was selected explicitly The resulting partition map differs from the factory installed partition map shown in Boot Disk Partitions on page 6 5 the a If selected Partition Tag Approximate...

Page 203: ...oading Solaris 1 Connect the CD ROM drive to your SPARCbook at SCSI ID 6 2 Power up your SPARCbook and external drive and when the OpenBoot greeting is displayed press Pause A on the keyboard The OpenBoot ok prompt is displayed 3 Boot the SPARCbook with the following command ok create no resume ok boot cdrom 4 After a considerable delay the Solaris installer window is displayed Follow the displaye...

Page 204: ...Backup and Restore Re installing the Operating System from CD ROM 14 10 SPARCbook Portable Workstation User Guide S3UG4_Book Page 10 Friday August 8 1997 11 37 am ...

Page 205: ...ARCbook The user installed upgrades covered allow you to add larger hard disk drives and more DRAM to your SPARCbook This chapter provides the following sections Overview 15 2 Upgrading the Hard Disk Drive 15 2 Upgrading the Main Memory 15 3 S3UG4_Book Page 1 Friday August 8 1997 11 37 am ...

Page 206: ...ard Disk Drive The removable hard disk drive makes it easy for you to carry out disk upgrades by installing larger capacity drives as they become available Disks can be obtained from your SPARCbook supplier either blank or preloaded with the Solaris Operating System You can install Solaris onto a blank disk as described in Re installing the Operating System from CD ROM on page 14 8 For preloaded d...

Page 207: ...te backup of all important files on your system The Tadpole install program partitions the drive automatically for the new memory size However this can be a very time consuming procedure Fitting new SIMMs Caution Always fit an identical pair of SIMMs for example two 64MB SIMMs Other combinations will not operate To avoid damaging your SPARCbook observe antistatic precautions when replacing the SIM...

Page 208: ...tdown as described in Powering off using a system shutdown on page 1 7 and is not connected to an external power supply unit 2 Close the lid and place your computer upside down on a level surface 3 Remove the battery cover and battery 4 Placing the forefinger of the left hand on the L symbol and the forefinger of the right hand on the R symbol on the SIMM cover see Figure 15 1 gently pull the SIMM...

Page 209: ...ounded as described by the supplied documentation 2 Gently press the latches of the first SIMM socket outward until the SIMM pops up see Figure 15 2 views A and B This frees the SIMM for removal 3 Remove the SIMM and place it in an antistatic bag 4 Repeat for the second SIMM Figure 15 1 Removing the Battery Cover Battery and SIMM Cover S3UG4_Book Page 5 Friday August 8 1997 11 37 am ...

Page 210: ...from its antistatic bag 3 Hold the SIMM so that its contact edge points away from you and the cut out edge is on the right Then place the SIMM s contact edge against the SIMM connector see Figure 15 2 views C and D 4 With the contacts in position gently press the SIMM downwards until the latches click into place 5 Repeat steps 3 and 4 with the second SIMM Figure 15 2 Removing and Replacing the SIM...

Page 211: ... factory load See Boot Disk Partitions on page 6 5 Be sure to backup all important program and data files before making any changes to the disk partitions as the process will destroy data on the disk drive The steps required to reconfigure the partition map on your hard disk are as follows Connect a CD ROM and backup device to your SPARCbook and power on Check that there is adequate free space on ...

Page 212: ...e size as the memory capacity of the system This is because the Save and Resume feature copies the contents of the main memory to an equal sized area of the hard disk before powering your SPARCbook down and uses this information to Resume the next time you power on see How Save and Resume Functions on page 5 2 Therefore if you increase the memory you must increase the save partition s size ò You i...

Page 213: ...used to calculate the free space requirements shown in Table 15 2 In this example the upgrade from 64MB to 128MB requires a total of 96MB free space to provide an additional 64MB for the save and 32MB for the swap partitions Note No examples are shown for upgrading to 256MB because this is a return to factory upgrade Memory Capacity MB Free Space Required Before Upgrade After Upgrade MB KB 32 64 6...

Page 214: ...48 98304 1879244 The result shows that there is sufficient space on this hard disk for the upgrade to succeed However if there is not sufficient space that is result is a small or negative value you will have to use a larger hard disk and load the operating system from the Tadpole or Sunsoft CDs or remove unwanted files from opt ò Calculating the New Partition Sizes Before you can repartition the ...

Page 215: ...nders for all subsequent partitions must be moved up by a corresponding amount In this example all partitions other than the root backup and usr partitions must be moved as illustrated in Figure 15 3 Repartitioning the drive ò Preparing to Repartition the Drive Boot your SPARCbook from the Tadpole CD as follows 1 Power up your SPARCbook with the CD ROM drive containing the Tadpole CD connected to ...

Page 216: ...from the AVAILABLE DISK SELECTIONS list In this example the only disk available is disk 0 Specify disk enter its number 0 selecting c0t0d0 disk formatted 3 From the format menu select partition format partition 4 From the partition menu select print partition print Part Tag Flag Cylinders Size Blocks 0 root wm 0 505 126 50MB 506 0 0 259072 1 swap wu 506 889 96 00MB 384 0 0 6014464 2 backup wm 0 11...

Page 217: ...tion are being increased in size so that the start cylinder for all subsequent partitions must move up by a corresponding amount a From Table 15 2 b Increases to the same size as the new memory capacity of the SPARCbook c This number will be different for each drive Using the information displayed by the partition print command Table 15 4 shows the values that must be used for this example 64MB to...

Page 218: ...rent table display display the current table label write partition map and label to the disk quit 2 Change each partition in turn as follows using the values from Table 15 4 in this example partition 1 Part Tag Flag Cylinders Size Blocks 1 swap wu 506 889 96 00MB 384 0 0 6014464 Enter partition id tag swap RETURN Enter partition permission flag wu RETURN Enter new starting cyl 506 RETURN Enter par...

Page 219: ...new partition map to the disk partition label 4 Quit from the partition and format menus partition quit format quit ò Making and Checking New Filesystems 1 To make and then check new filesystems for the changed partitions enter the following sequence of commands newfs dev rdsk c0t0d0s1 fsck dev rdsk c0t2d0s1 newfs dev rdsk c0t0d0s3 fsck dev rdsk c0t2d0s3 newfs dev rdsk c0t0d0s4 fsck dev rdsk c0t2d...

Page 220: ...System Upgrades Upgrading the Main Memory 15 16 SPARCbook Portable Workstation User Guide S3UG4_Book Page 16 Friday August 8 1997 11 37 am ...

Page 221: ...ce provides a problem solving checklist describes how to use the OpenBoot diagnostics software and how to solve some common software problems This chapter contains the following information Getting Further Help 16 2 Problem Solving Checklists 16 3 Using the OpenBoot Diagnostics 16 8 Software Problems 16 11 Resetting Your SPARCbook 16 14 S3UG4_Book Page 1 Friday August 8 1997 11 37 am ...

Page 222: ...e base of the unit Machine configuration what peripherals are connected For networking problems a brief description of your network A description of the problem and any steps you have taken to solve it See Problem Solving Checklists on page 16 3 Any warning messages or output you have observed Any codes displayed in the status display Contacting Customer Support é Customer Support can be contacted...

Page 223: ...ARCbook 3000 models The battery is discharged Power your SPARCbook from the AC adapter will also recharge the battery The AC adapter is faulty Try another Tadpole AC adapter to verify this Contact Customer Support for assistance if the AC adapter appears to be faulty ò SPARCbook fails to boot operating system main display OK status display OK Removable hard disk drive is not fitted Check that the ...

Page 224: ...Cbook to use a name server on page 8 11 Possible Cause What to Check or Action to Take Possible Cause What to Check or Action to Take ò SPARCbook fails to Resume The removable hard disk drive does not have usable Resume data in the save partition Carry out a full system startup See Using Full System Startup on page 1 8 Removable hard disk drive is not fitted Check that removable hard disk drive is...

Page 225: ...rks only if they have the same memory capacity See How Save and Resume Functions on page 5 2 Use standard Solaris shutdown and startup See Using Full System Startup on page 1 8 The disk partitions have been changed and there is no save partition Create a save partition on the hard disk if you wish to use Save and Resume See Why Repartition the SPARCbook s Hard Disk on page 15 8 Memory has been upg...

Page 226: ... command If ping fails there may be a basic hardware or software configuration problem and you should check the hardware interfaces and the basic software setup Ask for help from an experienced network administrator about specific configuration requirements for you location See Configuring Your SPARCbook for a TCP IP Network on page 8 9 See Configuring your SPARCbook to use a name server on page 8...

Page 227: ...ressing Pause PageDown See Pan and Zoom on page 11 4 Garbled display Wrong display timing parameters set Use NCE Display Panel to correctly configure the display interface See Configuring the Display Interface Using NCE on page 11 9 ò I O Problems External keyboard or mouse does not work Check that the external mouse or keyboard are compatible types and are connected to the combined Keyboard and M...

Page 228: ...ying the OpenBoot user interface Display the OpenBoot user interface as follows 1 Power on your SPARCbook 2 When the OpenBoot start up screen is displayed press Pause A The OpenBoot ok prompt is displayed Tadpole S3 SPARCbook keyboard present ROM Rev 2 15 V1 00 32 MB memory installed Serial 10683270 Ethernet address 0 0 83 a3 3 86 Host ID 80a30386 Initializing memory Type help for more information...

Page 229: ...owing command ok setenv diag switch false Checking the network interface As a check to see whether your SPARCbook s Ethernet hardware and connection to the Ethernet media are functioning correctly enter the following command ok watch net Using AUI Ethernet Interface Lance register test succeeded Internal loopback test succeeded External loopback test succeeded Looking for Ethernet packets is a goo...

Page 230: ...le diagnostics Use the serial channel as the input and output devices and to inhibit auto booting setenv diag switch true setenv output device ttya setenv input device ttya setenv auto boot false Note The last command will prevent your SPARCbook from automatically booting the operating system when you power on the normal mode of operation You must reverse these commands as described below to re en...

Page 231: ...ls and is therefore a critical component in enabling the SPARCbook to operate correctly For example a minor error in a network configuration file can completely prevent the network interface from operating This section provides some information on common software problems and gives brief advice about possible remedies in each case By its very nature it cannot be complete and situations may arise w...

Page 232: ...ng If you do not own the process you will need to become superuser to carry out this step Operating system panic If there is a hardware or a software fault the operating system may panic This occurs when the operating system encounters a problem so serious it cannot continue to run the machine If the system does panic a message will be printed on the screen saying so together with as much informat...

Page 233: ... into the terminal interface See Memory Usage and Swap Space on page 13 8 Memory failure There has been a memory error hardware during program execution The Solaris operating system includes the trace utility that allows you to monitor the system calls made by a process This can be used by an experienced UNIX programmer to track down the cause of a problem In addition experienced UNIX programmers ...

Page 234: ...a different filesystem or to a networked server or you must remove them Resetting Your SPARCbook If the operating system has panicked or the keyboard appears to have locked up and all other remedies have failed you may have to reset the SPARCbook A reset should only be used as a last resort because the operating system will have open files and unflushed buffers which will have to be repaired when ...

Page 235: ...cations A A A This appendix provides detailed technical specifications for the SPARCbook 3 GX and TX S3GX and S3TX and SPARCbook 3000 ST and XT models S3000ST and S3000XT S3UG4_Book Page 1 Friday August 8 1997 11 37 am ...

Page 236: ...ery backed EEPROM 1 Kbit Serially accessed Monitor ROM 512 Kbyte Sectored Flash ò Storage Hard Disk Drive 2 5 inch SCSI 2 5 inch IDE Contained in user removable module ò Internal Display Type TFT color Size 10 4 inch 12 1 inch Resolution 800 x 600 1024 x 768 Colors up to 16 777 216 ò Internal Peripherals Keyboard Lexmark Model M6 84 key notebook keyboard Country specific keyboard layout according ...

Page 237: ...and mouse port 6 pin mini DIN connector Supports Sun Type 4 or Type 5 compatible keyboards and mouse Modem V32bis Send Receive Fax V42bis compression Not applicable to SPARCbook 3000 models ISDN Terminal eqiupment TE 2B D interface 8 pin RJ45 socket Audio 16 bit stereo CD quality Stereo headphone output Stereo line level outputs Stereo line level inputs Built in mono mic for speech quality audio i...

Page 238: ...ons 11 8 x 8 5 x 2 0 inches 300 x 216 x 51 mm 11 8 x 10 27 x 2 0 inches 300 x 261 x 51 mm Weight 7 0 lb 3 15 kg including battery 8 0 lb 3 62 kg including battery Approvals FCC class B UL EN60950 CE ò Environmental Temperature Operational 5 35 C 41 95 F Stored 20 60 C 4 140 F Vibration Operational 3g Stored 5g Humidity Operational 8 80 RH Feature Model S3GX S3TX S3000 ST S3000 XT S3UG4_Book Page 4...

Page 239: ...signments for the interfaces on the I O panel The connectors detailed are as follows DC In B 2 Parallel Port Connector B 2 Ethernet B 3 Video B 3 SCSI B 4 Keyboard Mouse B 5 Serial Ports B 5 ISDN B 5 Modem SPARCbook 3 Models Only B 6 S3UG4_Book Page 1 Friday August 8 1997 11 37 am ...

Page 240: ...ora Pin Signal Pin Signal 1 STROBE 14 AUTOFEED 2 DATA 0 15 ERROR 3 DATA 1 16 INIT 4 DATA 2 17 SELECT_IN 5 DATA 3 18 Signal Ground 6 DATA 4 19 Signal Ground 7 DATA 5 20 Signal Ground 8 DATA 6 21 Signal Ground 9 DATA 7 22 Signal Ground 10 ACK 23 Signal Ground 11 BUSY 24 Signal Ground 12 PE 25 Signal Ground 13 SLCT 26 Signal Ground 1 2 13 1 14 26 S3UG4_Book Page 2 Friday August 8 1997 11 37 am ...

Page 241: ...nected 19 Not connected 7 Not connected 20 Not connected 8 Not connected 21 Not connected 9 Not connected 22 Not connected 10 5 V 23 Signal Ground 11 5V 24 Signal Ground 12 Not connected 25 Not connected 13 5V 26 Signal Ground Connector Pin Signal Pin Signal 1 RED 9 Not Connected 2 GREEN 10 Signal Ground 3 BLUE 11 DISPLAYID 0 4 DISPLAYID 2 12 DISPLAYID 1 5 Signal Ground 13 HSYNC 6 Signal Ground 14...

Page 242: ... 34 SCSI D PARITY 10 Signal Ground 35 Signal Ground 11 Signal Ground 36 Signal Ground 12 Not Used 37 Not Used 13 Not Used 38 SCSI TERMPWR 14 Not Used 39 Not Used 15 Signal Ground 40 Signal Ground 16 Signal Ground 41 SCSI ATN 17 Signal Ground 42 Signal Ground 18 Signal Ground 43 SCSI BSY 19 Signal Ground 44 SCSI ACK 20 Signal Ground 45 SCSI RST 21 Signal Ground 46 SCSI MSG 22 Signal Ground 47 SCSI ...

Page 243: ...ard Rx 3 5V 7 Mouse Tx 4 Mouse Rx 8 5V Connector Pin Signal Pin Signal 1 DTR 5 RECEIVE DATA 2 CTS 6 RTS 3 TRANSMIT DATA 7 DCD 4 Chassis Ground 8 TX CLOCK Connector Pin Signal Pin Signal 1 Not Connected 5 TE IN 2 Not Connected 6 TE OUT 3 TE OUT 7 Not Connected 4 TE IN 8 Not Connected 2 1 3 6 7 5 8 4 2 1 3 6 7 5 8 4 1 6 2 3 4 5 7 8 S3UG4_Book Page 5 Friday August 8 1997 11 37 am ...

Page 244: ...nly B 6 SPARCbook Portable Workstation User Guide Modem SPARCbook 3 Models Only Connector Pin Signal Pin Signal 1 Not Connected 4 TIP 2 Not Connected 5 Not Connected 3 RING 6 Not Connected 1 6 2 3 4 5 S3UG4_Book Page 6 Friday August 8 1997 11 37 am ...

Page 245: ...ts are rigorously tested before dispatch to the customer However if your system develops a serious fault it may need to be returned to the factory for repair This appendix tells you what to do in this event S3UG4_Book Page 1 Friday August 8 1997 11 37 am ...

Page 246: ...inal packaging for transportation If the original packaging is no longer available we require that a strong carton be used with a minimum of 5 cm 2 of polystyrene or equivalent packing surrounding the system within the carton The system must not be free to move within the carton Conditions ò MRA Numbers You must have an MRA number before returning products for repair Any carriage charges arising f...

Page 247: ...ze ______________________________ DRAM Size _________________________ Operating System ________________________ Version ____________________________ Root Password _________________________________________________________________ If you do not wish to divulge your password please ensure that it is disabled before returning your system Please also ensure that any disk security is disabled Give clear...

Page 248: ...Customer Support Information Conditions C 4 SPARCbook Portable Workstation User Guide S3UG4_Book Page 4 Friday August 8 1997 11 37 am ...

Page 249: ...er 4 6 amber LED 4 7 using 4 7 battery charger green LED 4 7 battery charging 4 2 battery charging external 4 10 battery life maximizing 4 4 battery low warning LED 3 3 4 3 Battery status 4 2 battery status 3 16 battery installing 1 3 boot disk model differences 6 5 partitions 6 5 15 8 boot disk command 5 4 boot disk configuring 6 8 boot disk partition sizes 6 5 boot failure 16 3 brightness adjust...

Page 250: ...connecting the AC adapter 1 5 connectors DC In 3 5 external battery 3 5 rear panel 3 7 contacting Customer Support 16 2 CPU specification A 2 create no resume command 5 4 creating a mount point 7 10 creating display types 11 14 creating filesystems 7 10 15 15 creating special files 7 6 floppy 7 13 D daisy chain 7 3 DC In active symbol 3 17 DC In connector 3 5 B 2 C 2 default router setting up 8 12...

Page 251: ...program 16 12 failure to Resume 16 4 fax commands 9 21 FAXtool 9 22 FCC Class B Notice iii FCC Part 68 Modem Information iv file mounting automatic 8 16 file sharing disabling 8 15 file sharing enabling 8 14 filesystems backing up 14 4 checking 15 15 creating 15 15 creating and checking 7 10 exporting 8 14 mounting 7 10 8 15 network sharing 8 13 restoring 14 6 fitting new SIMMs 15 3 fitting SIMMs ...

Page 252: ...gram 16 12 L LAN active symbol 3 17 latches 3 3 LEDs battery low 3 3 green 3 3 orange 3 3 Power ON 3 3 left function 3 11 Left function keys 3 12 legs 3 6 level 2 cache A 2 listing the disk partitions 15 12 loading PPP packages 9 6 low battery Save 5 5 M machine identification label 3 6 machine status 3 16 mail electronic 9 14 main memory upgrade 15 3 making filesystems 15 15 maximizing battery li...

Page 253: ...5 Pause Page Up 11 5 PCMCIA adapters 10 2 memory cards 10 2 port 3 3 10 4 PCMCIA active symbol 3 17 PCMCIA cards installing 10 5 removing 10 6 PCMCIA Interface 10 1 pinouts connectors B 2 C 2 Pointing Stick 3 3 point to point protocol 9 5 power management 4 2 power off using shutdwon 5 6 Power ON button 3 3 LED 3 3 Powering off 1 7 powering off using save 5 3 powering on 1 6 PPP 8 19 9 5 PPP setti...

Page 254: ...ecovery 5 4 save and swap partitions sizes 6 6 save partition 6 5 15 8 save partition 5 2 SCSI 3 8 SCSI daisy chain 7 3 SCSI devices checking 16 8 connecting 7 3 special files 7 5 SCSI devices overview 7 2 SCSI ID 7 6 SCSI ID for the removable hard disk drive 6 7 SCSI ID floppy disk drive 7 12 SCSI IDs 7 4 SCSI port 3 8 SCSI termination floppy disk drive 7 13 SCSI terminator 6 11 SCSI terminators ...

Page 255: ...apt er 6 12 testing a PPP link 9 13 testing devices 16 11 testing Your network connection 8 12 thick wire Ethernet 8 3 thin wire Ethernet 8 3 Time zone 2 4 TTY ports 3 8 pinout B 5 twisted pair Ethernet 8 3 Typographical conventions xx U unit dimensions A 4 unmounting a remote directory 8 17 unmounting a remote filesystem 8 17 upgrade main memory 15 3 upgrading the hard disk drive 15 2 URL Tadpole...

Page 256: ...kstation User Guide system configuration 2 2 X Xserver and display resolution 11 2 Xserver resolution 11 2 11 3 Z Zoom to Fit 11 5 zoom to view 11 6 zooming 11 4 keyboard commands 3 12 S3UG4_Book Page viii Friday August 8 1997 11 37 am ...

Reviews: