4
5
A. Operation of Air Compressor
a. For use with high pressure inflatables
For Model W-2100:
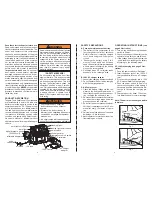
1. With thumb latch Quick Connector open,
place securely onto the tire valve stem
(Fig. 1).
2. Use thumb to close Quick Connector,
ensuring that the thumb latch is as far
down as possible (Fig. 2).
b. For use with low pressure inflatables
(Apply to model W-2100 and W-2200)
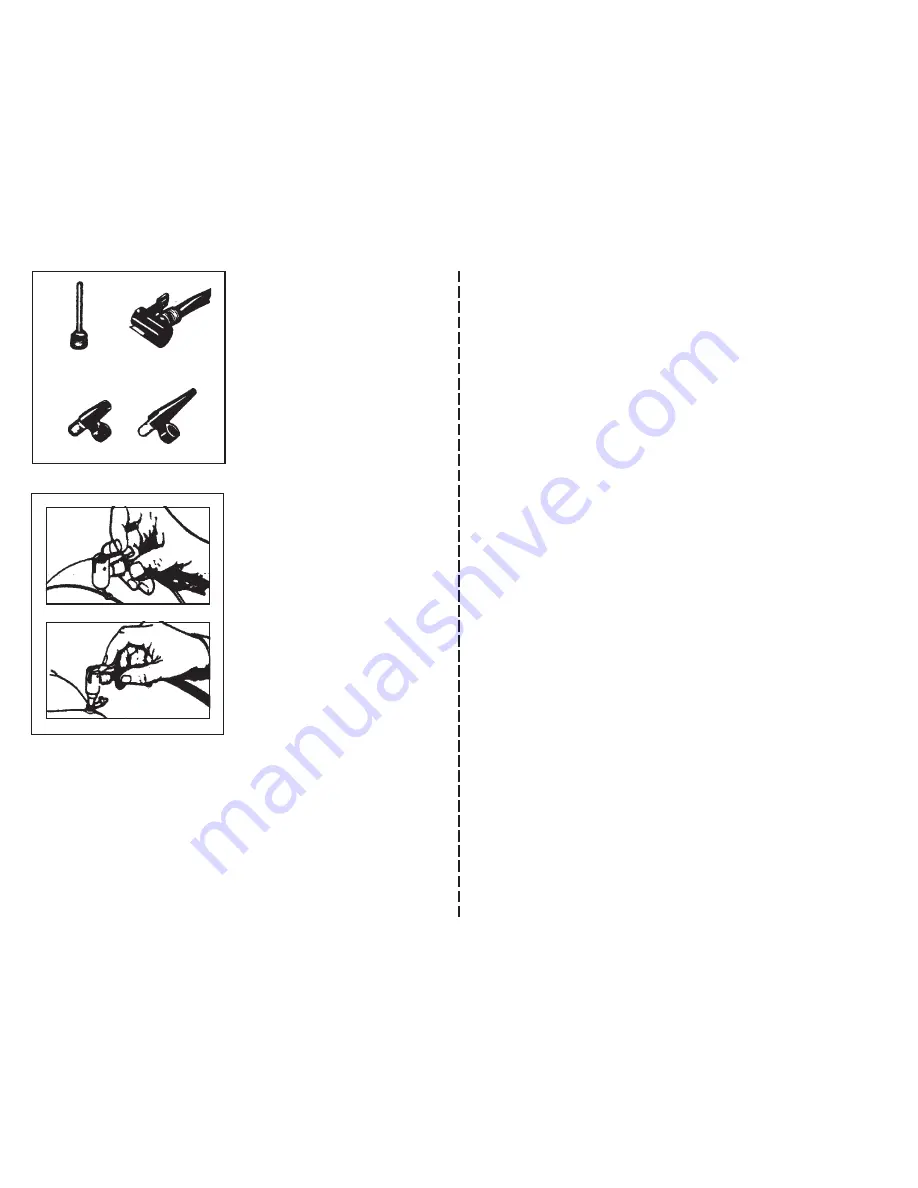
1. To inflate air mattresses, beach balls,
life jackets etc., select the suitable
adapter (Fig.3), then insert and secure
into the Quick Connector (see Fig 4).
2. Insert the connected adapter into the
appropriate receiver on the inflatable
(see Fig.4).
3. Toggle compressor ON/OFF switch to
ON position. Unit should begin inflat-
ing.
4. Inflate to a pressure or level of firmness
that is specifically recommended by the
manufacturer, then toggle compressor
ON/OFF switch to OFF. Check for de-
sired firmness or pressure and adjust
as needed.
5. Remove Quick Connector from the in-
flatable.
6. Remove the adapter from the Quick
Connector.
7. Check for proper firmness and adjust
as needed.
B. Operation of Work/Flashing Light
1. The unit is provided with an individual
work light and an individual flashing light
which can be operated simultaneously.
2. Turn power switch to “Power” before
any operation. Then turn the light ON/
OFF switch to the “ON” position for the
operation of each light.
C. Operation of Power Supply
1. This unit provides a 12V DC output which
can be used to drive 12V DC products
rated or less than 15A.
2. Turn the power switch to “Power” and
insert the cigarette plug of product into
the 12V DC cigarette socket of this unit
to obtain the power required.
Warning: Do not exceed the maximum
load of 15A
3. Toggle power switch to “POWER” posi-
tion.
4. Toggle compressor ON/OFF switch to
“ON” position. Unit should begin inflat-
ing.
5. Inflate until object nears it’s original
shape, use compressor’s gauge as a
reference to desired pressure.
6. When near correct operating pressure,
toggle compressor ON/OFF switch to
“OFF”, disconnect the thumb latch ac-
tuated Quick Connector.
7. Using tire gauge, check pressure and if
needed adjust to desired pressure as
determined by the vehicle and/or tire
manufacturer.
For model W-2200:
1. With thumb latch Quick Connector open,
place securely onto the tire valve stem
(Fig. 1).
2. Use thumb to close Quick Connector,
ensuring that the thumb latch is as far
down as possible (Fig. 2).
3. Turn the power switch to “Power”. In the
digital gauge, press the reset button to
move from Bar to PSI as needed. Press
“+” or “–” to choose the desired pres-
sure.
4. Toggle the compressor ON/OFF switch
to “ON” position. Unit should begin in-
flating and will stop near the desired
pressure. Unit has electronic memory
of previous pressure setting and will
inflate next item to the same pressure
until reset the value by “+” or “–” button.
5. When desired pressure is reached,
toggle compressor ON/OFF switch to
“OFF” position and the power switch to
“Recharge” to turn off the power.
6. Using tire gauge, check pressure and
if needed adjust to desired pressure
as determined by the vehicle and/or tire
manufacturer.
7. Move to next item being inflated and re-
peat step 3 or if done, remove and store
the air hose in the storage compart-
ment provided.
Tips of Operation
1. Do not overheat the compressor, pay
close attention to cycle times (the com-
pressors time on and off). Never ex-
ceed 15 minutes continuous running.
Let unit cool for 30 minutes, then try
again.
2. Operate and store in a clean, dry envi-
ronment. Do not obstruct the units
vented surface openings.
3. This unit is protected by a built-in 15A
fuse. Replacement shall be made with
a fuse with the same rating.
Fuse Replacement Procedure
1. Make sure that the power switch is turned
“Off” by toggling to “Recharge” and the
12V DC output socket is disconnected
from any load.
2. Open the front compartment door.
3. Pull out the blown fuse and replace with
a new one.
Performance Tip
Keep tires inflated per your vehicles own-
ers manual. This will increase gas mile-
age and reduce tire wear.
Fig. 4
Fig. 3
Sports Adapter
Quick Connector
Adapters for Inflatables


